EntityPicker 实体选择器
基本用法
满足下列情况可以使用 EntityPicker:
-
字段值是实体实例。
-
用户需要通过查找界面或通过输入特定值选择或创建实体。
-
用户需要为关联实体打开编辑界面。
Jmix Studio 创建实体编辑器时,会默认为实体引用属性生成 EntityPicker。
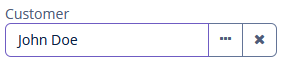
在下面的例子中,界面为具有 customer 属性的 Order 实体定义了 id 为 orderDc 的数据容器。在 entityPicker 元素中,通过 dataContainer 属性连接到 orderDc 数据容器,并给 property 属性设置了 customer 实体属性。实体属性是另一实体的引用,在上面的示例中就是 Customer 实体。
<data>
    <instance id="orderDc"
              class="ui.ex1.entity.Order">
        <fetchPlan extends="_base">
            <property name="customer" fetchPlan="_instance_name"/>
        </fetchPlan>
        <loader/>
    </instance>
</data>
<layout spacing="true">
    <vbox spacing="true" id="vbox">
        <entityPicker id="customerField"
                      dataContainer="orderDc"
                      property="customer"
                      caption="msg://ui.ex1.entity/Order.customer">
            <actions>
                <action id="lookup" type="entity_lookup"/>
                <action id="clear" type="entity_clear"/>
            </actions>
        </entityPicker>
    </vbox>
</layout>|
为了让 |
操作
可以给 EntityPicker 设置自定义或预定义的操作,操作作为按钮显示在右侧。
定义操作可以在 XML 中用 actions 元素或者在控制器中用 addAction() 方法编程式添加。
|
如需在 Jmix Studio 中添加 |
预定义操作
当 Studio 在编辑界面生成 EntityPicker 时,还会同时生成两个预定义的操作:entity_lookup 和 entity_clear。此外,还支持 entity_open 和 entity_openComposition 操作。
用 type 和 id 属性在 XML 中配置预定义操作。
如果创建无操作的 EntityPicker,XML 加载器仅定义 entity_lookup 和 entity_clear 操作。如需添加其他预定义操作,例如,entity_open,可以按照下面这样指定 actions 元素:
<entityPicker dataContainer="orderDc"
              property="customer"
              caption="msg://ui.ex1.entity/Order.customer">
    <actions>
        <action id="lookup" type="entity_lookup"/>
        <action id="open" type="entity_open"/>
        <action id="clear" type="entity_clear"/>
    </actions>
</entityPicker>
actions 元素不是对标准操作进行扩展,而是进行覆盖。因此,需要明确定义所有必需操作的标识符。
自定义操作
如需在 XML 中定义自定义操作,可以使用内部的 actions 元素。为 action 指定 id 和 icon 属性:
<entityPicker id="customerEntityPicker"
              property="customer"
              dataContainer="orderDc">
    <actions>
        <action id="lookup" type="entity_lookup"/>
        <action id="points"
                icon="QUESTION"
                description="msg://knowPoints"/>
    </actions>
</entityPicker>
然后在界面控制器订阅 Action.ActionPerformedEvent 实现自定义逻辑:
@Autowired
private EntityPicker<Customer> customerEntityPicker;
@Autowired
private Notifications notifications;

@Subscribe("customerEntityPicker.points")  (1)
public void onCustomerEntityPickerPoints(Action.ActionPerformedEvent event) {
    Customer customer = customerEntityPicker.getValue();
    if (customer != null) {
        notifications.create()
                .withCaption(customer.getFirstName() +
                        " has " + customer.getRewardPoints() +
                        " reward points")
                .show();
    } else {
        notifications.create()
                .withCaption("Choose a customer")
                .show();
    }
}| 1 | @Subscribe 注解包含 EntityPicker 的 id 以及操作的 id,以“.”分隔。 |
|
可以用 Studio 生成处理 |
编程式添加操作
使用 addAction() 以编程方式添加操作。
-
添加标准操作
例如,如果在组件的 XML 描述中没有内部的
actions元素,就可以使用这个方法添加缺少的标准操作:@Autowired private Actions actions; @Autowired private EntityPicker<Customer> entityPicker; @Subscribe public void onInit(InitEvent event) { entityPicker.addAction(actions.create(EntityOpenAction.class)); } -
添加自定义操作
创建自定义操作的示例:
@Autowired
private EntityPicker<Customer> customerEp;

@Subscribe
public void onInit(InitEvent event) {
    customerEp.addAction(new BaseAction("showLevel")
            .withCaption(null)
            .withDescription(null)
            .withIcon(JmixIcon.VIEW_ACTION.source())
            .withHandler(e -> {
                Customer customer = customerEp.getValue();
                if (customer != null) {
                    notifications.create()
                            .withCaption(customer.getFirstName() + " " +
                                    customer.getLastName() +
                                    "'s level is " + customer.getLevel())
                            .show();
                } else {
                    notifications.create()
                            .withCaption("Choose a customer")
                            .show();
                }
            }));
}
MetaClass
可以在不绑定数据容器的情况下使用 EntityPicker,即不设置 dataContainer 和 property 属性。在这种情况下,需要使用 metaClass 属性指定 EntityPicker 的实体类型。示例:
<entityPicker id="custPicker" metaClass="uiex1_Customer">
    <actions>
        <action id="lookup" type="entity_lookup"/>
        <action id="open" type="entity_open"/>
    </actions>
</entityPicker>
可以通过将组件注入控制器并调用其 getValue() 方法来获取所选实体的实例。
设置图标
EntityPicker 左侧可以有图标。只需要在界面控制器注册 fieldIconProvider 并实现自定义逻辑:
@Install(to = "customerField", subject = "fieldIconProvider")
private String customerFieldFieldIconProvider(Customer customer) { (1)
    return (customer != null) ? "font-icon:CHECK" : "font-icon:BAN";
}| 1 | fieldIconProvider 代理方法实现。 |
参阅 图标 了解更多关于使用图标的内容。
如需编程式注册字段的图标 provider,使用组件的 setFieldIconProvider() 方法。
输入文本值
默认情况下,用户不能手动输入值。如果设置 fieldEditable 属性为 true,则启用手动输入功能。这个功能可以用来根据用户输入的值创建实体实例。
需要注意,输入的值不会设置给数据模型。用 FieldValueChangeEvent 处理用户输入。
下面的例子中,我们有 Address 实体,此实体的 country 属性关联至 Country 实体。Country 实体只有一个 name 属性。我们在 XML 中定义 countryField 的属性 fieldEditable="true":
<entityPicker id="countryField" property="country" fieldEditable="true">
    <actions>
        <action id="lookup" type="entity_lookup"/>
        <action id="clear" type="entity_clear"/>
    </actions>
</entityPicker>
现在用户可以手动输入值了。如需处理该值(字符串格式),在控制器中订阅 FieldValueChangeEvent 事件:
@Autowired
private DataContext dataContext;

private Country country;

@Autowired
private TextField<String> addressField;

@Autowired
private EntityPicker<Country> countryField;

@Autowired
private Dialogs dialogs;

@Subscribe("countryField") (1)
public void onCountryFieldFieldValueChange(ValuePicker.FieldValueChangeEvent<Country>
                                                       event) {
    String value = event.getText(); (2)
    if (!Strings.isNullOrEmpty(value)) {
        country = dataContext.create(Country.class); (3)
        country.setName(value);
        countryField.setValue(country); (4)
    }
}| 1 | @Subscribe 注解包含 EntityPicker id。 |
| 2 | 从事件对象中获取输入的值。 |
| 3 | 创建一个 Country 实体实例。 |
| 4 | 将创建的实例设置给该字控件。 |
如需以编程的方式注册事件处理器,使用组件的 addFieldValueChangeListener() 方法。
编程式创建 EntityPicker
如需在控制器中创建 EntityPicker,可以使用 UiComponents 工厂。需要注意的是,以编程方式创建的 EntityPicker 无默认操作,需要手动添加必须的操作:
@Autowired
private Metadata metadata;
@Autowired
private UiComponents uiComponents;
@Autowired
private Actions actions;
@Subscribe
public void onInit(InitEvent event) {
    EntityPicker<User> userPicker = uiComponents.create(EntityPicker.of(User.class));
    userPicker.setMetaClass(metadata.getClass(User.class));
    userPicker.addAction(actions.create(EntityLookupAction.class));
    userPicker.addAction(actions.create(EntityOpenAction.class));
    userPicker.addAction(actions.create(EntityClearAction.class));
    vbox.add(userPicker);
}
事件和处理器
|
如需使用 Jmix Studio 生成处理器的桩代码,需要在界面 XML 描述或者 Jmix UI 层级结构面板选中该组件,然后用 Jmix UI 组件面板的 Handlers 标签页生成。 或者可以使用界面控制器顶部面板的 Generate Handler 按钮。 |
FieldIconProvider
参阅 Setting Icons。
Formatter
为组件添加一个 formatter。
下面的例子中,我们展示 customerFormat 实体选择控件 formatter 的用法:
@Install(to = "customerFormat", subject = "formatter")
protected String customerFormatFormatter(Customer value) {
    return value != null ? value.getFirstName() + " " + value.getLastName() : null;
}
如需以编程的方式添加 formatter,使用组件的 addFormatter() 方法。
Validator
参阅 Validator。
ValueChangeEvent
参阅 ValueChangeEvent。
EntityPicker XML 属性
|
可以使用 Studio 界面设计器的 Jmix UI 组件面板查看和编辑组件的属性。 |
align - buffered - caption - captionAsHtml - colspan - contextHelpText - contextHelpTextHtmlEnabled - css - dataContainer - description - descriptionAsHtml - editable - enable - box.expandRatio - fieldEditable - height - htmlSanitizerEnabled - icon - id - inputPrompt - metaClass - property - required - requiredMessage - stylename - tabIndex - visible - width
