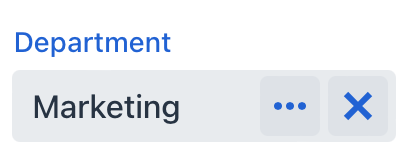
entityPicker 实体选择器
entityPicker 在文本控件中显示 实体 实例,并在用户单击右侧的按钮时执行操作。
-
XML 元素:
entityPicker -
Java 类:
EntityPicker
基本用法
满足下列情况可以使用 entityPicker:
-
字段值是实体实例。
-
用户需要通过查找视图或通过输入特定值选择或创建实体。
-
用户需要为关联实体打开详情视图。
Jmix Studio 创建实体详情视图时,会默认为实体引用属性生成 entityPicker。

在下面的例子中,User 实体引用了 Department 实体。因此,userDc 数据容器需要获取 User 实体的 department 属性。在 entityPicker 元素中,dataContainer 属性设置了 userDc 数据容器,property 属性引用 department 实体属性。
<data>
    <instance class="com.company.onboarding.entity.User" id="userDc">
        <fetchPlan extends="_base">
            <property name="department" fetchPlan="_base"/>
        </fetchPlan>
        <loader id="userDl"/>
    </instance>
</data>
<layout>
    <entityPicker id="entityPicker"
                  dataContainer="userDc"
                  property="department"
                  label="Department" >
        <actions>
            <action id="entityLookup" type="entity_lookup"/>
            <action id="entityClear" type="entity_clear"/>
        </actions>
    </entityPicker>
</layout>|
为了让 |
操作
可以给 entityPicker 设置自定义或预定义的操作,操作作为按钮显示在右侧。
定义操作可以在 XML 中用 actions 元素或者在控制器中用 addAction() 方法编程式添加。
|
如需在 Jmix Studio 中添加 |
预定义操作
当 Studio 在详情视图中生成 entityPicker 时,还会同时生成两个预定义的操作:entity_lookup 和 entity_clear。此外,还支持 entity_open 和 entity_openComposition 操作。
用 type 和 id 属性在 XML 中配置预定义操作。
如果创建无操作的 entityPicker,XML 加载器仅定义 entity_lookup 和 entity_clear 操作。如需添加其他预定义操作,例如,entity_open,可以按照下面这样指定 actions 元素:
<entityPicker dataContainer="userDc"
              property="department"
              label="Department" >
    <actions>
        <action id="entityLookup" type="entity_lookup"/>
        <action id="entityClear" type="entity_clear"/>
        <action id="entityOpen" type="entity_open"/>
    </actions>
</entityPicker>
actions 元素不是对标准操作进行扩展,而是进行覆盖。因此,需要明确定义所有必需操作的标识符。
自定义操作
如需在 XML 中定义自定义操作,可以使用内部的 actions 元素。为 action 指定 id 和 icon 属性:
<entityPicker id="departmentEntityPicker"
              dataContainer="userWithDeptManagerDc"
              property="department">
    <actions>
        <action id="entityLookup" type="entity_lookup"/>
        <action id="knowManager" icon="QUESTION"
                description="Know HR-manager"/>
    </actions>
</entityPicker>
然后在视图控制器订阅 Action.ActionPerformedEvent 实现自定义逻辑:
@ViewComponent
private EntityPicker<Department> departmentEntityPicker;

@Autowired
private Notifications notifications;

@Subscribe("departmentEntityPicker.knowManager")
public void onKnowManager(ActionPerformedEvent event) {
    Department department = departmentEntityPicker.getValue();
    if (department != null)
        notifications.create(department.getName() + " has "
                + department.getHrManager() + " HR-manager")
                .show();
    else notifications.create("Choose a department").show();
}|
可以用 Studio 生成处理 |
编程式添加操作
使用 addAction() 以编程方式添加操作。
-
添加标准操作
例如,如果在组件的 XML 描述中没有内部的
actions元素,就可以使用这个方法添加缺少的标准操作:@ViewComponent private EntityPicker<Department> departmentEntityPicker; @Autowired private Actions actions; @Subscribe public void onInit(InitEvent event) { departmentEntityPicker.addAction(actions.create(EntityOpenAction.class)); } -
添加自定义操作
创建自定义操作的示例:
@ViewComponent
private EntityPicker<Department> departmentEntityPicker;

@Subscribe
public void onInit(InitEvent event) {
    departmentEntityPicker.addAction(new BaseAction("showManager")
            .withIcon(VaadinIcon.QUESTION_CIRCLE)
            .withHandler(e -> {
                Department department = departmentEntityPicker.getValue();
                if (department != null)
                    notifications.create(department.getName() + " has "
                                    + department.getHrManager() + " HR-manager")
                            .show();
                else notifications.create("Choose a department").show();
            }));
}
XML 属性
id - allowCustomValue - autofocus - classNames - colspan - dataContainer - enabled - errorMessage - height - helperText - invalid - label - maxHeight - maxWidth - metaClass - minHeight - minWidth - placeholder - property - readOnly - required - requiredIndicatorVisible - requiredMessage - tabIndex - themeNames - title - visible - width
metaClass
可以在不绑定数据容器的情况下使用 entityPicker,即不设置 dataContainer 和 property 属性。在这种情况下,需要使用 metaClass 属性指定 entityPicker 的实体类型。示例:
<entityPicker metaClass="Department">
    <actions>
        <action id="entityLookup" type="entity_lookup"/>
        <action id="entityOpen" type="entity_open"/>
    </actions>
</entityPicker>
可以通过将组件注入控制器并调用其 getValue() 方法来获取所选实体的实例。
事件和处理器
AttachEvent - BlurEvent - ComponentValueChangeEvent - CustomValueSetEvent - DetachEvent - FocusEvent - formatter - statusChangeHandler - validator
|
在 Jmix Studio 生成处理器桩代码时,可以使用 Jmix UI 组件面板的 Handlers 标签页或者视图类顶部面板的 Generate Handler 添加,也可以通过 Code → Generate 菜单(Alt+Insert / Cmd+N)生成。 |
