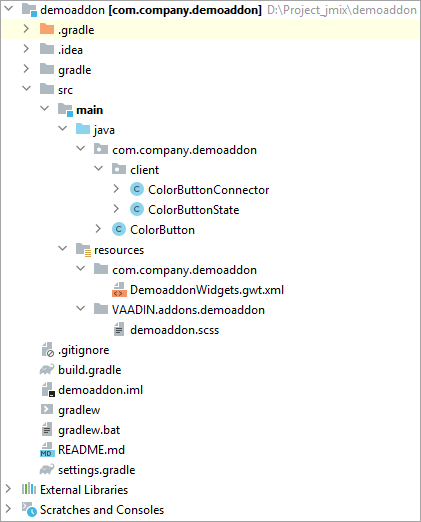
创建并使用小部件扩展组件
小部件扩展组件提供自定义的 UI 组件,可以在不同的应用程序中重复使用。
必须满足下列条件:
-
JAR 文件必须包含
DemoaddonWidgets.gwt.xml。 -
JAR 的 manifest 清单必须指定
*.gwt.xml的路径:jar { // pack client Java sources with copySpec { from sourceSets.main.allJava include "com/company/demoaddon/**" duplicatesStrategy = DuplicatesStrategy.WARN } // register exported widgetset manifest { attributes(['Vaadin-Widgetsets': 'com.company.demoaddon.DemoaddonWidgets', 'Vaadin-Stylesheets': 'VAADIN/addons/demoaddon/demoaddon.scss']) } }
小部件集将基于 manifest 清单中具有 Vaadin-Widgetset 键的所有 JAR 自动生成。支持方便地使用 Vaadin 附加组件。
无需在扩展组件中编译小部件。
使用小部件扩展组件
-
打开想要使用小部件扩展组件的项目。
-
创建一个 自定义主题,例如,使用
helium-extended名称。 -
打开
build.gradle文件并做下列修改:-
添加
mavenLocal()仓库。 -
删除
implementation 'io.jmix.ui:jmix-ui-widgets-compiled'依赖。 -
将扩展组件的依赖添加至项目的
implementation和widgets配置中,示例:implementation 'com.company:demoaddon:0.0.1-SNAPSHOT' widgets 'com.company:demoaddon:0.0.1-SNAPSHOT' implementation 'io.jmix.ui:jmix-ui-widgets' widgets 'io.jmix.ui:jmix-ui-widgets' -
添加 compileWidgets 任务(需根据你应用程序的包路径修改):
compileWidgets {
    generate "com.company.sample.widget.CustomWidgetSet"
    includePaths('**/io/jmix/**/widget/**', '**/com/company/sample/widget/**')
}
-
-
在
application.properties文件添加jmix.ui.widget-set属性(根据上面的compileWidgets任务调整路径):jmix.ui.widget-set=com.company.sample.widget.CustomWidgetSet -
重新加载项目。
-
创建一个
color-button-screen界面用于演示组件的功能。打开
ColorButtonScreen.java界面控制器并添加下列代码,在界面中放置组件:ColorButtonScreen.java@UiController("sample_ColorButtonScreen") @UiDescriptor("color-button-screen.xml") public class ColorButtonScreen extends Screen { @Subscribe protected void onInit(InitEvent event) { ColorButton button = new ColorButton(); (1) button.setCaption("Button"); button.setColor("#AFEEEE"); getWindow().unwrap(Layout.class).addComponent(button); (2) } }1 初始化一个 color button 的实例。 2 使用 unwrap()方法获取 Vaadin 容器,并在其内部添加新的组件。 -
启动应用程序并查看结果:

本页是否有帮助?

感谢您的反馈
