声明式操作
可以在 XML 界面描述中为任何实现了 ActionsHolder 接口的组件(包括 window 或 fragment)指定一组操作。操作用 actions 元素定义,它包含内部的 action 元素。
action 属性
action 元素有下列属性:
-
id- 标识符,在ActionsHolder组件中应该是唯一的。 -
type- 定义操作类型。如果设置了该属性,框架会搜索带有@ActionType注解指定此类型的类,并用该类实例化此操作。如果未指定类型,框架会创建一个 BaseAction 类的实例。参阅 标准操作 了解如何使用框架提供的操作类型,以及 自定义操作类型 了解如何创建自己的操作类型。 -
caption- 操作名称。 -
description- 操作描述。 -
enable- 可用性标识。可能值:true、false。 -
icon- 操作图标。
-
primary- 表明是否应使用特殊样式高亮显示表示此操作的按钮。可能值:true、false。高亮显示在
hover和helium主题中默认可用;如需在halo主题中启用此功能,请将$jmix-highlight-primary-action样式变量 设置为true。默认情况下,
create标准列表操作和查找界面中的lookupSelectAction是默认 primary 的。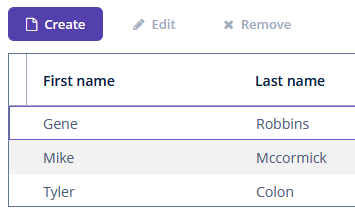 Figure 1. The Create button with the
createprimary action -
shortcut- 键盘快捷键。可以在 XML 描述中对快捷键值进行硬编码。可选的修饰键:
ALT、CTRL、SHIFT,由“-”字符分隔。示例:<action id="create" shortcut="ALT-N"/>如需避免使用硬编码值,可以使用下面列表中的预定义快捷键别名,示例:
<action id="edit" shortcut="${TABLE_EDIT_SHORTCUT}"/>支持下列快捷键别名:
-
TABLE_EDIT_SHORTCUT -
TABLE_INSERT_SHORTCUT -
TABLE_ADD_SHORTCUT -
TABLE_REMOVE_SHORTCUT -
COMMIT_SHORTCUT -
CLOSE_SHORTCUT -
NEXT_TAB_SHORTCUT -
PREVIOUS_TAB_SHORTCUT -
PICKER_LOOKUP_SHORTCUT -
PICKER_OPEN_SHORTCUT -
PICKER_CLEAR_SHORTCUT还有一种方法,使用
UiComponentProperties类和方法的全限定名,方法需要返回快捷键:<action id="remove" shortcut="${io.jmix.ui.UiComponentProperties#getTableRemoveShortcut}"/>
-
-
visible- 可见性标识。可能值:true、false。
示例
下面是操作声明和处理的示例。
界面操作
下面例子中,我们声明了一个标识符是 sayHello 的操作,标题来自界面的消息包。此操作绑定一个按钮,操作的标题用来作为按钮的名称。
<window xmlns="http://jmix.io/schema/ui/window"
        caption="msg://ui.ex1.screen.actions/actionScreen.caption">
    <actions>
        <action id="sayHello" caption="msg://sayHello" shortcut="ALT-T"/>
    </actions>
    <layout>
        <vbox spacing="true">
            <button action="sayHello"/>
        </vbox>
    </layout>
</window>
界面控制器订阅操作的 ActionPerformedEvent,这样当用户单击按钮或按下 ALT-T 快捷键时,将调用 onSayHello() 方法。
@Autowired
private Notifications notifications;

@Subscribe("sayHello") (1)
public void onSayHello(Action.ActionPerformedEvent event) {
    notifications.create()
            .withCaption("Hello")
            .withType(Notifications.NotificationType.HUMANIZED)
            .show();
}| 1 | @Subscribe 注解包含操作 id。 |
|
注意,为整个界面声明的操作不会刷新状态。也就是说,如果一个操作有特定的 |
|
可以使用 Studio 生成 |
PopupButton 操作
下面列子中,我们在 XML 中声明了一个带有操作的 popupButton:
<popupButton id="sayBtn" caption="Say">
    <actions>
        <action id="hello" caption="Say Hello"/>
        <action id="goodbye" caption="Say Goodbye"/>
    </actions>
</popupButton>
在界面控制器中订阅操作的 ActionPerformedEvent:
@Autowired
private Notifications notifications;

private void showNotification(String message) {
    notifications.create()
            .withCaption(message)
            .withType(Notifications.NotificationType.HUMANIZED)
            .show();
}

@Subscribe("sayBtn.hello") (1)
public void onSayBtnHello(Action.ActionPerformedEvent event) {
    showNotification(event.getSource().getCaption());
}

@Subscribe("sayBtn.goodbye")
public void onSayBtnGoodbye(Action.ActionPerformedEvent event) {
    showNotification(event.getSource().getCaption());
}| 1 | @Subscribe 注解包含 PopupButton 的 id 和操作的 id,以点号分隔。 |
Table 操作
下面列子中,我们在 XML 中声明了一个带有操作的 groupTable:
<groupTable id="customersTable"
            width="100%"
            dataContainer="customersDc">
    <actions>
        <action id="create" type="create"/>
        <action id="edit" type="edit"/>
        <action id="remove" type="remove"/>
        <action id="copy" caption="Copy"
                icon="COPY" trackSelection="true"/>
    </actions>
    <columns>
        <column id="firstName"/>
        <column id="lastName"/>
    </columns>
    <buttonsPanel alwaysVisible="true">
        <button action="customersTable.create"/>
        <button action="customersTable.edit"/>
        <button action="customersTable.remove"/>
        <button action="customersTable.copy"/>
    </buttonsPanel>
</groupTable>
在这个例子中,除了表格的 create、edit 和 remove 标准动作之外,还声明了 copy 操作。trackSelection="true" 属性表示如果表格中没有选中行,则操作和相应按钮将被禁用。该属性用在要对当前选定的表格行执行操作时。
在界面控制器中订阅操作的 ActionPerformedEvent:
@Subscribe("customersTable.copy")
public void onCustomersTableCopy(Action.ActionPerformedEvent event) {
    // ...
}
EntityPicker 操作
在下面的例子中,为 EntityPicker 组件声明了标准的 entity_lookup 操作和一个额外的 points 操作。description 属性配置将光标悬停在操作按钮上时显示的提示信息。
<entityPicker id="customerEntityPicker"
              property="customer"
              dataContainer="orderDc">
    <actions>
        <action id="lookup" type="entity_lookup"/>
        <action id="points"
                icon="QUESTION"
                description="msg://knowPoints"/>
    </actions>
</entityPicker>
然后可以在界面控制器订阅 Action.ActionPerformedEvent 实现自定义逻辑:
@Autowired
private EntityPicker<Customer> customerEntityPicker;
@Autowired
private Notifications notifications;

@Subscribe("customerEntityPicker.points")  (1)
public void onCustomerEntityPickerPoints(Action.ActionPerformedEvent event) {
    Customer customer = customerEntityPicker.getValue();
    if (customer != null) {
        notifications.create()
                .withCaption(customer.getFirstName() +
                        " has " + customer.getRewardPoints() +
                        " reward points")
                .show();
    } else {
        notifications.create()
                .withCaption("Choose a customer")
                .show();
    }
}| 1 | @Subscribe 注解包含 EntityPicker 的 id 和操作的 id,以点号分隔。 |
获取操作引用
界面控制器中,可以通过直接注入或者从实现了 ActionsHolder 接口的组件中获取声明式定义的操作引用。可用于编程式设置操作属性。示例:
@Named("sayBtn.hello")
private Action sayBtnHello;
@Autowired
private PopupButton sayBtn;

@Subscribe
public void onBeforeShow(BeforeShowEvent event) {
    sayBtnHello.setEnabled(false);
    sayBtn.getActionNN("goodbye").setEnabled(false);
}