开始使用
创建实体和视图
首先,创建一个实体及其 CRUD 视图,用于保存新闻并进行管理。按以下步骤:
-
创建
NewsItem实体,使用下列属性:-
date,为LocalDate类型。 -
subject,为String类型。 -
content,为String类型,长度无限制。
-
-
为实体创建列表和详情视图。
-
打开列表视图,添加一个新的按钮,并绑定发送 email 的操作:
news-item-list-view.xml<hbox id="buttonsPanel" classNames="buttons-panel"> <button id="createButton" action="newsItemsDataGrid.createAction"/> <button id="editButton" action="newsItemsDataGrid.editAction"/> <button id="removeButton" action="newsItemsDataGrid.removeAction"/> <button id="sendEmailButton" action="newsItemsDataGrid.sendEmailAction"/> (1) <simplePagination id="pagination" dataLoader="newsItemsDl"/> </hbox> <dataGrid id="newsItemsDataGrid" width="100%" minHeight="20em" dataContainer="newsItemsDc" columnReorderingAllowed="true"> <actions> <action id="createAction" type="list_create"/> <action id="editAction" type="list_edit"/> <action id="removeAction" type="list_remove"/> <action id="sendEmailAction" type="list_itemTracking" icon="vaadin:envelope" text="Send Email"/> (2) </actions> <columns resizable="true"> <column property="date"/> <column property="subject"/> <column property="content"/> </columns> </dataGrid>1 添加新按钮。 2 添加新操作。
发送 email 的逻辑
UI 完成后,我们需要继续添加业务逻辑。这里的业务逻辑会使用扩展组件的 API。
-
为
sendEmailAction操作创建一个处理方法。在方法中,我们显示一个对话框询问是否将新闻加入发送队列:@Autowired private Dialogs dialogs; (1) @Subscribe("newsItemsDataGrid.sendEmailAction") public void onNewsItemsDataGridSendEmailAction(final ActionPerformedEvent event) { NewsItem newsItem = newsItemsDataGrid.getSingleSelectedItem(); dialogs.createOptionDialog() .withHeader("Sending email") .withText("Emails will be queued for sending. Continue?") .withActions( new DialogAction(DialogAction.Type.YES) { @Override public void actionPerform(Component component) { try { sendNewsByEmail(newsItem); } catch (IOException e) { log.error("Error sending email"); notifications.create("Error sending email").show(); } } }, new DialogAction(DialogAction.Type.NO) ) .open(); }1 注入 io.jmix.flowui.Dialogs对象。 -
实现
sendNewsByEmail()方法。@Autowired private Emailer emailer; (1) @Autowired private Resources resources; (2) private void sendNewsByEmail(NewsItem newsItem) throws IOException { InputStream resourceAsStream = resources.getResourceAsStream("/META-INF/resources/icons/icon.png"); (3) byte[] bytes = IOUtils.toByteArray(resourceAsStream); EmailAttachment emailAttachment = new EmailAttachment(bytes, "logo.png", "logoId"); (4) final EmailInfo emailInfo = EmailInfoBuilder.create() (5) .setAddresses("john.doe@company.com,jane.doe@company.com") .setSubject(newsItem.getSubject()) .setFrom(null) (6) .setBodyContentType("text/plain; charset=UTF-8") .setBody(newsItem.getContent()) .setAttachments(emailAttachment) .setImportant(false) .build(); emailer.sendEmailAsync(emailInfo); (7) }1 注入 io.jmix.email.Emailer接口。2 注入 io.jmix.core.Resources接口。3 为了演示如何添加附件,我们将使用一个应用程序图标文件。 4 创建一个 io.jmix.email.EmailAttachment对象。5 使用 io.jmix.email.EmailInfoBuilder创建一个io.jmix.email.EmailInfo对象。6 from 地址将从 jmix.email.from-address 属性中获取。 7 异步发送电子邮件(在后台)。
配置 SMTP 服务参数
使用 Spring Boot 的 mail 属性 在 application.properties 文件中定义基本的邮件发送参数,例如协议、主机、端口等。
| 可能需要从系统管理员或服务提供商处获取 SMTP 服务器配置参数。有关使用这些提供商配置邮件发送的步骤,请参阅 为 Google 和 Microsoft 设置 OAuth。 |
使用 UI
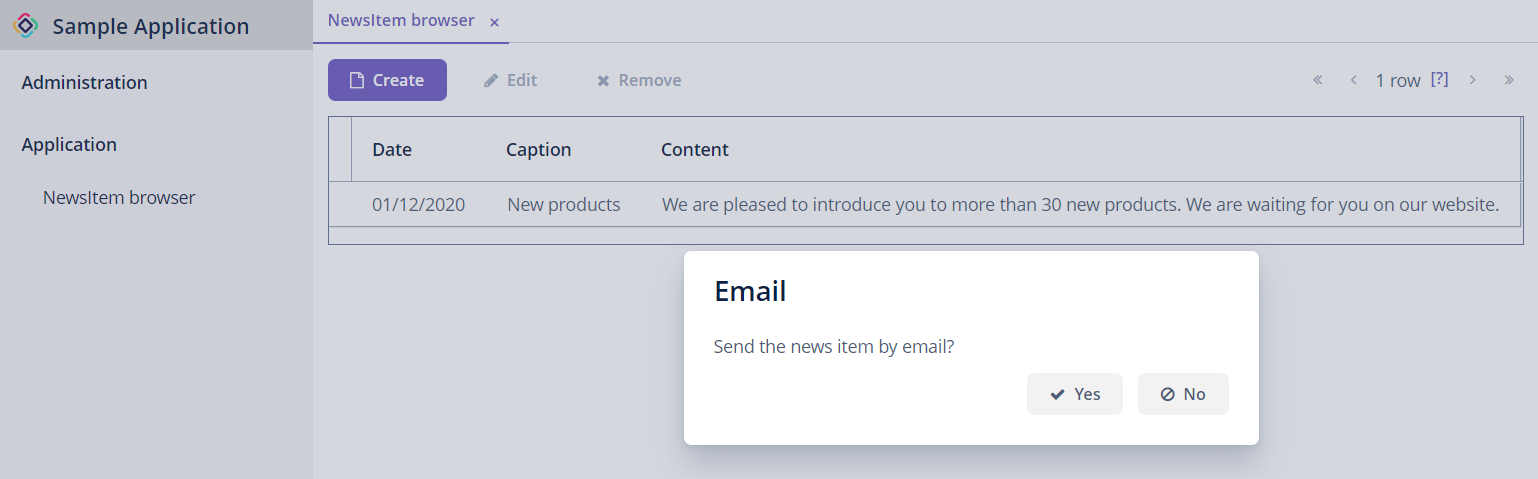
运行应用程序,打开 News Item 界面,然后点击 Create 新建一个实体。保存实体后返回之前的视图,选择一条并点击 Send Email。此时会弹出窗口询问是否发送电子邮件,选择 Yes。
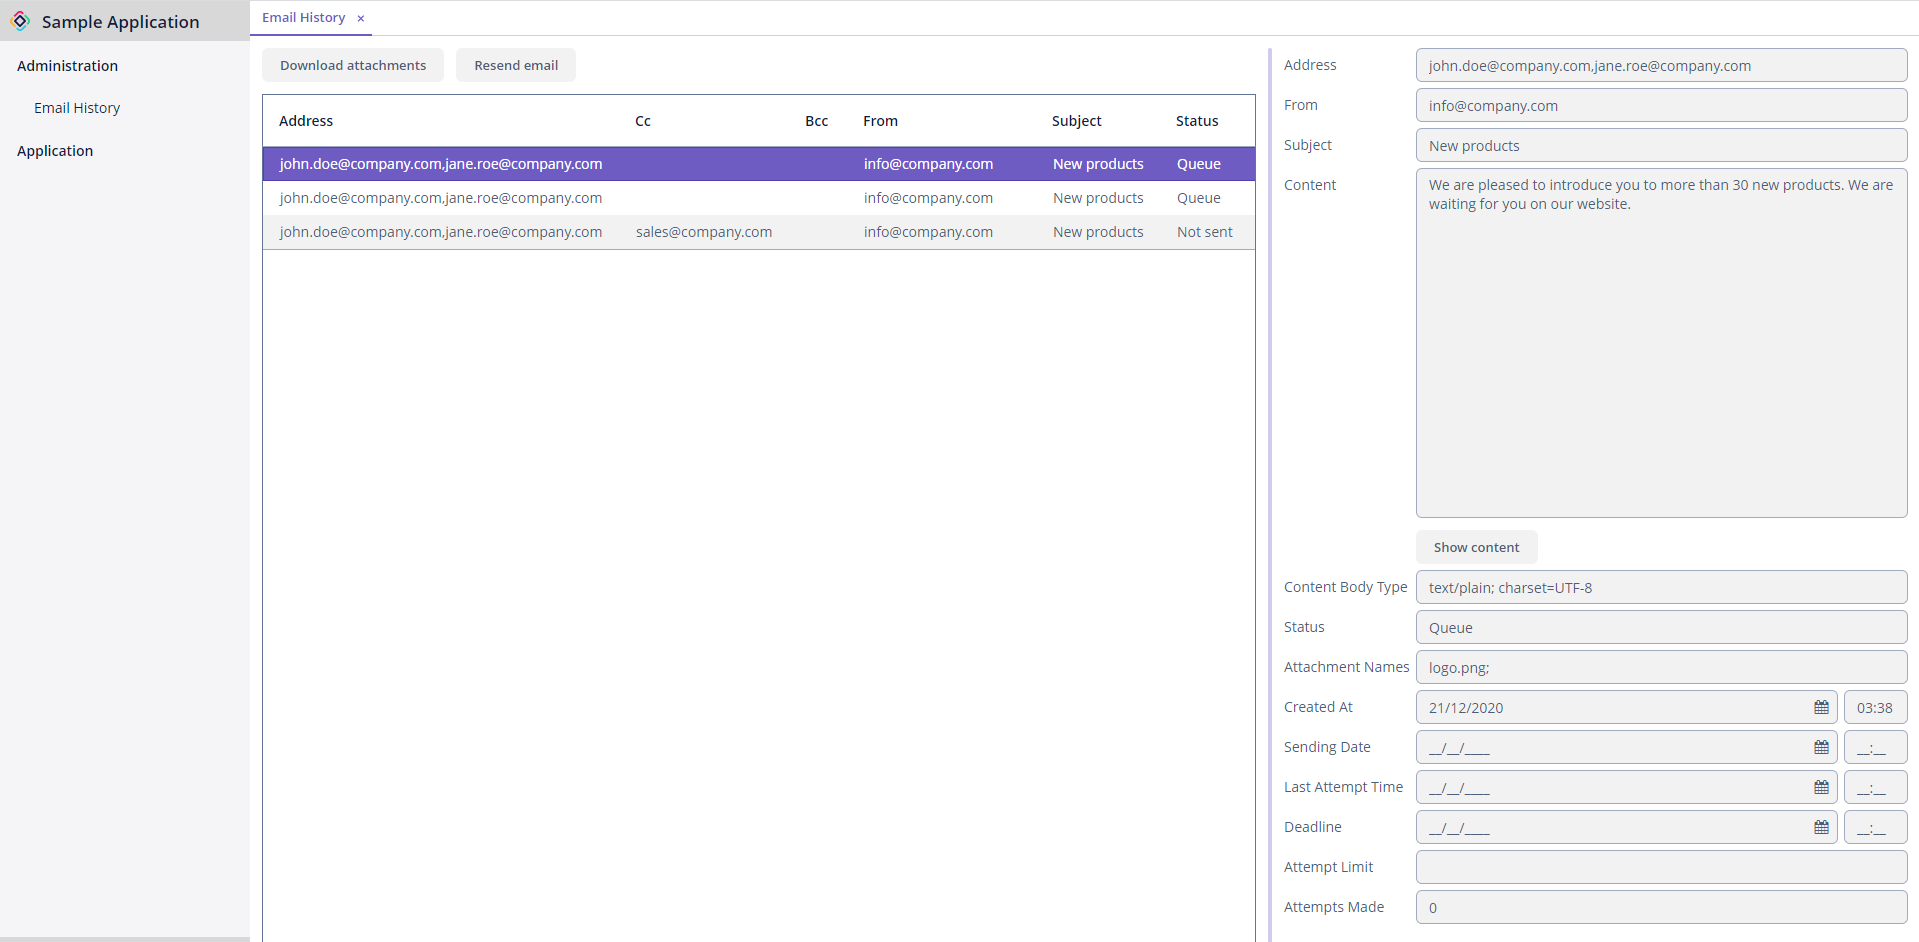
切换至应用程序的 Email → 邮件历史记录 视图。此时可以看到一行状态为 Queue(排队中) 的记录,表示邮件仍然在排队,并未发送。邮件信息展示在右侧。
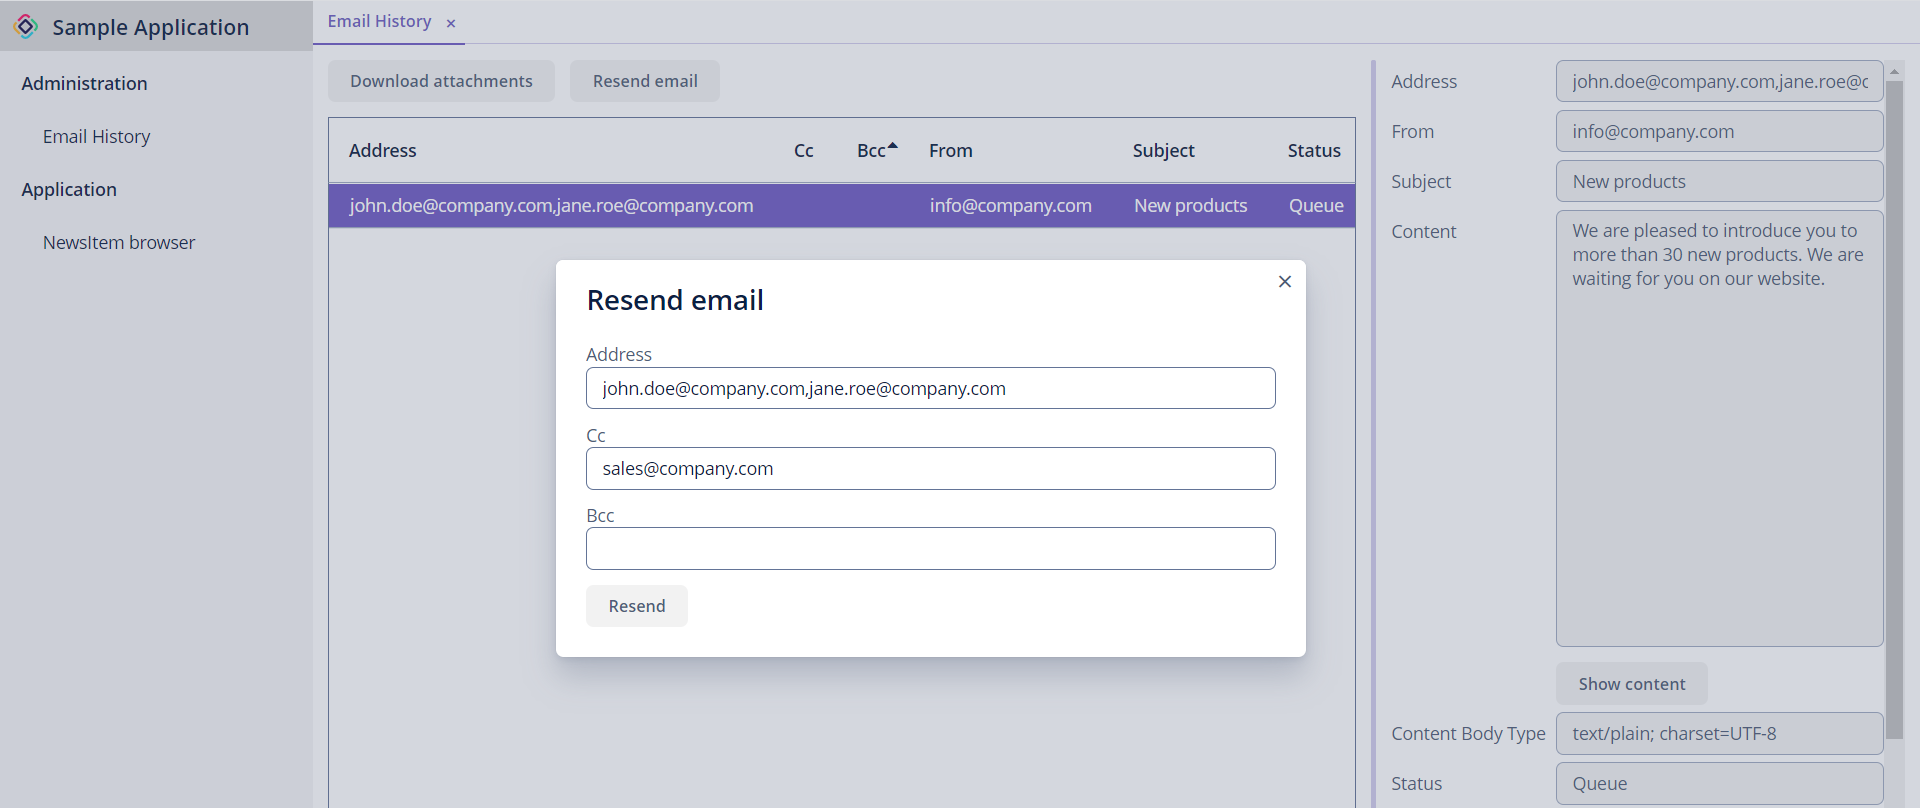
如需从 UI 发送邮件,选中列表中的条目,然后点击 Resend email(再次发送)。可以在发送之前修改或添加收件人。发送成功后,表格中的状态会变成 Sent(已发送)。
| 如需正常发发送排队的邮件或按特定的计划发送,可以配置 Quartz 调度器。 |
本页是否有帮助?

感谢您的反馈