3. 在电子邮件中使用消息模板
添加“邮件通知”按钮
在预订的列表视图中添加一个 Notify by Email 按钮。这个按钮可以向预订的创建人发送一个电子邮件通知。
打开 booking-list-view.xml 并在 bookingsDataGrid 的操作区添加一个 notifyEmail 操作:
<action id="notifyEmail"
        type="list_itemTracking"
        icon="ENVELOPE"
        text="msg://notifyEmail.text"/>
然后,将按钮与操作关联:
<hbox id="buttonsPanel" classNames="buttons-panel">
    <!--...-->
    <button id="notifyEmailButton" action="bookingsDataGrid.notifyEmail"/>
</hbox>
从模板生成电子邮件
为 notifyEmailButton 操作生成一个 ActionPerformedEvent 的处理方法。并添加以下逻辑:
@ViewComponent
private DataGrid<Booking> bookingsDataGrid;

@Autowired
private MessageTemplatesGenerator messageTemplatesGenerator; (1)

@Autowired
private Emailer emailer; (2)

@Autowired
private Notifications notifications; (3)

@Subscribe("bookingsDataGrid.notifyEmail")
public void onBookingsDataGridNotifyEmail(final ActionPerformedEvent event) {
    Booking booking = bookingsDataGrid.getSingleSelectedItem();
    User creator = booking.getCreator(); (4)

    String email = creator.getEmail();
    if (email == null) {
        showNoEmailNotification(creator); (5)
        return;
    }

    List<String> messages = messageTemplatesGenerator.generateMultiTemplate()
            .withTemplateCodes("booking-email-subject", "booking-email-body") (6)
            .withParams(
                    Map.of(
                            "booking", booking,
                            "today", new Date()
                    )) (7)
            .generate();

    EmailInfo emailInfo = EmailInfoBuilder.create()
            .setAddresses(email)
            .setSubject(messages.get(0))
            .setBody(messages.get(1))
            .setBodyContentType("text/html; charset=UTF-8")
            .build(); (8)

    try {
        emailer.sendEmail(emailInfo); (9)
    } catch (EmailException e) {
        showSendingErrorNotification(email);
    }

    showSendingSuccessNotification(email); (10)
}

private void showSendingErrorNotification(String email) {
    notifications.create("Failed to send email to %s".formatted(email))
            .withThemeVariant(NotificationVariant.LUMO_ERROR)
            .show();
}

private void showNoEmailNotification(User creator) {
    notifications.create("%s did not specify an email".formatted(creator.getDisplayName()))
            .withThemeVariant(NotificationVariant.LUMO_ERROR)
            .show();
}

private void showSendingSuccessNotification(String email) {
    notifications.create("The message has been successfully sent to %s".formatted(email))
            .withThemeVariant(NotificationVariant.LUMO_SUCCESS)
            .show();
}| 1 | 从消息模板生成消息的 bean。 |
| 2 | 发送电子邮件的 bean。 |
| 3 | 为用户显示通知的 bean。 |
| 4 | 从 bookingsDataGrid 获取所选的 booking 及其 creator。 |
| 5 | 检查 creator 是否有 email 地址,如果没有则显示一个错误消息并退出。 |
| 6 | 用 booking-email-subject 和 booking-email-body 模板生成邮件主题和正文。 |
| 7 | 为模板传递参数 booking 和 today。 |
| 8 | 用收件人的地址、主题、正文和内容类型构建一个 EmailInfo 对象。 |
| 9 | 使用 emailer bean 发送邮件。如果出错,则显示一条错误信息。 |
| 10 | 显示发送成功的消息。 |
邮件发送和查看
验证电子邮件生成过程:
-
启动应用程序并打开 Application → Bookings 视图。
-
创建新的预订。在 creator 字段中选择一个有电子邮件地址的用户,并填写其他必填字段。
-
选择该预订,然后点击 Notify by Email。应用程序会显示一条成功通知。
-
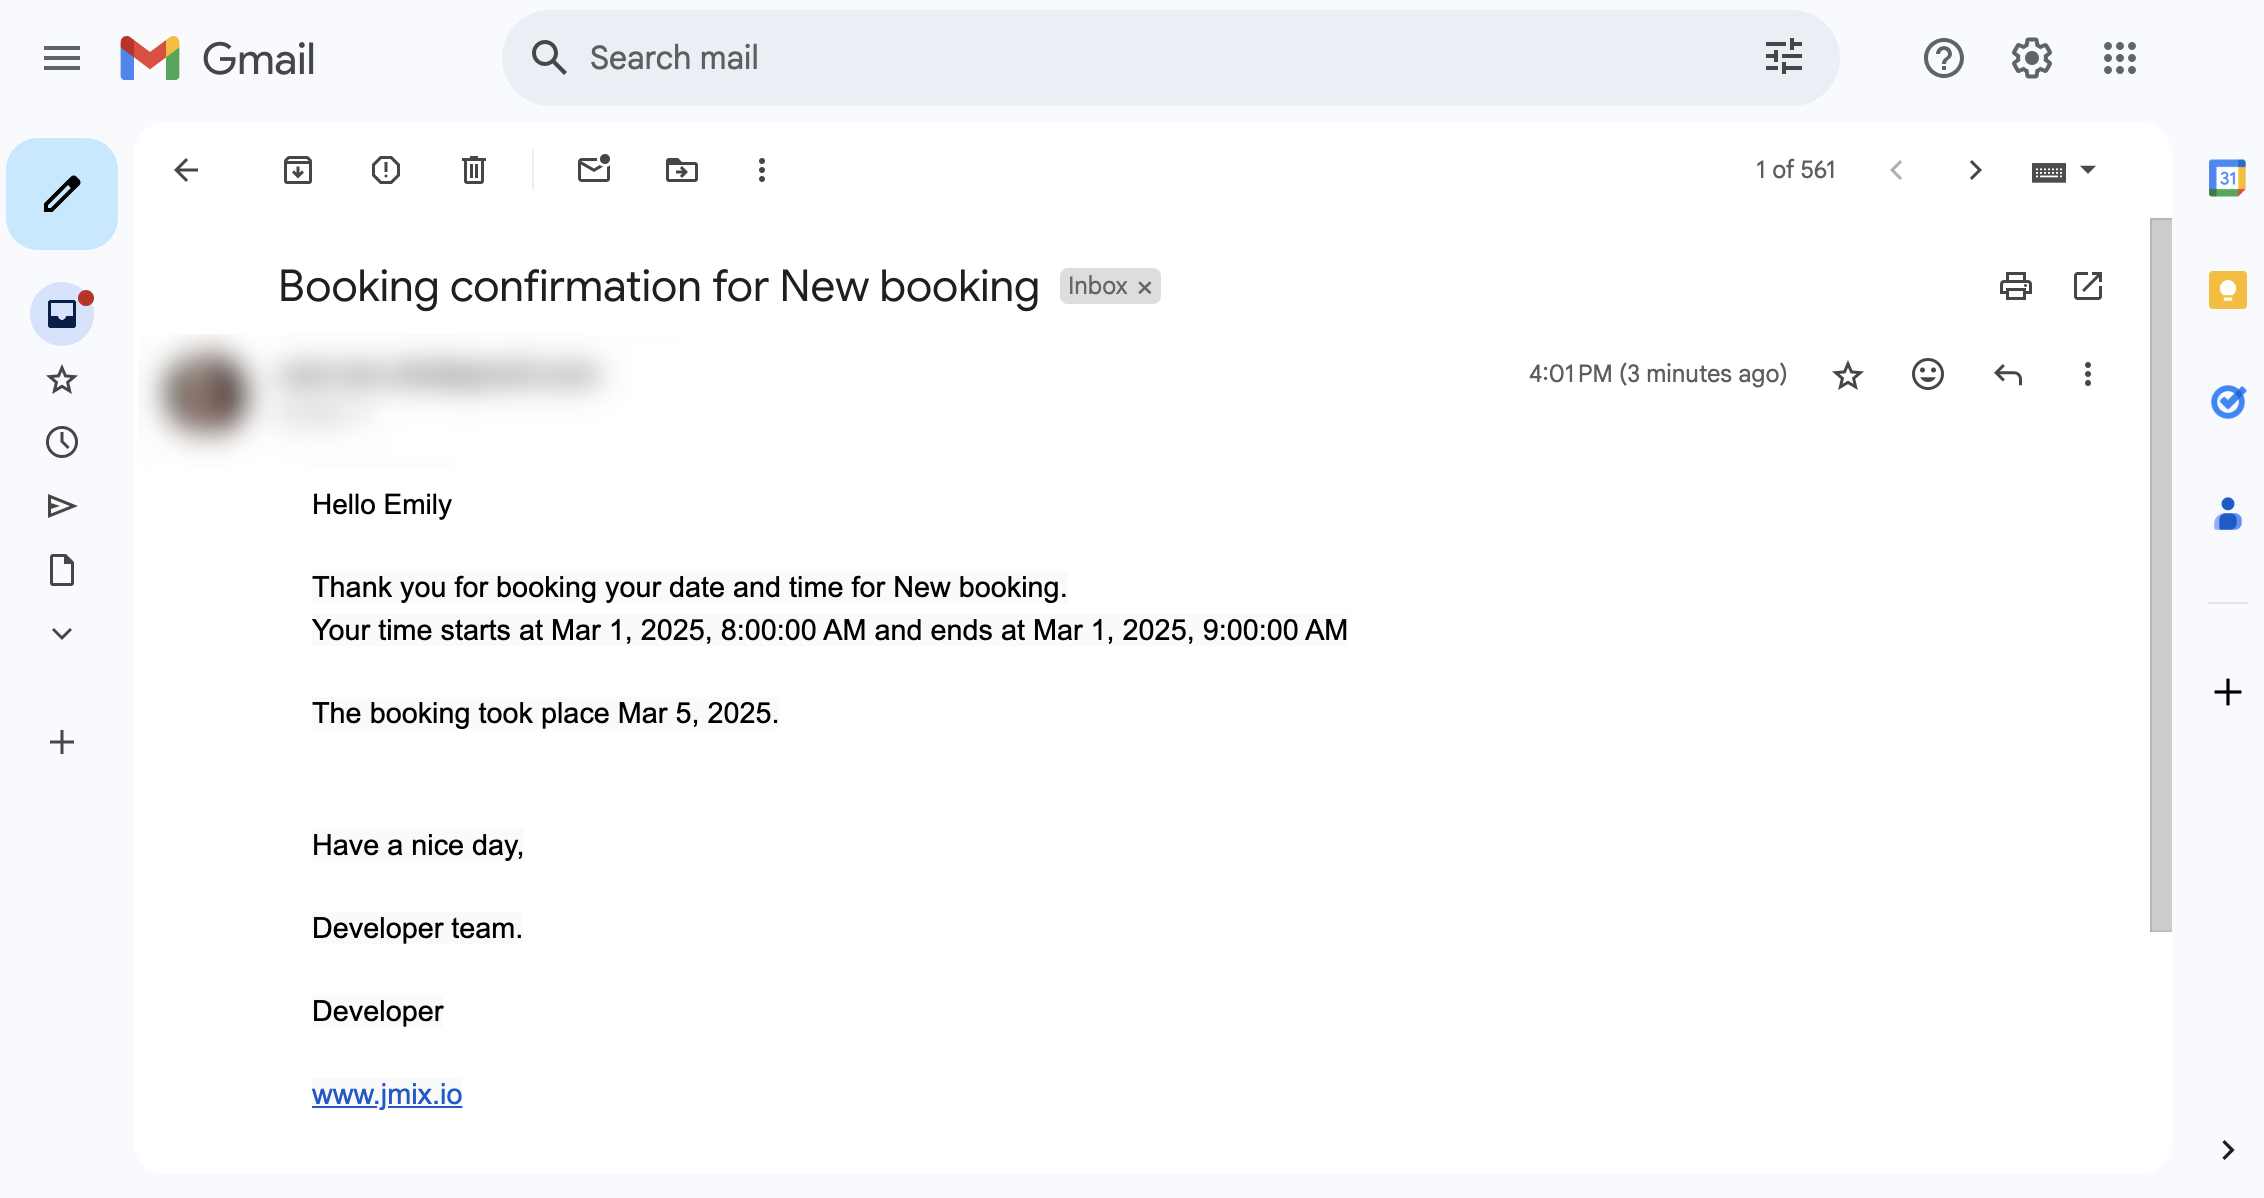
检查收件人的收件箱,确认电子邮件内容与预订详情和配置的模板匹配。
本页是否有帮助?

感谢您的反馈