4. 使用消息模板的通知
开始之前,请确保项目中安装了 the 通知消息 扩展组件。如果未安装,请安装后再继续。
本小节我们将学习:
-
配置通知消息扩展组件。
-
用模板编辑器创建一个
Plain text模板。 -
在模板中添加参数。
-
在项目中演示如何创建一个使用该模板的通知消息。
配置通知消息扩展组件
配置通知消息扩展组件的详细信息,请参阅 配置 部分。在这里,我们将简要概述其中的关键步骤。
按照以下步骤:
-
创建一组
NotificationType实例,并通过NotificationTypesRepository在应用程序主类中注册:@Autowired private NotificationTypesRepository notificationTypesRepository; @EventListener public void onApplicationContextRefreshed(final ContextRefreshedEvent event) { notificationTypesRepository.registerTypes( new NotificationType("info", "INFO_CIRCLE"), new NotificationType("warn", "WARNING") ); } -
在
main-view.xml文件添加一个消息通知提示符组件:<mainView xmlns="http://jmix.io/schema/flowui/main-view" xmlns:ntf="http://jmix.io/schema/notifications/ui" title="msg://MainView.title"> <navigationBar> <header id="header" classNames="jmix-main-view-header"> <drawerToggle id="drawerToggle" classNames="jmix-main-view-drawer-toggle" themeNames="contrast" ariaLabel="msg://drawerToggle.ariaLabel"/> <h1 id="viewTitle" classNames="jmix-main-view-title"/> </header> <ntf:notificationsIndicator id="ntfIndicator" classNames="me-m"/> </navigationBar>
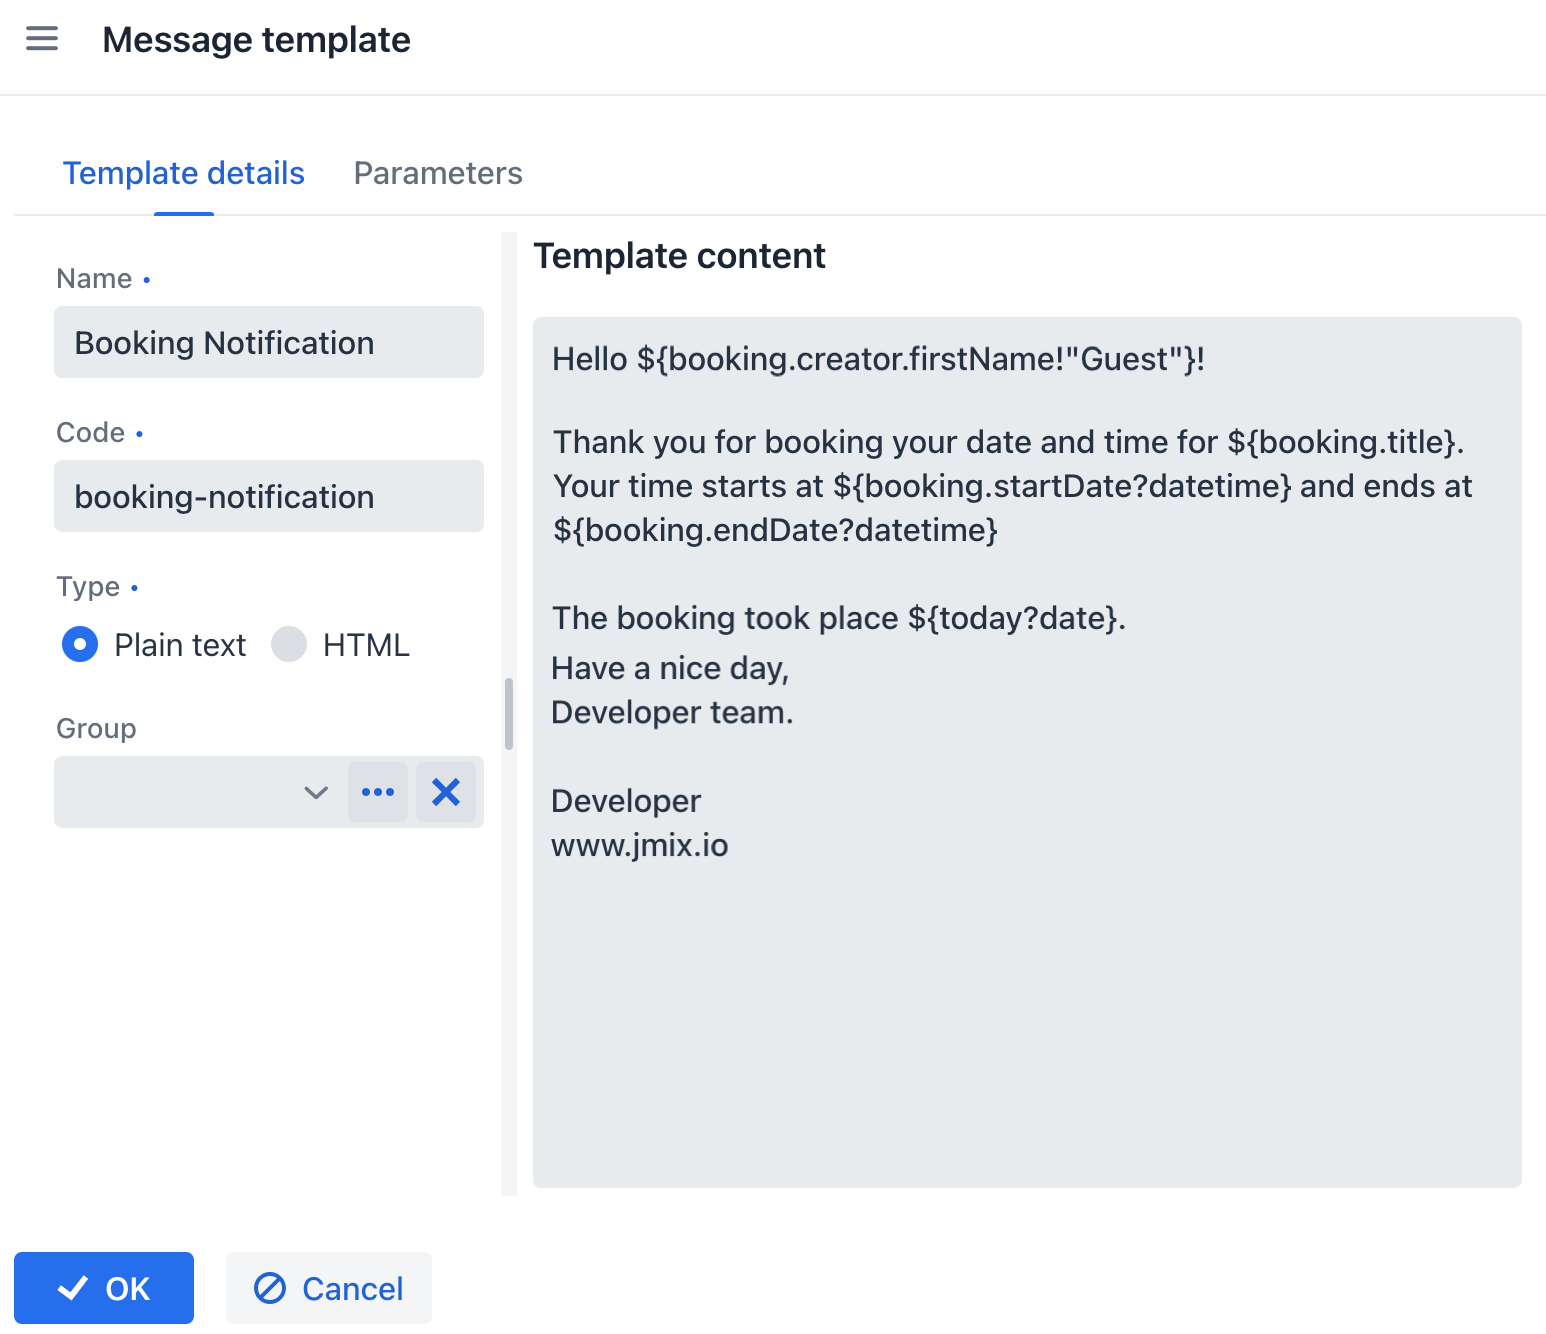
创建消息模板
启动应用程序。打开 Message Templates 视图。点击 Create 按钮创建新模板。
新模板配置如下:
-
Name:输入一个用户友好的模板名称,例如
Booking Notification。 -
Code:设置模板的编码为
booking-notification。 -
Type:选择 Plain text 模板类型。
-
Content:定义模板的内容:
Hello ${booking.creator.firstName!"Guest"}!

Thank you for booking your date and time for ${booking.title}.
Your time starts at ${booking.startDate?datetime} and ends at ${booking.endDate?datetime}

The booking took place ${today?date}.

Have a nice day,
Developer team.

Developer
www.jmix.io
这个模板使用了 Apache FreeMarker 模板引擎语法中的 占位符 格式。
添加模板参数
模板设计器中切换至 Parameters 参数。点击 Create 按钮并添加两个参数:
-
Booking
-
Name:Booking
-
Alias:booking
-
Type:Entity
-
Entity:Booking
-
-
Today
-
Name: Today
-
Type: Date
-
配置完成后,请保存。
创建通知消息
打开 Notifications 视图。点击 Create notification 按钮开始创建一个新的通知消息。按如下配置:
-
Subject:消息的主题 -
Booking information。 -
Type:选择之前创建的一个消息类型。我们选择
Info。 -
Recipients:通知的接收人列表。在字段中输入 username,并从下拉列表选择接收人。
-
勾选 Use message template 复选框,并选择之前创建的模板:
Booking Notification。 -
输入参数值。

-
点击 OK。随后,通知会被保存并为指定的用户显示。
查看消息通知
以 Mari 用户的身份登录系统。
|
注意,用户
|
在主视图右上角找到通知指示器并点击。然后打开通知查看其完整内容:
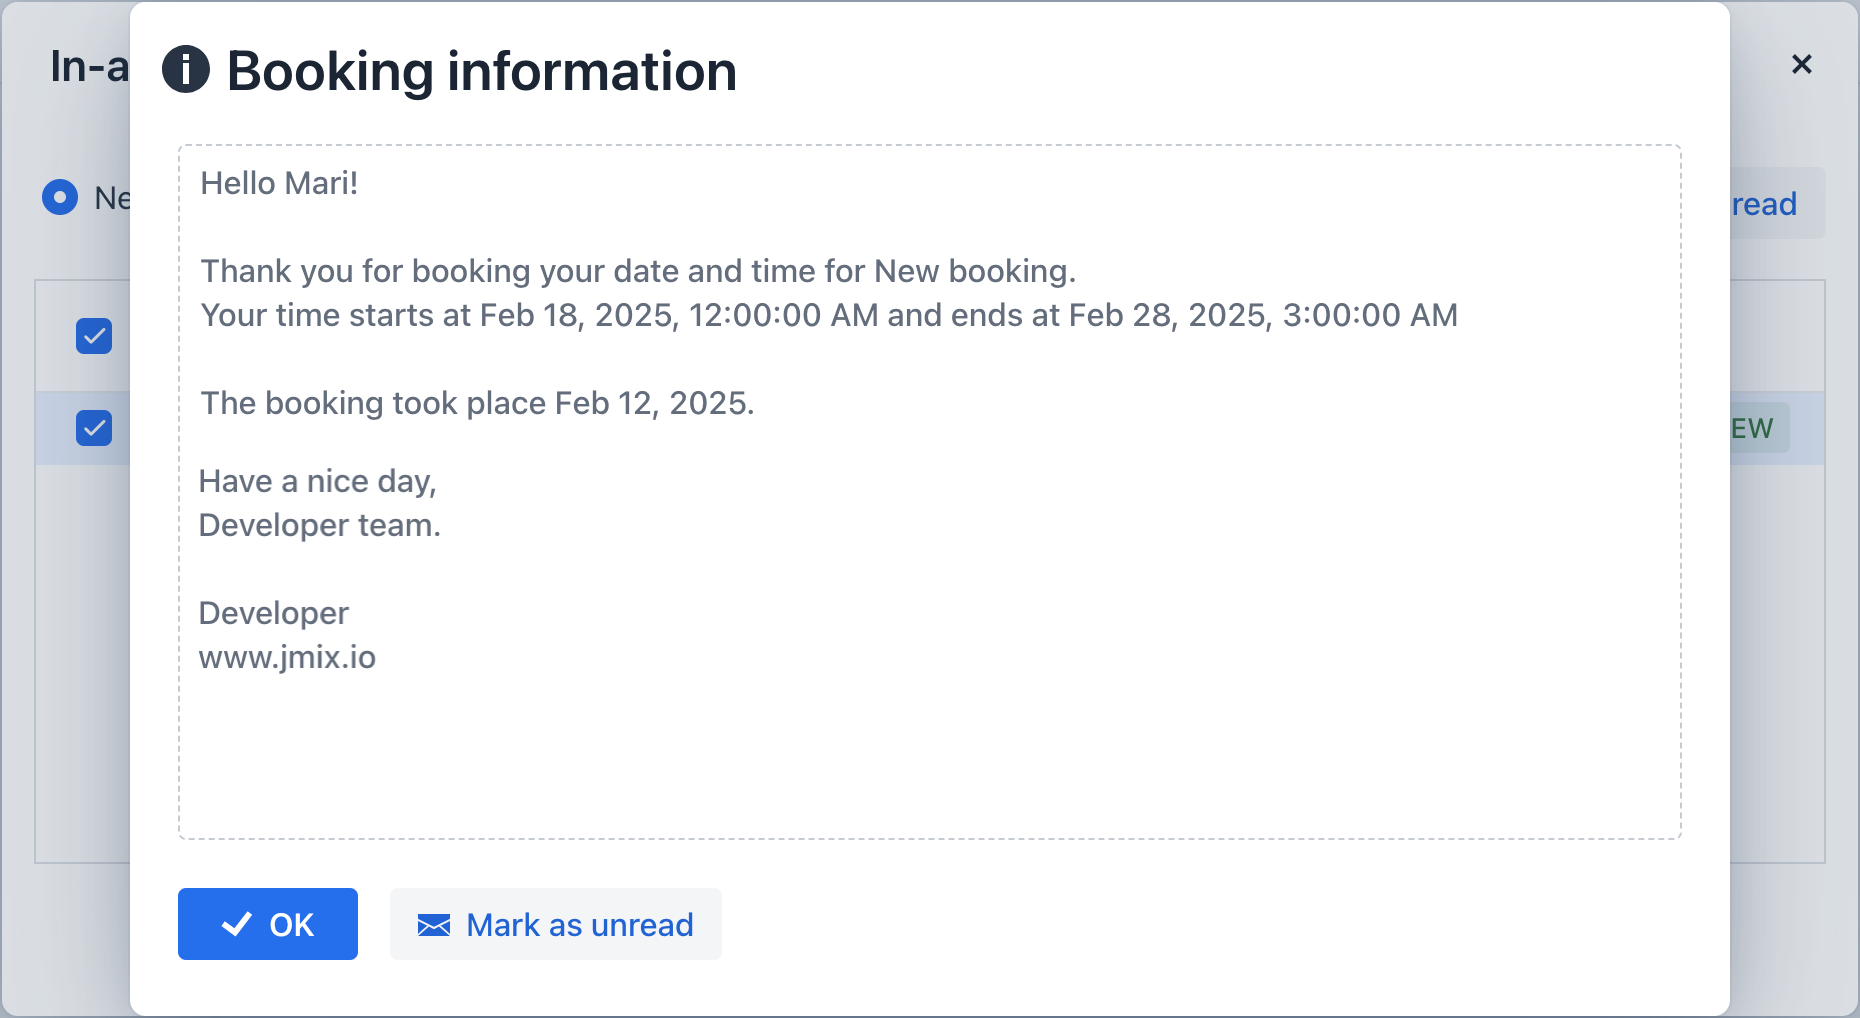
可以看到,我们在创建消息时提供的参数值已经自动插入消息模板中的占位符位置,提供个性化的消息内容展示。
