布局规则
本章节介绍在视图中放置可视化组件和布局组件的正确方法。
组件大小
所有实现了 com.vaadin.flow.component.HasSize 接口的组件(例如,button 按钮、textField、dataGrid、vbox 等),都有这些相同的属性:width、minWidth、maxWidth、height、minHeight、maxHeight。这些属性对应同名的 CSS 样式属性。
在需要响应式布局时,组件需要根据不同的屏幕大小做适配,这时可以使用 min/max 属性。这些属性还可以防止组件溢出或者太大。参阅 技巧 部分了解实际用法。
|
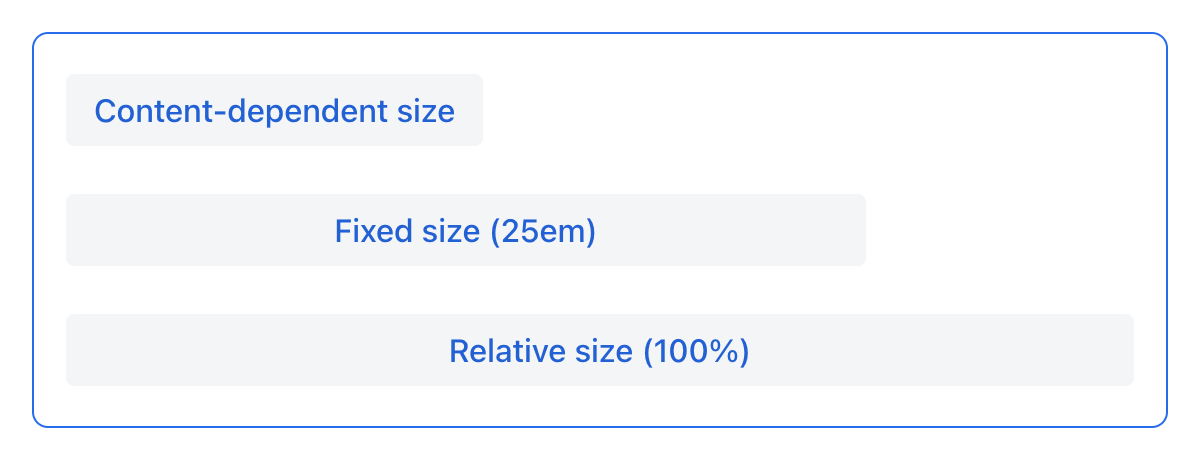
组件大小的维度有以下几种:
-
基于内容 -
AUTO -
固定大小,例如,
25em -
基于父组件的相对大小(百分比),例如,
100%
| 组件大小的值必须是一个正确的 CSS 字符串。 |
基于内容的尺寸
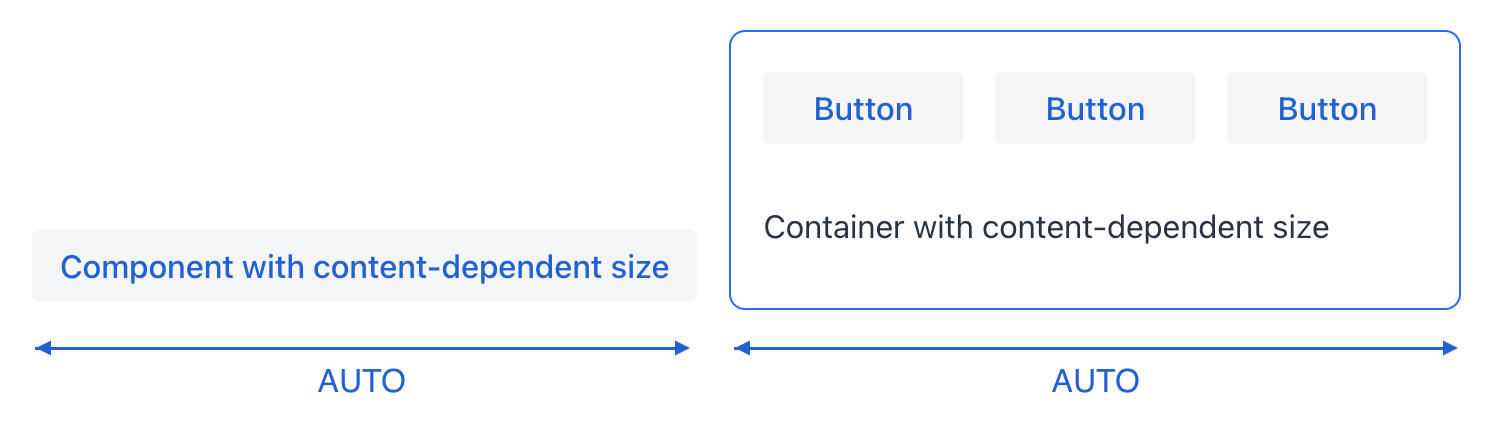
组件会根据内容的大小占据足够的空间。
示例:
-
对于
button,大小由text长度决定。 -
对于布局组件,大小由布局内的所有组件的大小决定。
<button text="Button" width="AUTO"/>button.setWidth("AUTO");基于内容的组件大小会在界面的布局初始化或内容发生变化时自动调整。
固定尺寸
固定大小意味着组件尺寸在运行时不会更改。
<vbox width="20em" height="15em"/>vBox.setWidth("20em");
vBox.setHeight("15em");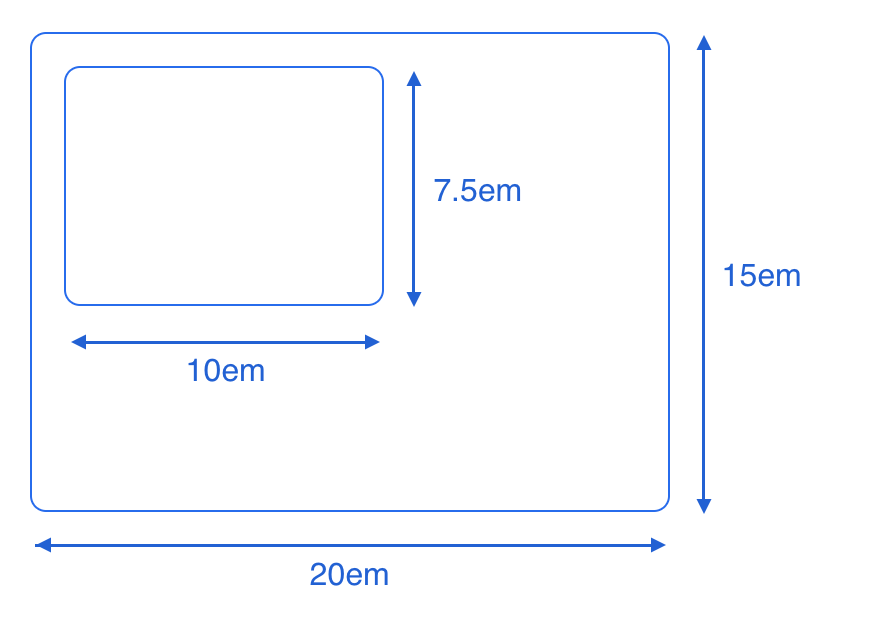
固定大小可以用绝对长度单位(例如,px)或相对长度单位(例如,em)进行设置。平台中所有的视图和组件都使用相对长度单位,比如 em 和 rem,因此应用程序能适配不同的屏幕。
em 是相对父组件字体大小的尺寸单位。默认情况下,字体大小为 16px。有关尺寸单位的更多内容,请参阅 CSS 值和单位。
|
你可能会遇到这样一种情况:为组件定义了固定大小(例如宽度),但如果父布局容器中没有足够的空间,则组件会变小。如果需要避免这个影响,可以使用相应的属性将 minWidth/minHeight 值设置为与 width/height 值相同,或使用 css 属性设置 flex-shrink: 0。这是因为当组件放置在 flexbox 容器内时,如 hbox、vbox 或 flexLayout,即使组件在容器的 主轴 上具有固定的尺寸,但也无法扩展父容器的尺寸。根据 flex 规范, flex-shrink 属性的初始值为 1,也就是说在默认情况下,如果没有足够的可用空间, flex-item 会使用较小的尺寸。
|
相对尺寸
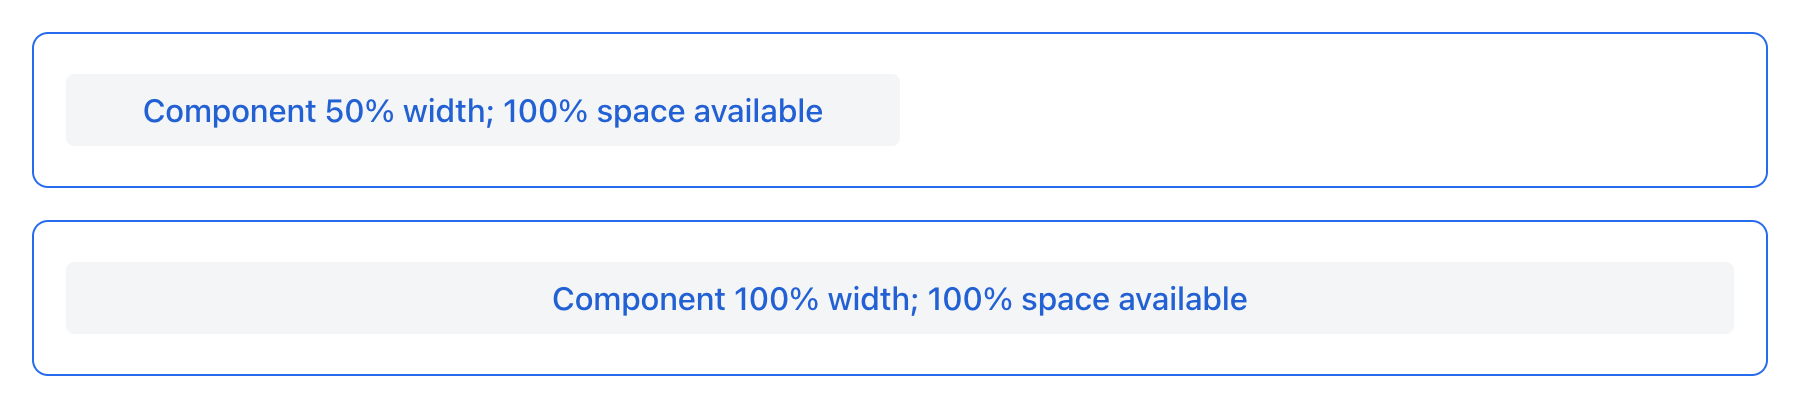
相对大小表示组件占可用空间的百分比。
<button text="Button" width="50%"/>button.setWidth("50%");具有相对尺寸的组件将根据可用空间的变化而变化,调整其在屏幕上的实际大小。
布局特性
-
根
layout元素是垂直布局 (vbox),默认情况下具有 100% 的宽度和高度。 -
scroller必须具有固定或相对(但不是AUTO)的宽度和高度。scroller内位于滚动方向上的组件,不应具有相对尺寸。
组件的延展
可以设置组件进行延展(expand)并占用布局中所有的额外空间。
<hbox expand="btn" padding="true" width="100%">
    <button text="Button"/>
    <button id="btn" text="Button"/>
    <button text="Button"/>
</hbox>
<vbox expand="btn" width="100%" minHeight="20em">
    <button text="Button"/>
    <button id="btn" text="Button"/>
    <button text="Button"/>
</vbox>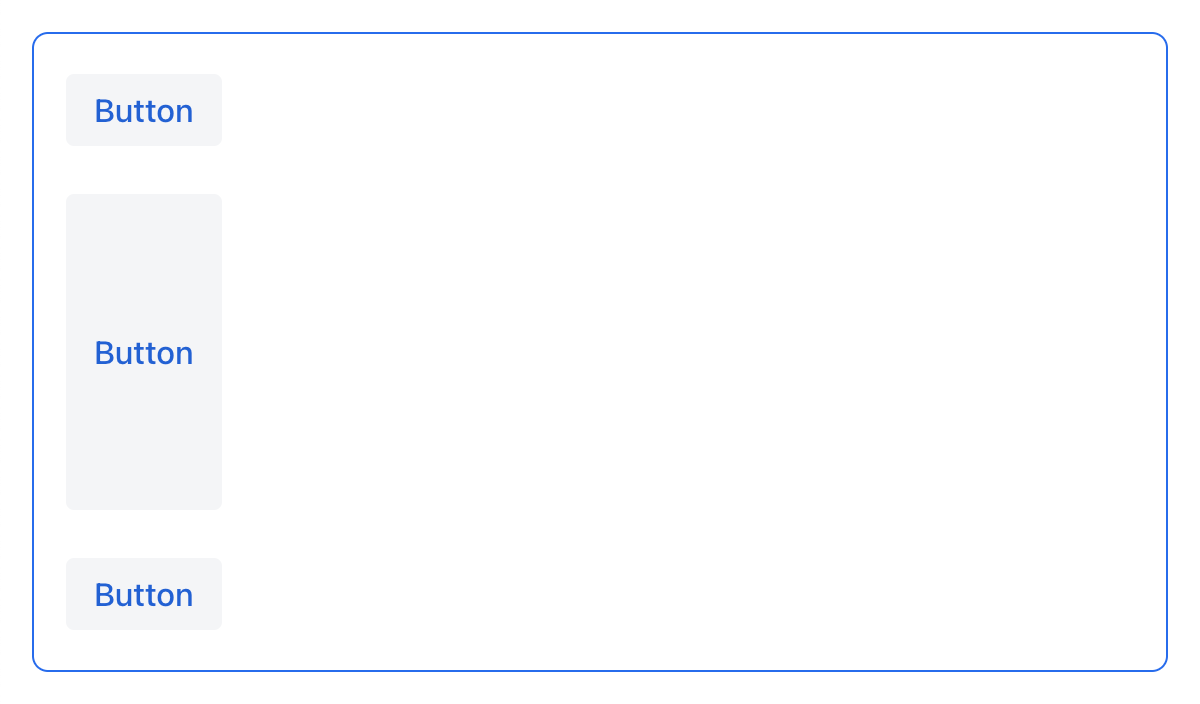
延展组件,其实就是将其 flex-grow CSS 属性设置为 1。
|
间距、外边距和内边距
使用间距(spacing)、外边距(margin)和内边距(padding)可以定义组件四周或内部的空白区域。
间距
spacing 属性控制是否启用组件的 spacing 主题配置。如果主题支持这个属性,则组件会使用或移除间距。


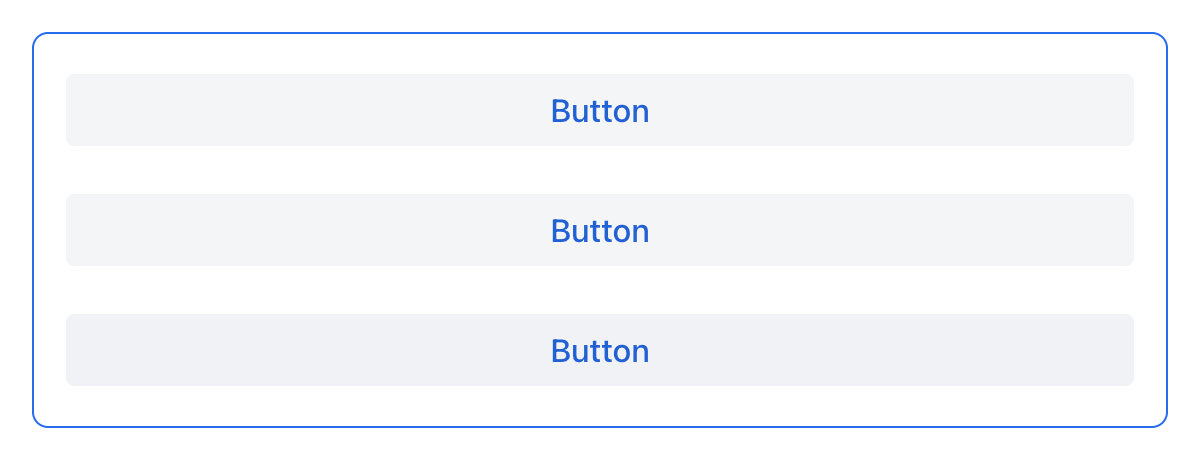
vbox 和 hbox 组件默认开启间距。
其他间距选项
'spacing' 属性隐式地为组件主题添加了中等间距配置,这相当于定义 themeNames="spacing"。若要设置其他间距选项,需要显式使用 themeNames 属性。有五种不同的间距主题可供选择:
| 主题变量 | 样式效果 |
|---|---|
|
组件之间非常小的间距 |
|
组件之间较小的间距 |
|
组件之间中等间距 |
|
组件之间较大的间距 |
|
组件之间非常大的间距 |
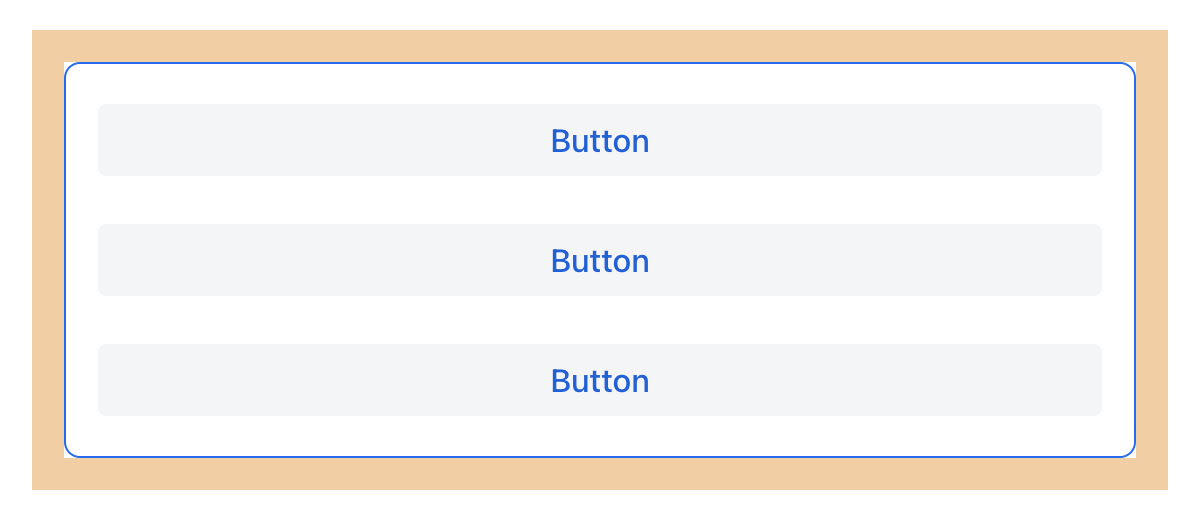
使用 spacing-xl 主题变量的示例:
<vbox themeNames="spacing-xl" alignItems="STRETCH">
    <button text="Button"/>
    <button text="Button"/>
    <button text="Button"/>
</vbox>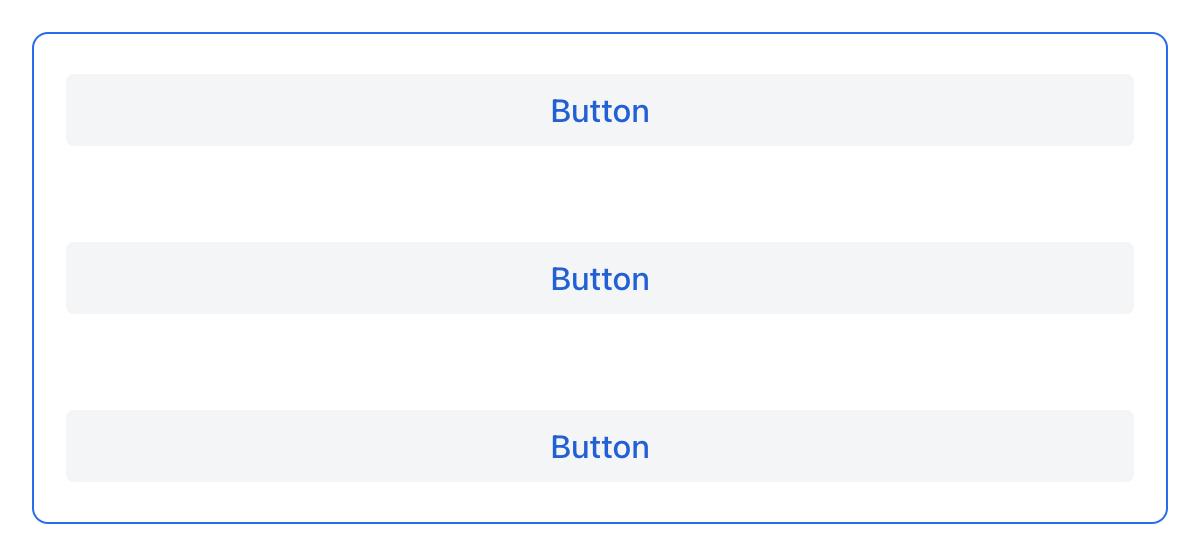
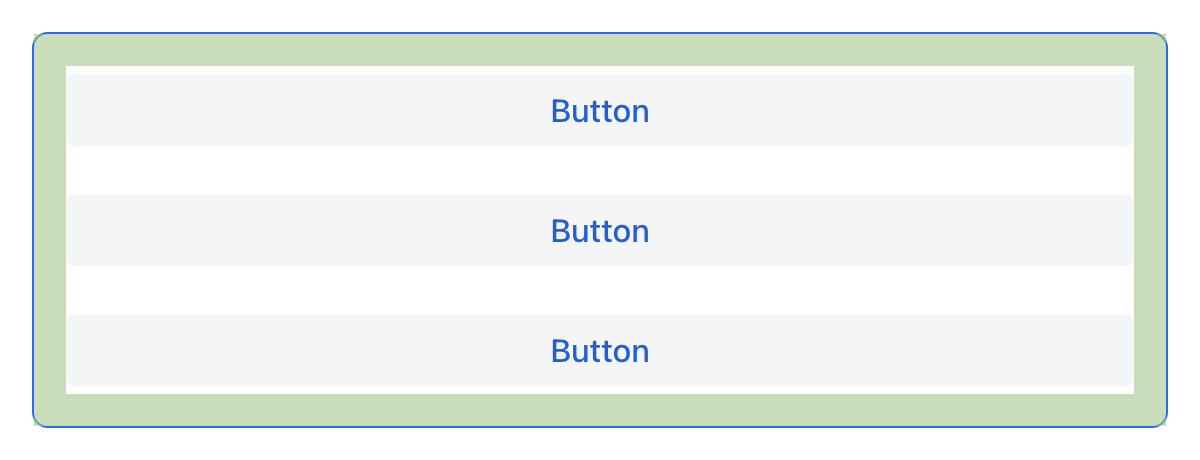
对齐
JustifyContent 模式
justifyContent 属性对应于 CSS 的 justify-content 属性,用于定义在 flex 容器中如何在 主轴 方向布局内部组件并分配间距。
| 值 | 描述 |
|---|---|
|
内部组件放置于容器主轴方向的开始位置。 |
|
内部组件放置于容器主轴方向的中间位置。 |
|
内部组件放置于容器主轴方向的结束位置。 |
|
内部组件以等宽间距均匀放置在主轴方向,注意,第一个内部组件放置在起始位置,最后一个放置在结束位置。 |
|
内部组件以等宽间距均匀放置在主轴方向。注意,第一个组件和最后一个组件与边框的间距是组件之间间距的一半。 |
|
内部组件以等宽间距均匀放置在主轴方向,组件与边框的间距与组件之间间距相等。 |
对于 vbox 和设置了 flexDirection="COLUMN"(即,flex-direction: column)的 flexLayout 布局中,justifyContent 属性的效果如下:
<vbox justifyContent="START" minHeight="20em">
    <button text="Button"/>
    <button text="Button"/>
    <button text="Button"/>
</vbox>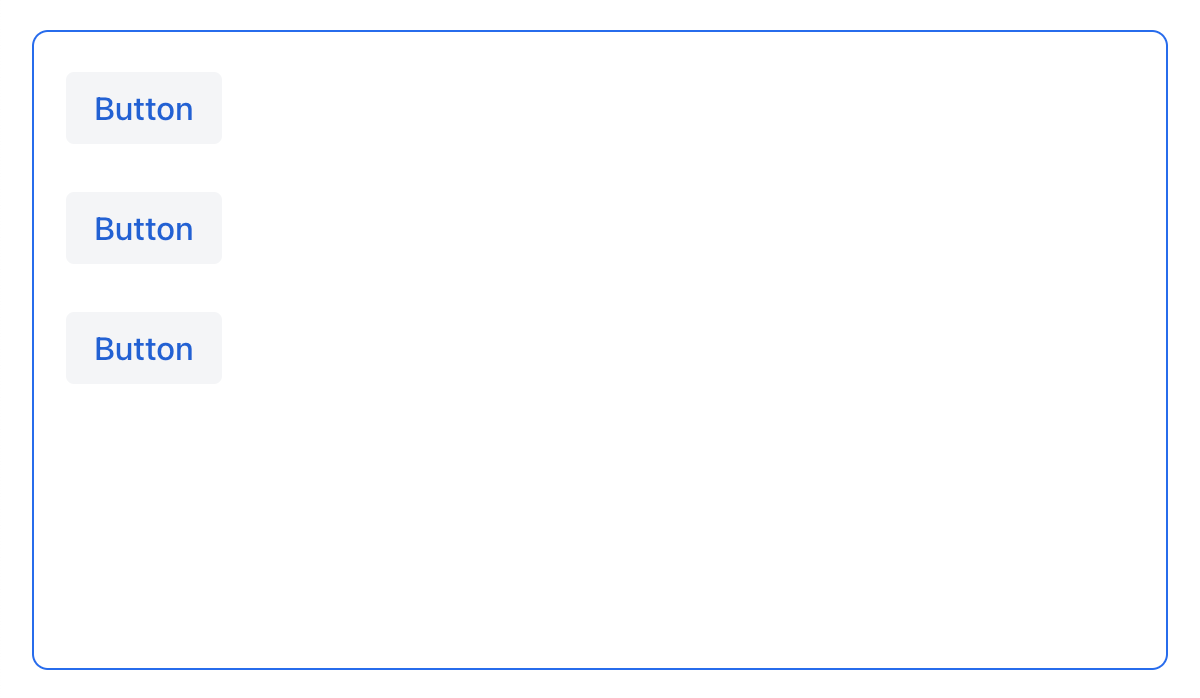
<vbox justifyContent="CENTER" minHeight="20em">
    <button text="Button"/>
    <button text="Button"/>
    <button text="Button"/>
</vbox>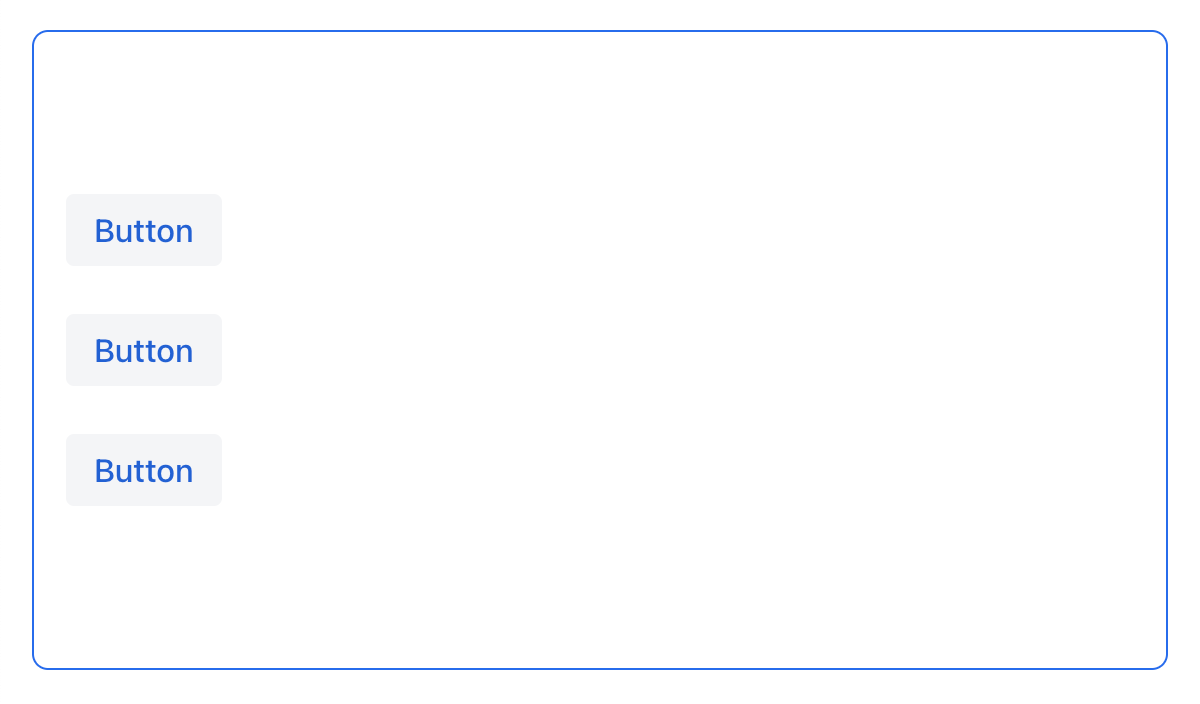
<vbox justifyContent="END" minHeight="20em">
    <button text="Button"/>
    <button text="Button"/>
    <button text="Button"/>
</vbox>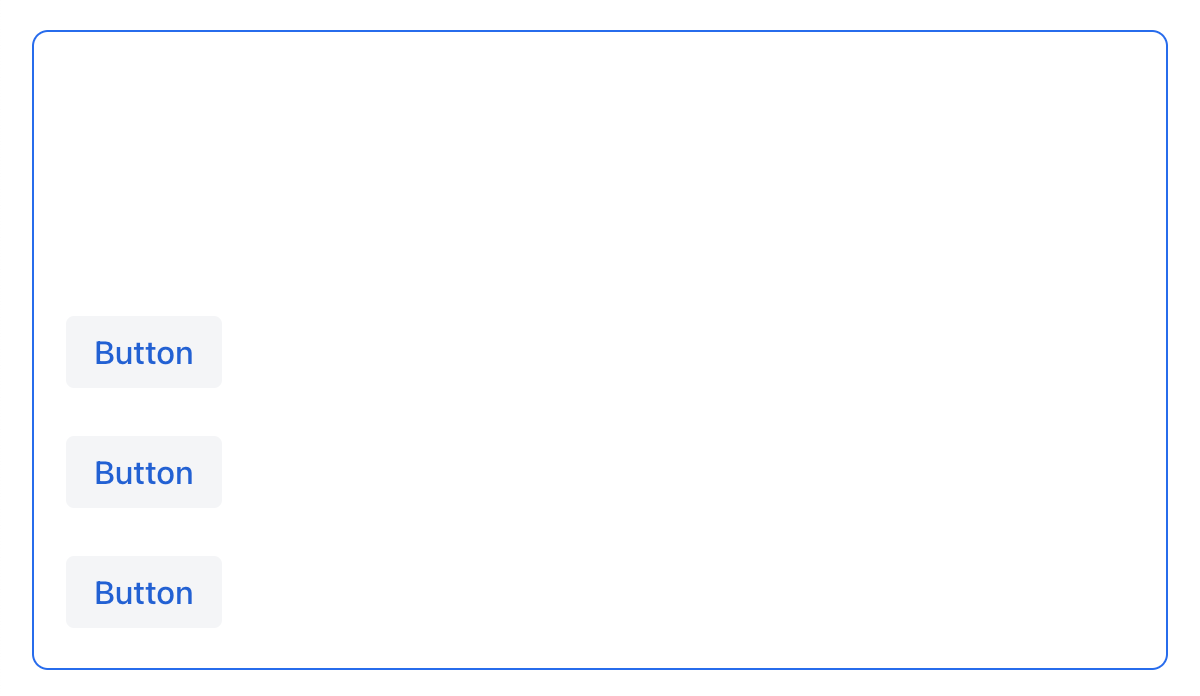
<vbox justifyContent="BETWEEN" minHeight="20em">
    <button text="Button"/>
    <button text="Button"/>
    <button text="Button"/>
</vbox>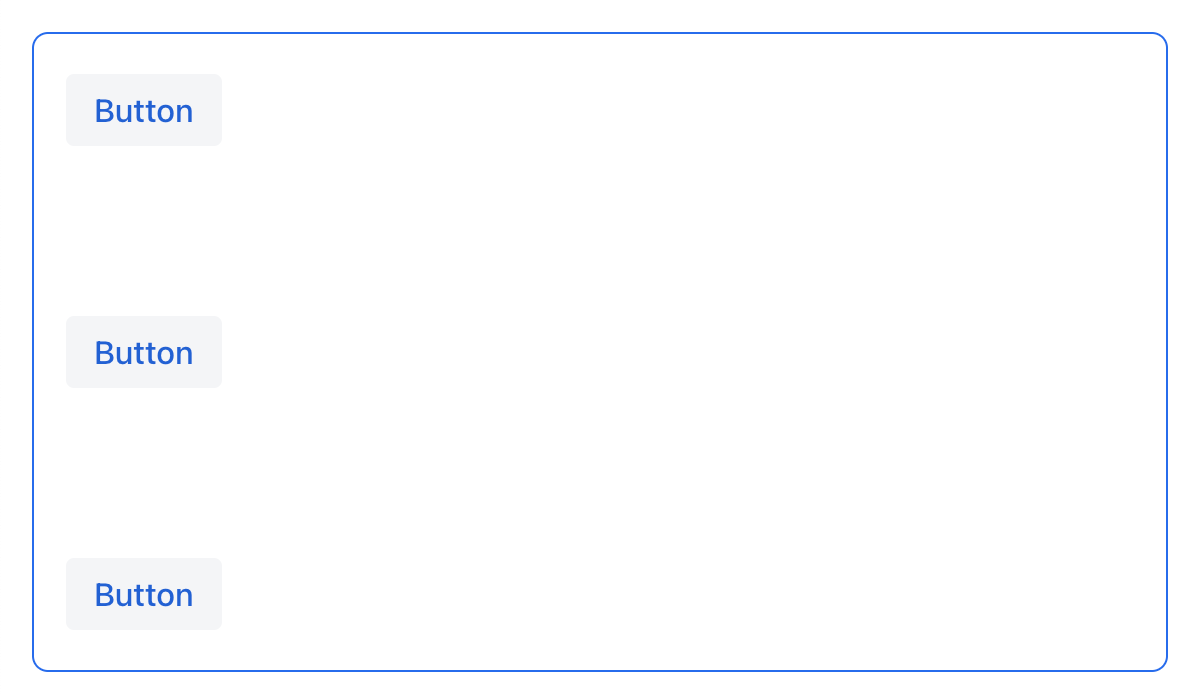
<vbox justifyContent="AROUND" minHeight="20em">
    <button text="Button"/>
    <button text="Button"/>
    <button text="Button"/>
</vbox>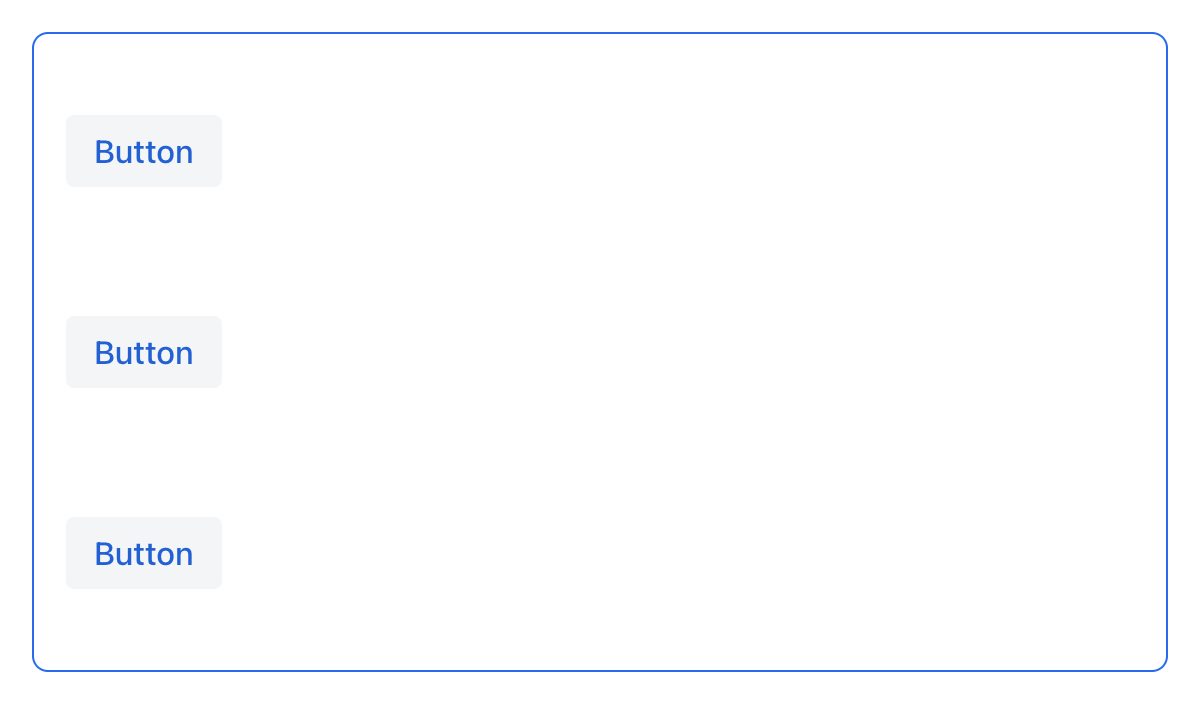
<vbox justifyContent="EVENLY" minHeight="20em">
    <button text="Button"/>
    <button text="Button"/>
    <button text="Button"/>
</vbox>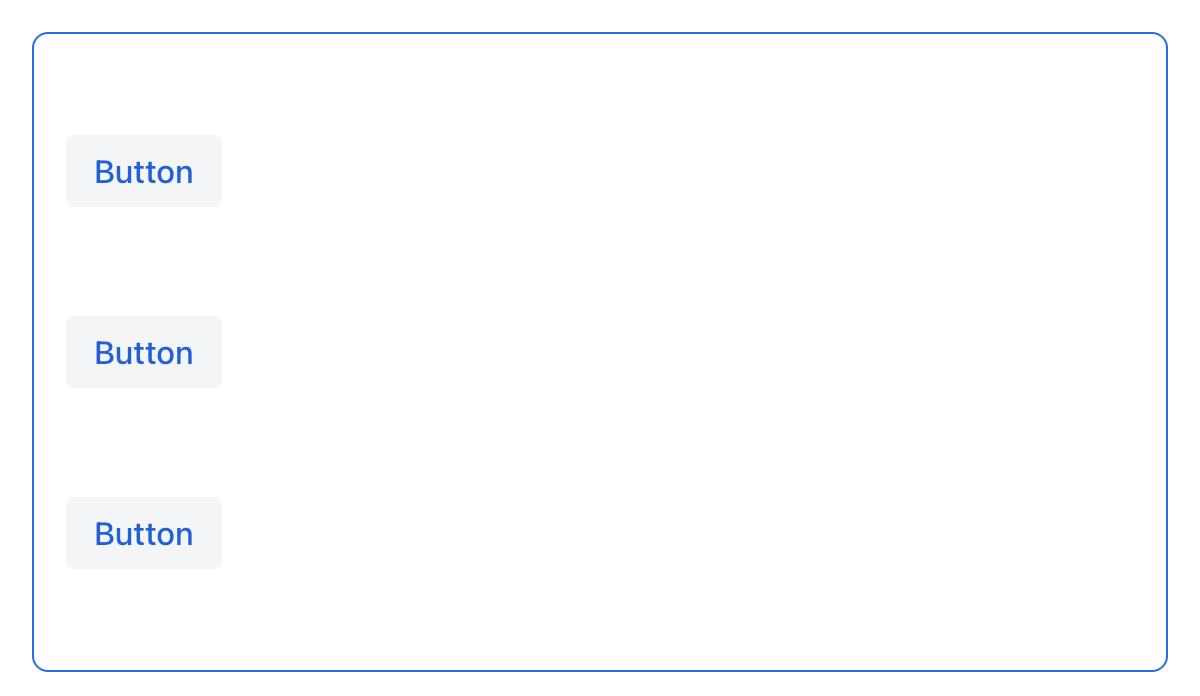
对于 hbox 和设置了 flexDirection="ROW"(即,flex-direction: row)的 flexLayout 布局中,justifyContent 属性的效果如下:
<hbox justifyContent="START" padding="true" width="100%">
    <button text="Button"/>
    <button text="Button"/>
    <button text="Button"/>
</hbox>
<hbox justifyContent="CENTER" padding="true" width="100%">
    <button text="Button"/>
    <button text="Button"/>
    <button text="Button"/>
</hbox>
<hbox justifyContent="END" padding="true" width="100%">
    <button text="Button"/>
    <button text="Button"/>
    <button text="Button"/>
</hbox>
<hbox justifyContent="BETWEEN" padding="true" width="100%">
    <button text="Button"/>
    <button text="Button"/>
    <button text="Button"/>
</hbox>
<hbox justifyContent="AROUND" padding="true" width="100%">
    <button text="Button"/>
    <button text="Button"/>
    <button text="Button"/>
</hbox>
<hbox justifyContent="EVENLY" padding="true" width="100%">
    <button text="Button"/>
    <button text="Button"/>
    <button text="Button"/>
</hbox>
AlignItems
alignItems 属性对应于 CSS 的 align-items 属性,用于定义 flex 容器中组件在 交叉轴 方向上的摆放规则。可以看做是交叉轴(与 主轴 垂直)的 justify-content 属性。
| 值 | 描述 |
|---|---|
|
内部组件放置于交叉轴的开始位置。 |
|
内部组件放置于交叉轴的中间位置。 |
|
内部组件放置于交叉轴的结束位置。 |
|
交叉轴方向未定义尺寸的内部组件 会被拉伸以占满容器。 |
|
内部组件放置于容器的基线位置。仅对 |
|
内部组件继承父容器的 |
对于 vbox 和设置了 flexDirection="COLUMN"(即,flex-direction: column)的 flexLayout 布局中,alignItems 属性的效果如下:
<vbox alignItems="START">
    <button text="Button" width="6em"/>
    <button text="Button" width="7em"/>
    <button text="Button" width="5em"/>
</vbox>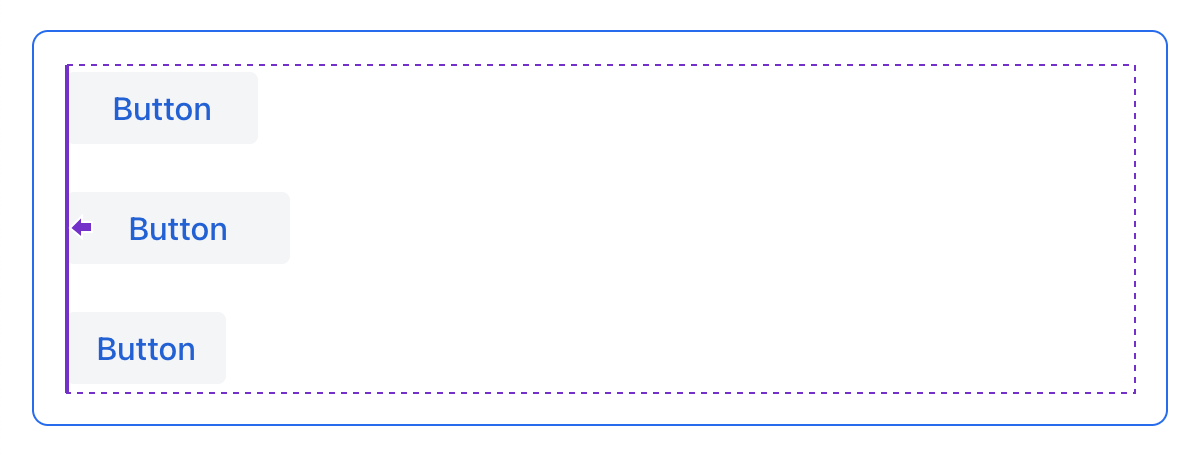
<vbox alignItems="CENTER">
    <button text="Button" width="6em"/>
    <button text="Button" width="7em"/>
    <button text="Button" width="5em"/>
</vbox>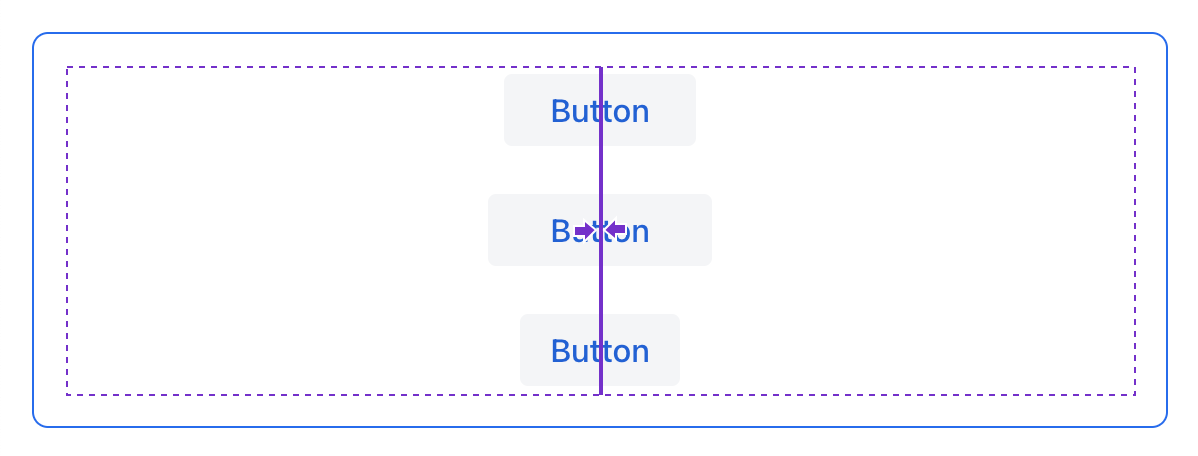
<vbox alignItems="END">
    <button text="Button" width="6em"/>
    <button text="Button" width="7em"/>
    <button text="Button" width="5em"/>
</vbox>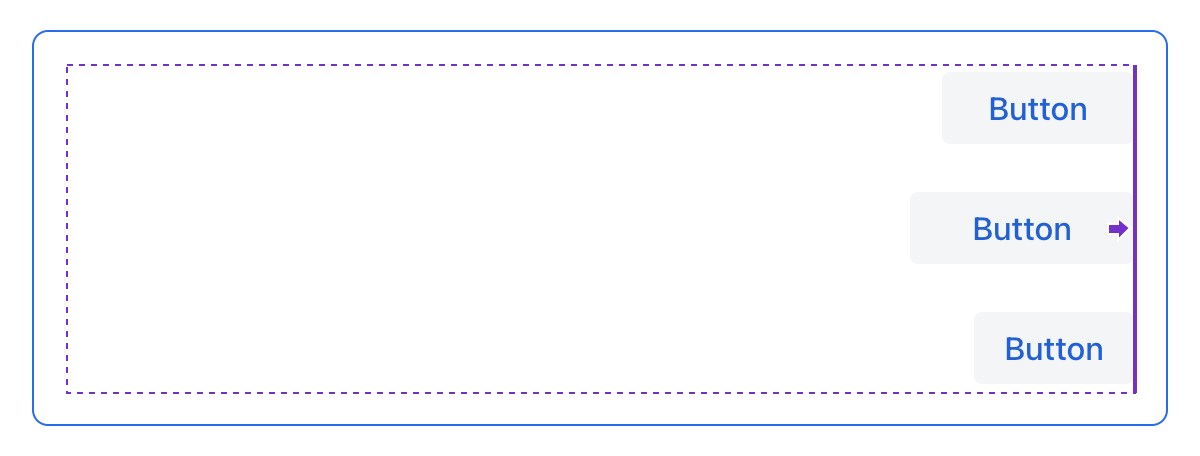
<vbox alignItems="STRETCH">
    <button text="Button" width="AUTO"/>
    <button text="Button" width="AUTO"/>
    <button text="Button" width="AUTO"/>
</vbox>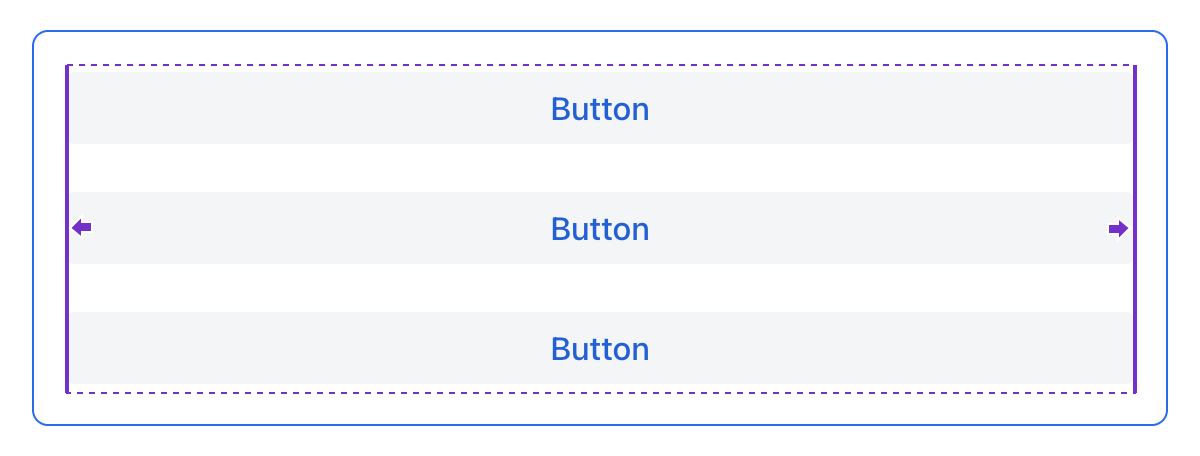
对于 hbox 和设置了 flexDirection="ROW"(即,flex-direction: row)的 flexLayout 布局中,alignItems 属性的效果如下:
<hbox alignItems="START" padding="true" width="100%" minHeight="10em">
    <button text="Button" height="2em"/>
    <button text="Button" height="3em"/>
    <button text="Button" height="1.5em"/>
</hbox>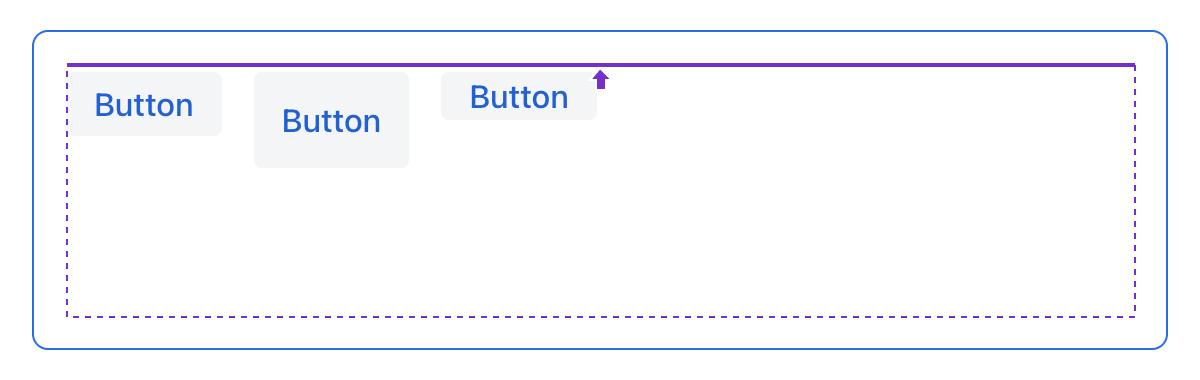
<hbox alignItems="CENTER" padding="true" width="100%" minHeight="10em">
    <button text="Button" height="2em"/>
    <button text="Button" height="3em"/>
    <button text="Button" height="1.5em"/>
</hbox>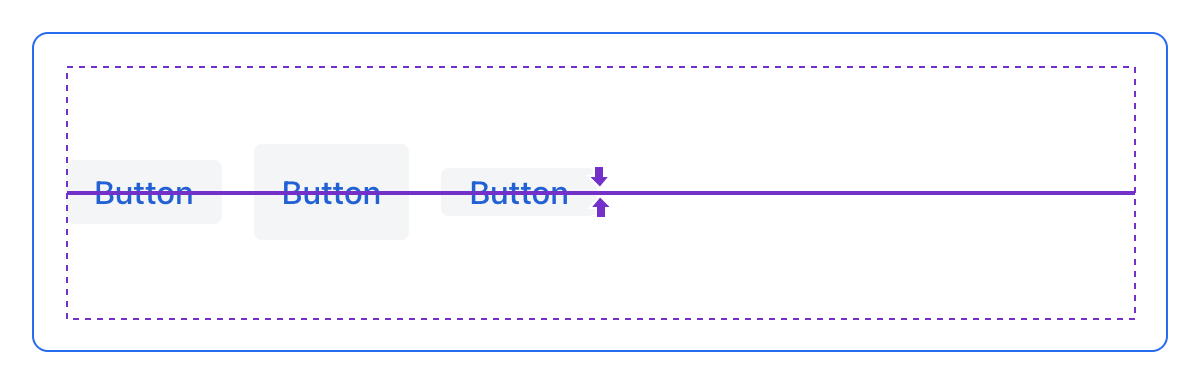
<hbox alignItems="END" padding="true" width="100%" minHeight="10em">
    <button text="Button" height="2em"/>
    <button text="Button" height="3em"/>
    <button text="Button" height="1.5em"/>
</hbox>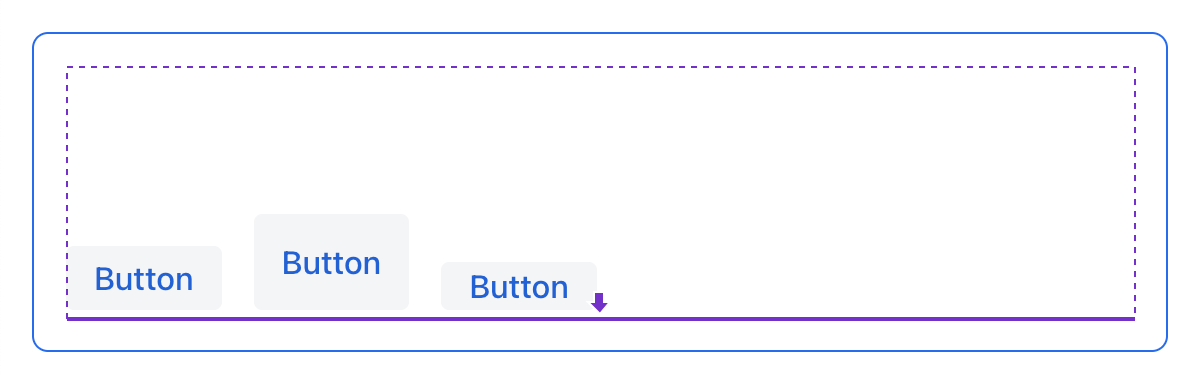
<hbox alignItems="STRETCH" padding="true" width="100%" minHeight="10em">
    <button text="Button" height="AUTO"/>
    <button text="Button" height="AUTO"/>
    <button text="Button" height="AUTO"/>
</hbox>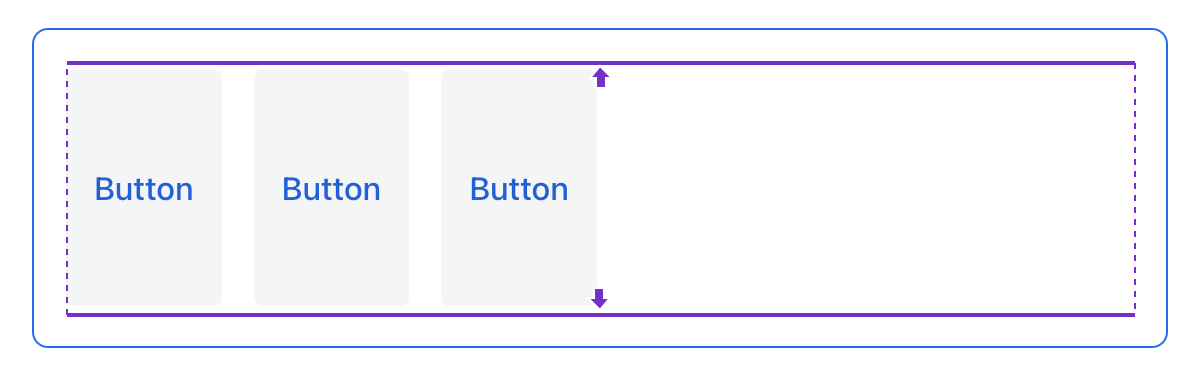
<hbox alignItems="BASELINE" padding="true" width="100%" minHeight="10em">
    <button text="Button" height="2em"/>
    <button text="Button" height="3em"/>
    <button text="Button" height="1.5em"/>
</hbox>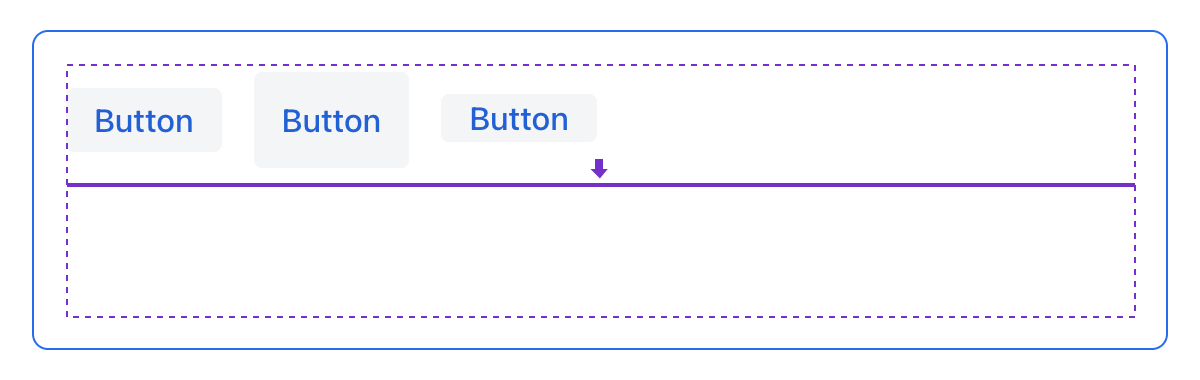
AlignSelf
alignSelf 属性对应 CSS 的 align-self 属性,用于为单个内部组件定义组件在容器内的对齐方式。该属性会覆盖容器设置的 alignItems 属性。
<vbox alignItems="START">
    <button text="alignSelf=END" alignSelf="END"/>
    <button text="alignSelf=CENTER" alignSelf="CENTER"/>
    <button text="alignSelf=AUTO" alignSelf="AUTO"/>
</vbox>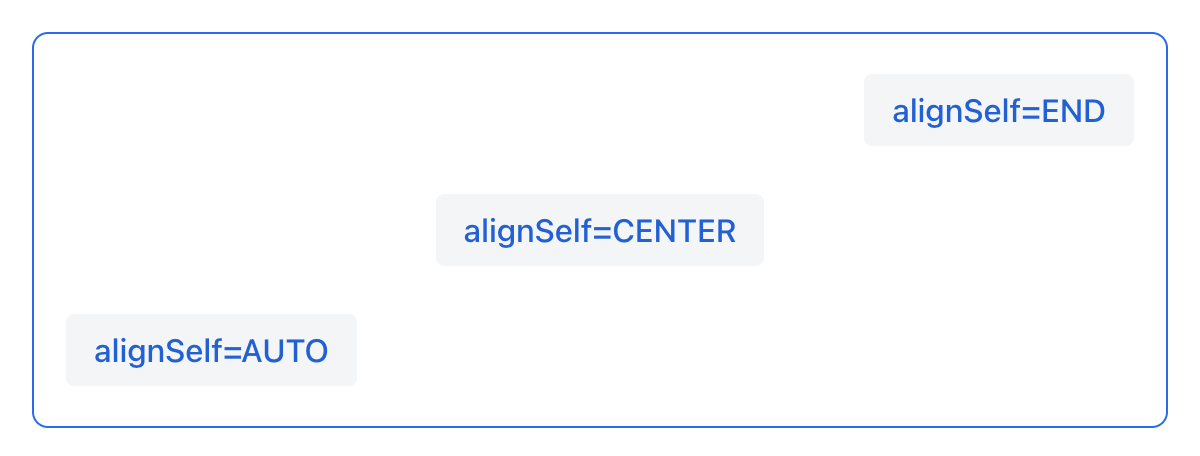
<hbox alignItems="START" justifyContent="BETWEEN" padding="true" width="100%" minHeight="10em">
    <button text="alignSelf=END" alignSelf="END"/>
    <button text="alignSelf=CENTER" alignSelf="CENTER"/>
    <button text="alignSelf=AUTO" alignSelf="AUTO"/>
</hbox>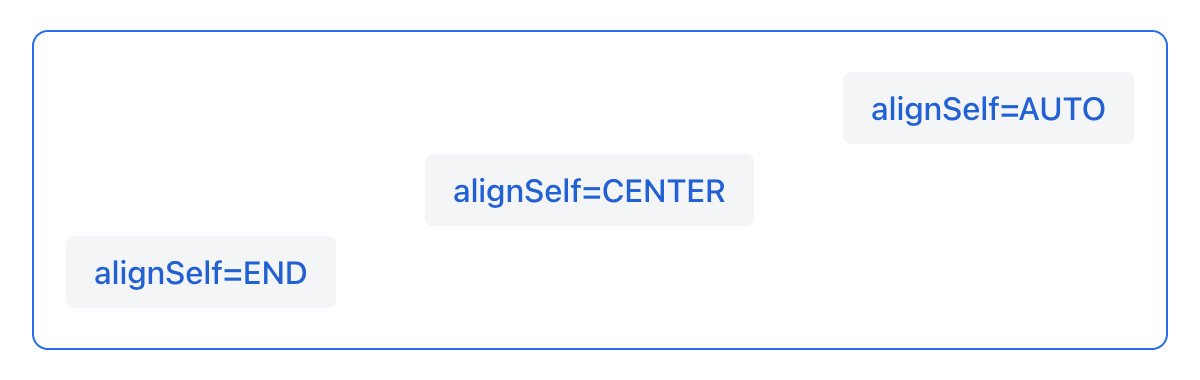
常见的布局错误
常见错误 1. 在基于内容尺寸的容器中设置组件的相对尺寸
<vbox>
    <dataGrid id="usersDataGrid" dataContainer="usersDc"
              width="100%" height="100%">
        <actions/>
        <columns>
            <column property="firstName"/>
            <column property="lastName"/>
            <column property="username"/>
        </columns>
    </dataGrid>
</vbox>这个例子中,dataGrid 高度为 100%,而 vbox 的默认高度为 AUTO(基于内容)。结果导致 dataGrid 被折叠为一条横线:

常见错误 2. 没有为内部的 vbox 容器禁用 padding
<layout>
    <genericFilter ...>
        ...
    </genericFilter>

    <vbox width="100%">
        <hbox id="buttonsPanel" classNames="buttons-panel">
            ...
        </hbox>
        <dataGrid id="usersDataGrid" ...>
            ...
        </dataGrid>
    </vbox>
    <hbox>
        ...
    </hbox>
</layout>这个例子中,vbox 内放置了一个 hbox 和 dataGrid,而这个 vbox 默认是带有 padding 的。结果导致 vbox 内的组件不能与外部的组件对齐。
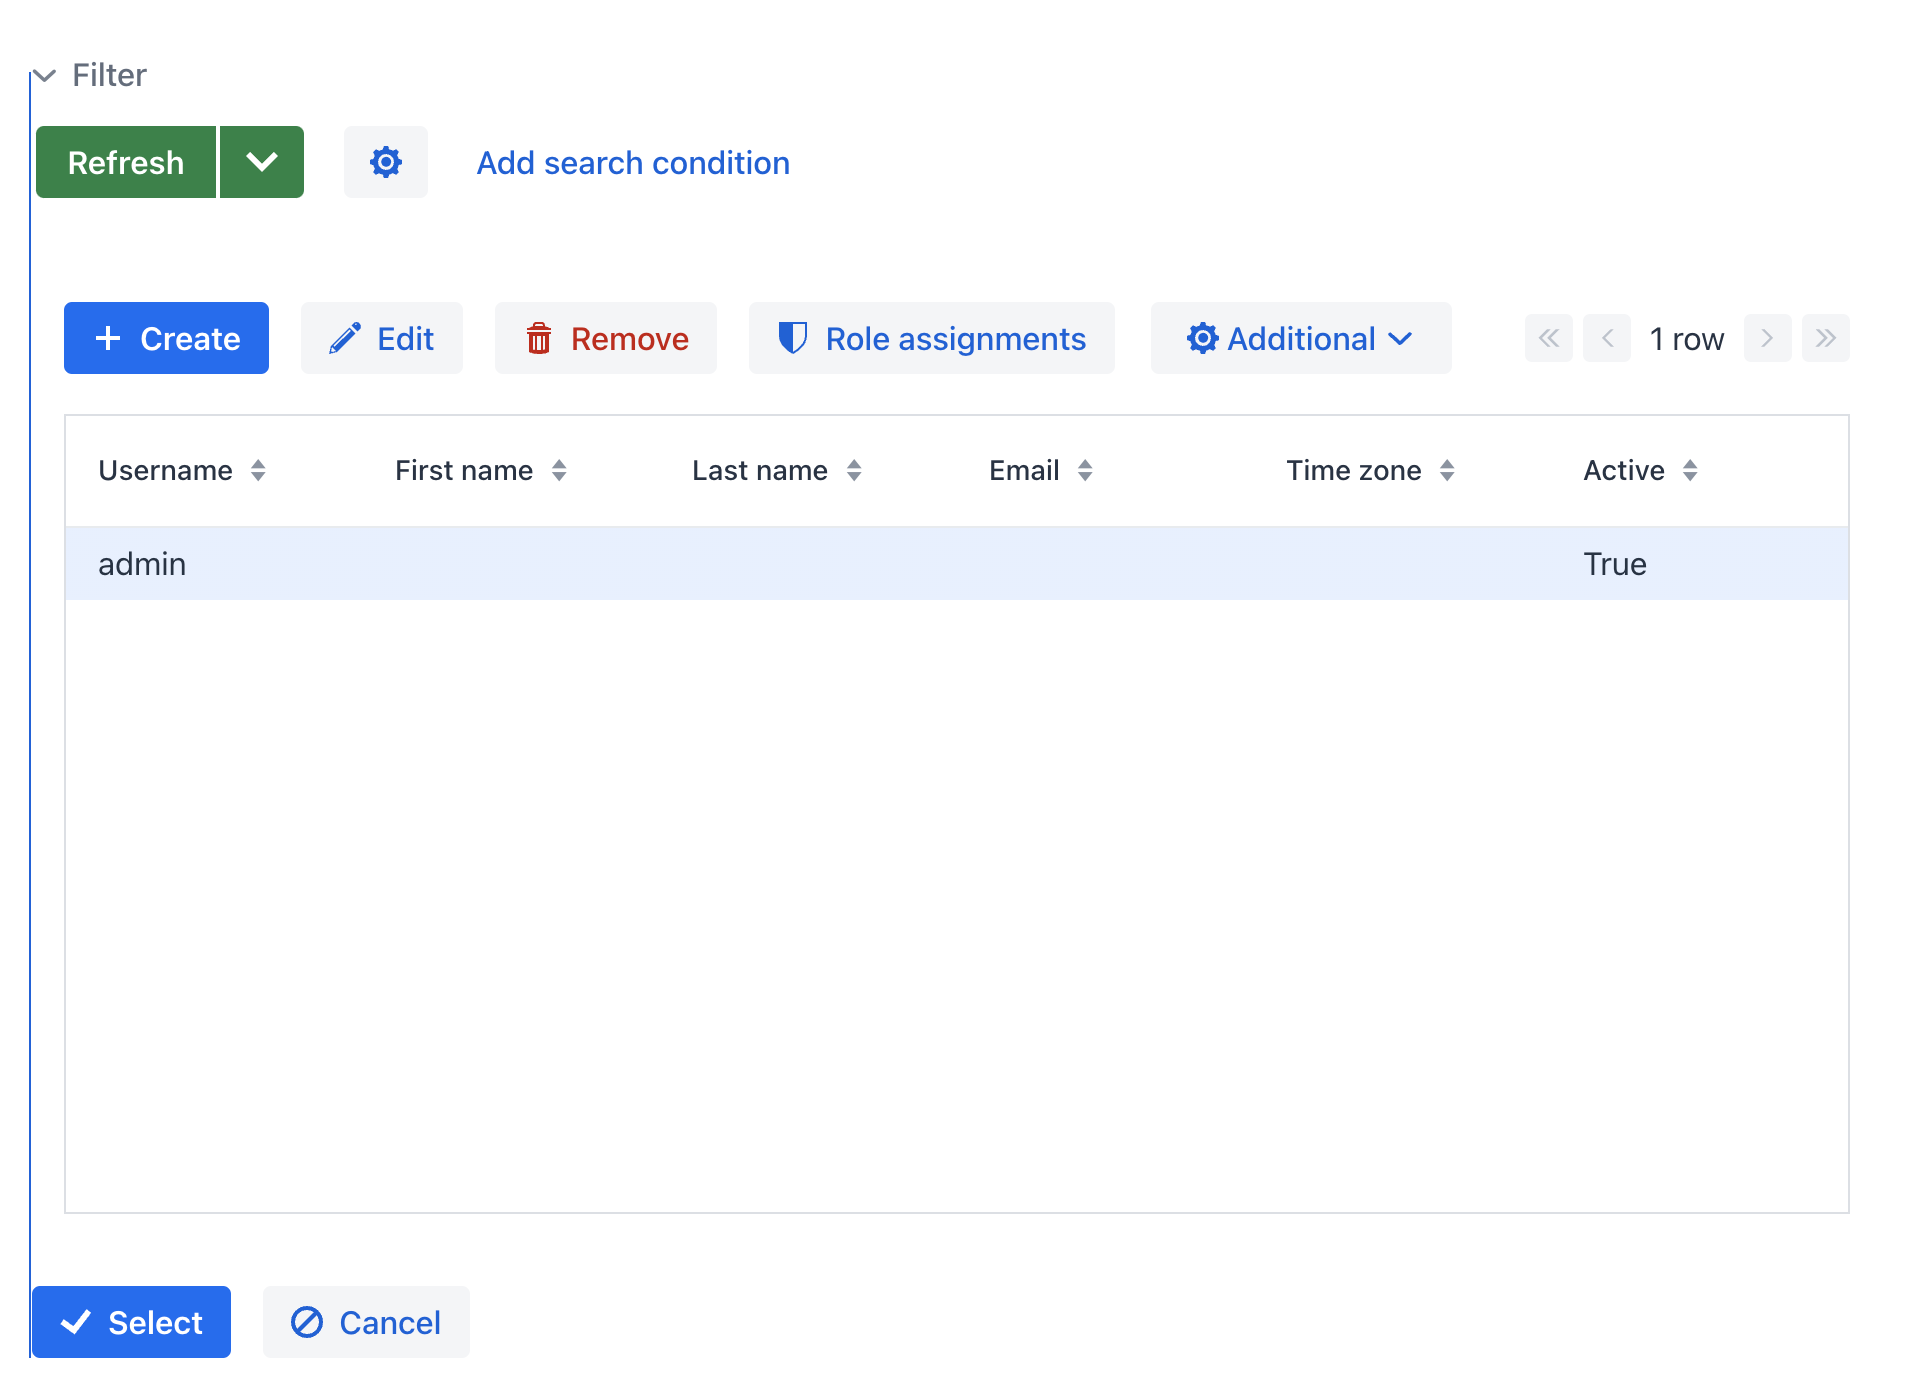
常见错误 3. 对齐相对尺寸的内部组件
<hbox alignItems="CENTER" padding="true" width="100%" minHeight="10em">
    <span text="Span" height="100%"/>
</hbox>这个例子中,span 高度为 100%,而外部的 hbox 容器定义了 alignItems="CENTER"。结果导致文字放在了左上角。
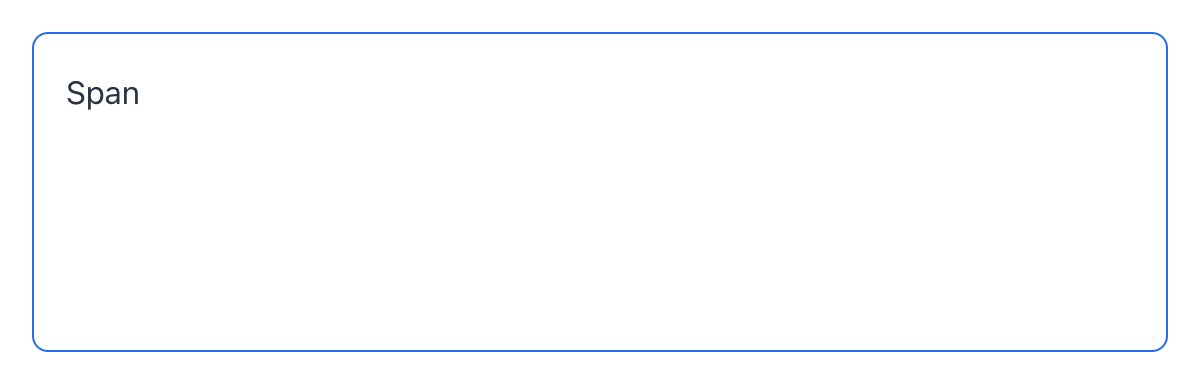
常见错误 4. 拉伸固定尺寸的组件
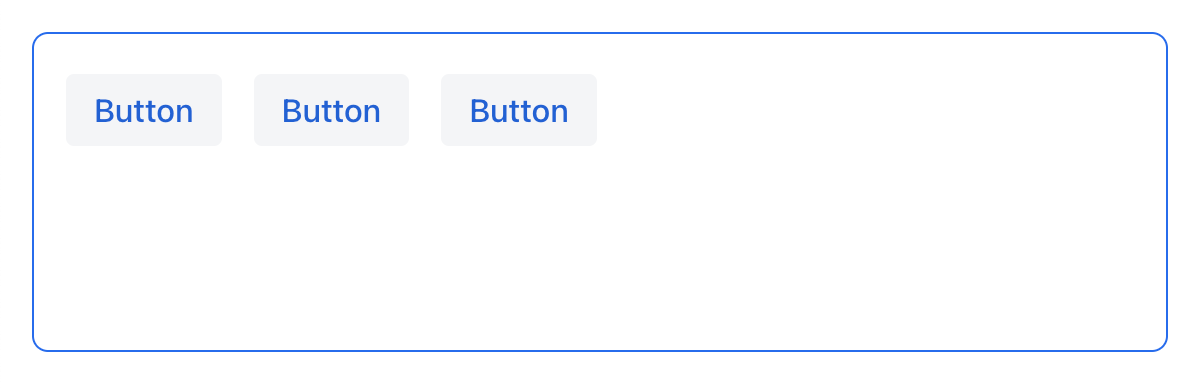
<hbox alignItems="STRETCH" padding="true" width="100%" minHeight="10em">
    <button text="Button"/>
    <button text="Button"/>
    <button text="Button"/>
</hbox>
这个例子中,按钮的样式定义了默认高度。结果导致按钮并没有被垂直拉伸。
常见错误 5. 设置尺寸未指定单位
<textField width="400"/>这个例子中,textField 没有指定宽度的单位。结果这样的设置是无效的,因为没有默认的尺寸单位。
小技巧
适应不同屏幕大小
定义一个自适应文本控件,在大屏幕的尺寸固定,而在小屏幕具有 100% 宽度:
<hbox width="100%">
    <textField width="100%" maxWidth="40em"/>
    <button text="Button"/>
</hbox>
下面的示例中,定义了一个单列的表单布局,该列在大屏幕上是固定大小,而在小屏幕上具有 100% 宽度:
<formLayout id="form"
            dataContainer="taskTypeDc"
            classNames="mx-m"
            maxWidth="40em"> (2)
    <responsiveSteps>
        <responsiveStep minWidth="0" columns="1"/> (1)
    </responsiveSteps>

    <textField id="nameField" property="name"/>
    <textArea id="descriptionField" property="description"
              height="9.5em"/>
</formLayout>| 1 | 设置表单布局中在所有的屏幕分辨率都只有一列 |
| 2 | 设置最大宽度 |
使用 Lumo 辅助类
对于简单的样式设置,可以使用 Vaadin 提供的 Lumo Utility Classes(辅助类)。Lumo 辅助类 是预定义的 CSS 类名和样式表。可用于设置 HTML 元素和布局的样式,而无需编写 CSS。
每个辅助类对元素使用特定的样式,例如背景色、边框、字体、大小或间距。并且提供了用于 CSS flexbox 和网格布局功能的类。
LumoUtility Java 类包含所有实用辅助类的字符串常量。这些常量划为不同的分类,例如 LumoUtility.Margin。
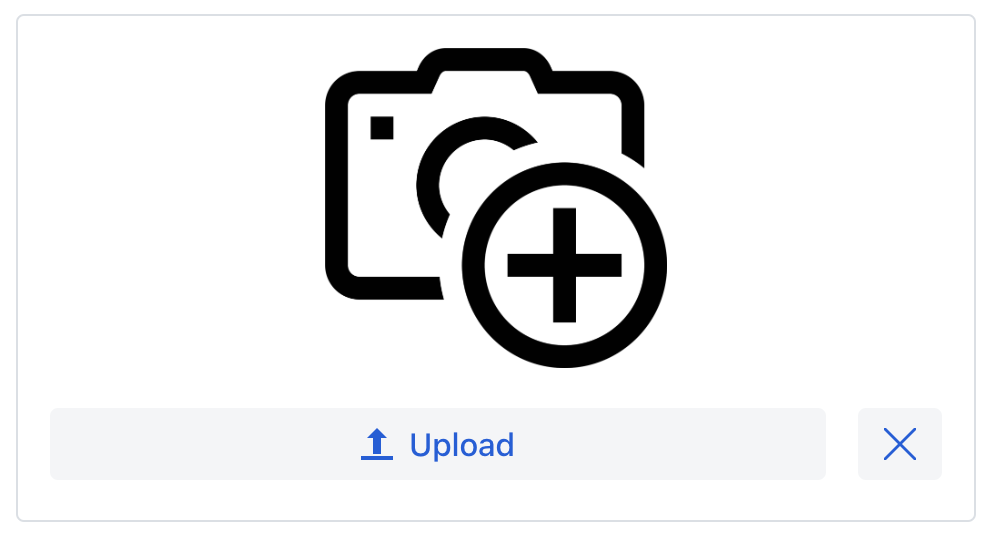
使用 Lumo 辅助类为布局容器添加圆边框的示例:
<vbox id="imageWrapper"
      classNames="border                (1)
                  rounded-m             (2)
                  border-contrast-20"   (3)
      alignItems="CENTER"
width="100%" maxWidth="30em">| 1 | 添加默认边框 |
| 2 | 设置 border radius 为 var(--lumo-border-radius-m) |
| 3 | 设置 border color 为 var(--lumo-contrast-20pct) |
下面的示例将组件与对齐至水平容器的 end 端:
<header id="header" classNames="jmix-main-view-header">
    <drawerToggle id="drawerToggle"
                  classNames="jmix-main-view-drawer-toggle"
                  themeNames="contrast"
                  ariaLabel="msg://drawerToggle.ariaLabel"/>
    <h1 id="viewTitle" classNames="jmix-main-view-title"/>

    <button id="logoutButton" icon="SIGN_OUT" classNames="ms-auto me-s"/> (1)
</header>| 1 | ms-auto 表示 margin-inline-start: auto,即定义元素的 inline start margin,根据 flex-direction 映射为实际的 margin 值;me-s 表示 margin-inline-end: var(--lumo-space-s),即定义元素的 inline end margin。 |

