与 Jmix UI 集成
在创建了组件的客户端和服务端之后,便可以在 视图 中使用,只需创建组件的 Java 类实例并添加至父组件即可。
但是,视图的内容一般在 XML 文件中定义。本节介绍如何在 XML 中使用新创建的组件以及如何在 Studio 的可视化设计器中与其他 Jmix UI 组件一样使用。
支持 XML
以下是为 前一章 创建的 Slider 组件实现 XML 支持的示例。
-
创建
app-ui-components.xsd文件并定义组件的 XML 标记:<xs:schema xmlns="http://company.com/schema/app-ui-components" elementFormDefault="qualified" targetNamespace="http://company.com/schema/app-ui-components" xmlns:xs="http://www.w3.org/2001/XMLSchema" xmlns:layout="http://jmix.io/schema/flowui/layout"> <xs:element name="slider"> <xs:complexType> <xs:complexContent> <xs:extension base="layout:baseComponent"> <xs:attribute name="min" type="xs:integer"/> <xs:attribute name="max" type="xs:integer"/> <xs:attribute name="value" type="xs:integer"/> <xs:attributeGroup ref="layout:hasSize"/> </xs:extension> </xs:complexContent> </xs:complexType> </xs:element> </xs:schema> -
创建一个组件加载器,当在视图 XML 中使用组件时,需要用加载器初始化该组件。
import io.jmix.flowui.xml.layout.loader.AbstractComponentLoader;

public class SliderLoader extends AbstractComponentLoader<Slider> {

    @Override
    protected Slider createComponent() {
        return factory.create(Slider.class);
    }

    @Override
    public void loadComponent() {
        loadInteger(element, "min", resultComponent::setMin); (1)
        loadInteger(element, "max", resultComponent::setMax);
        loadInteger(element, "value", resultComponent::setValue);

        componentLoader().loadSizeAttributes(resultComponent, element); (2)
    }
}
1 基类提供了辅助方法用于加载属性值。 2 componentLoader()方法返回ComponentLoaderSupportbean 的实例,提供了加载通用属性的方法。 -
为了在框架中注册组件和加载器,需要创建一个 Spring 配置类,并使用
@Configuration注解:@Configuration public class ComponentRegistrationConfiguration { @Bean public ComponentRegistration slider() { return ComponentRegistrationBuilder.create(Slider.class) .withComponentLoader("slider", SliderLoader.class) .build(); } @Bean public ComponentRegistration datePicker() { return ComponentRegistrationBuilder.create(ExtendedDatePicker.class) .withComponentLoader("datePicker", DatePickerLoader.class) .replaceComponent(TypedDatePicker.class) .build(); } }
然后,可以在视图的 XML 中定义 Slider 组件了:
<view xmlns="http://jmix.io/schema/flowui/view"
      xmlns:app="http://company.com/schema/app-ui-components"> (1)
    <layout>
        <app:slider id="slider"
                    width="20em"
                    min="10" max="100" value="50"/> (2)
    </layout>
</view>| 1 | 用与组件 XSD 中相同的 xmlns 和 targetNamespace 属性定义命名空间。 |
| 2 | 添加 slider 元素时,需使用命名空间前缀。 |
支持 Studio
在 Studio 中支持新组件,需要创建一个带 @StudioUiKit 注解的接口,其中包含一个带 @StudioComponent 注解的方法:
import io.jmix.flowui.kit.meta.StudioComponent;
import io.jmix.flowui.kit.meta.StudioProperty;
import io.jmix.flowui.kit.meta.StudioPropertyType;
import io.jmix.flowui.kit.meta.StudioUiKit;
@StudioUiKit
public interface StudioComponents {
@StudioComponent(
name = "Slider",
classFqn = "com.company.onboarding.component.Slider",
category = "Components",
xmlElement = "slider",
xmlns = "http://company.com/schema/app-ui-components",
xmlnsAlias = "app",
properties = {
/* Common attributes */
@StudioProperty(xmlAttribute = "id", type = StudioPropertyType.COMPONENT_ID),
@StudioProperty(xmlAttribute = "alignSelf", type = StudioPropertyType.ENUMERATION,
classFqn = "com.vaadin.flow.component.orderedlayout.FlexComponent$Alignment",
defaultValue = "AUTO",
options = {"START", "END", "CENTER", "STRETCH", "BASELINE", "AUTO"}),
@StudioProperty(xmlAttribute = "css", type = StudioPropertyType.STRING),
@StudioProperty(xmlAttribute = "colspan", type = StudioPropertyType.INTEGER),
@StudioProperty(xmlAttribute = "visible", type = StudioPropertyType.BOOLEAN,
defaultValue = "true"),
/* Size attributes */
@StudioProperty(xmlAttribute = "height", type = StudioPropertyType.SIZE),
@StudioProperty(xmlAttribute = "width", type = StudioPropertyType.SIZE),
@StudioProperty(xmlAttribute = "maxHeight", type = StudioPropertyType.SIZE),
@StudioProperty(xmlAttribute = "maxWidth", type = StudioPropertyType.SIZE),
@StudioProperty(xmlAttribute = "minHeight", type = StudioPropertyType.SIZE),
@StudioProperty(xmlAttribute = "minWidth", type = StudioPropertyType.SIZE),
/* Slider attributes */
@StudioProperty(xmlAttribute = "min", type = StudioPropertyType.INTEGER,
defaultValue = "0"),
@StudioProperty(xmlAttribute = "max", type = StudioPropertyType.INTEGER,
defaultValue = "100")
}
)
void slider();
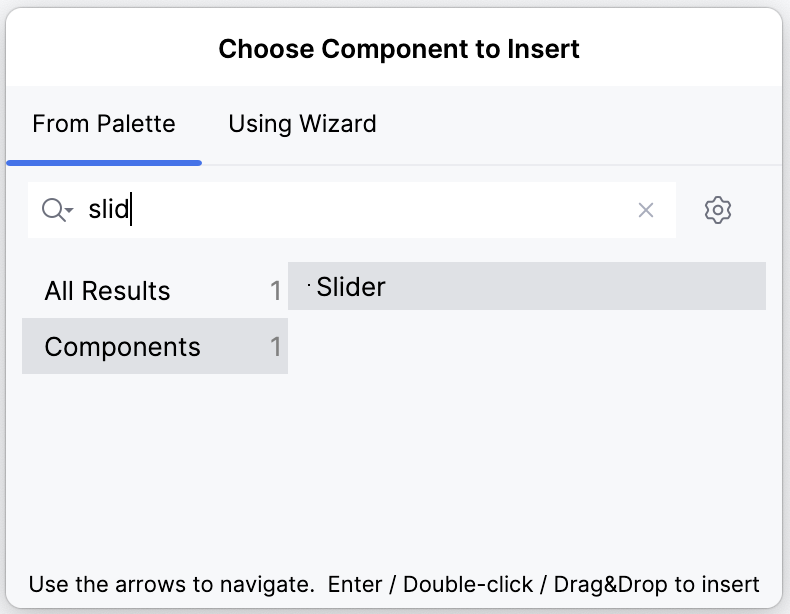
}然后,Studio 会在 Add Component 工具箱中显示新的组件了:
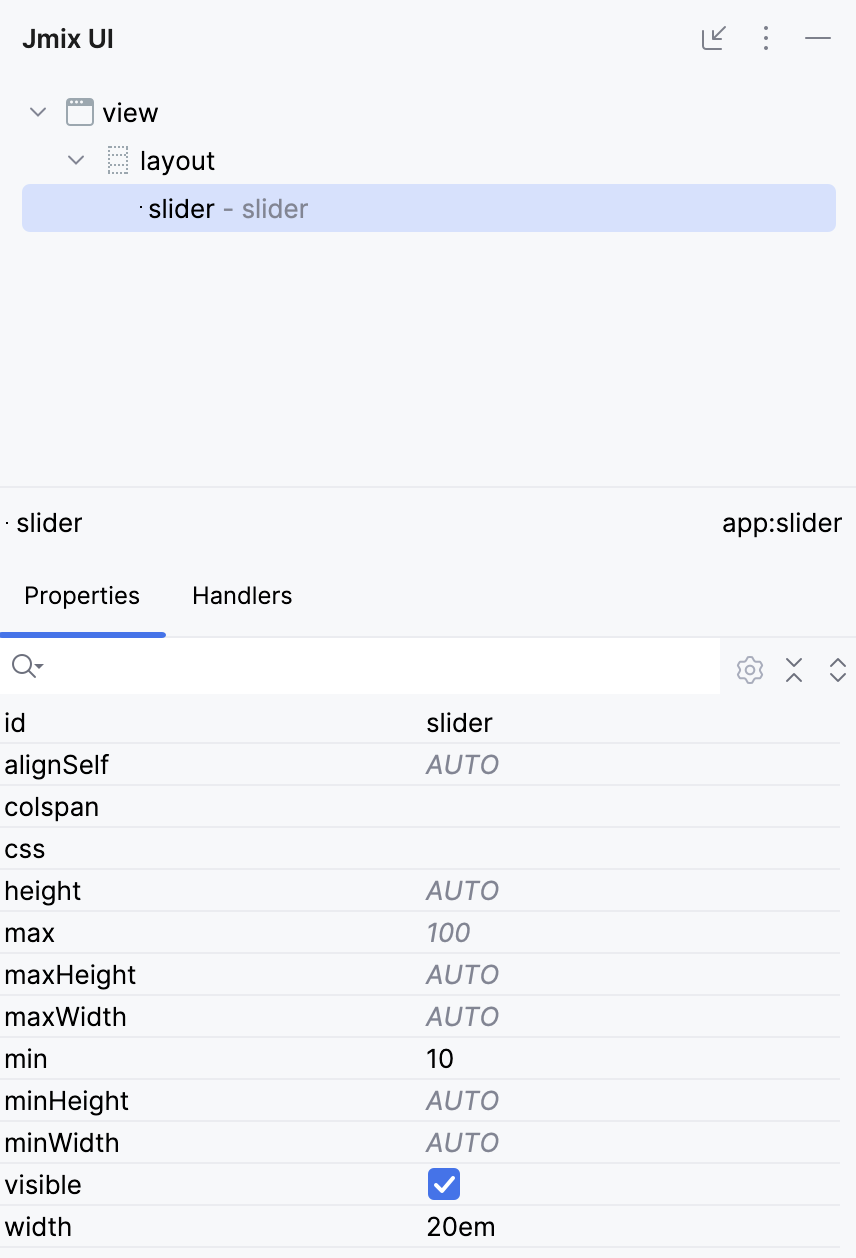
以及在组件的属性面板中显示其可用的属性:
本页是否有帮助?

感谢您的反馈