9. 数据访问控制
到目前为止,我们都是用 admin 用户登录应用程序,对 UI 和数据具有完全的访问权限。这最后一节中,我们将为 HR 经理和员工设置不同访问应用程序的权限。
员工的资源角色
创建资源角色
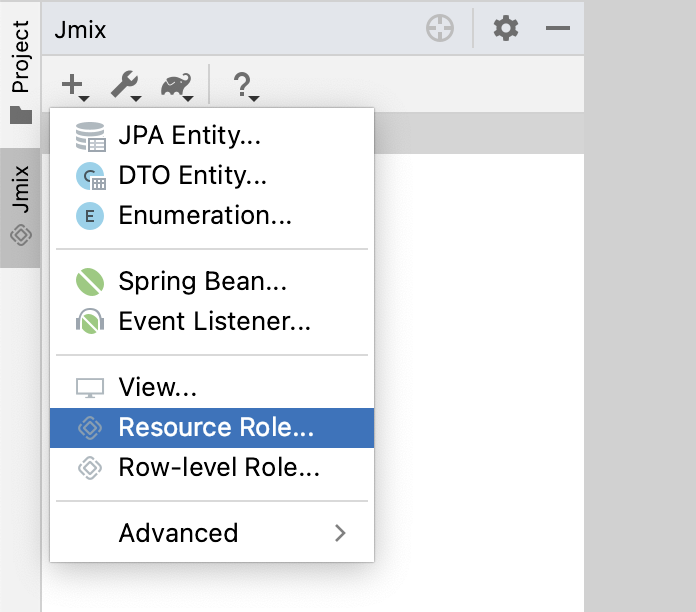
在 Jmix 工具窗口中,点击 New( )→ Resource Role:
New Resource Role 弹窗中,Role name 字段输入 Employee 并在 Security scope 下拉框选择 UI:
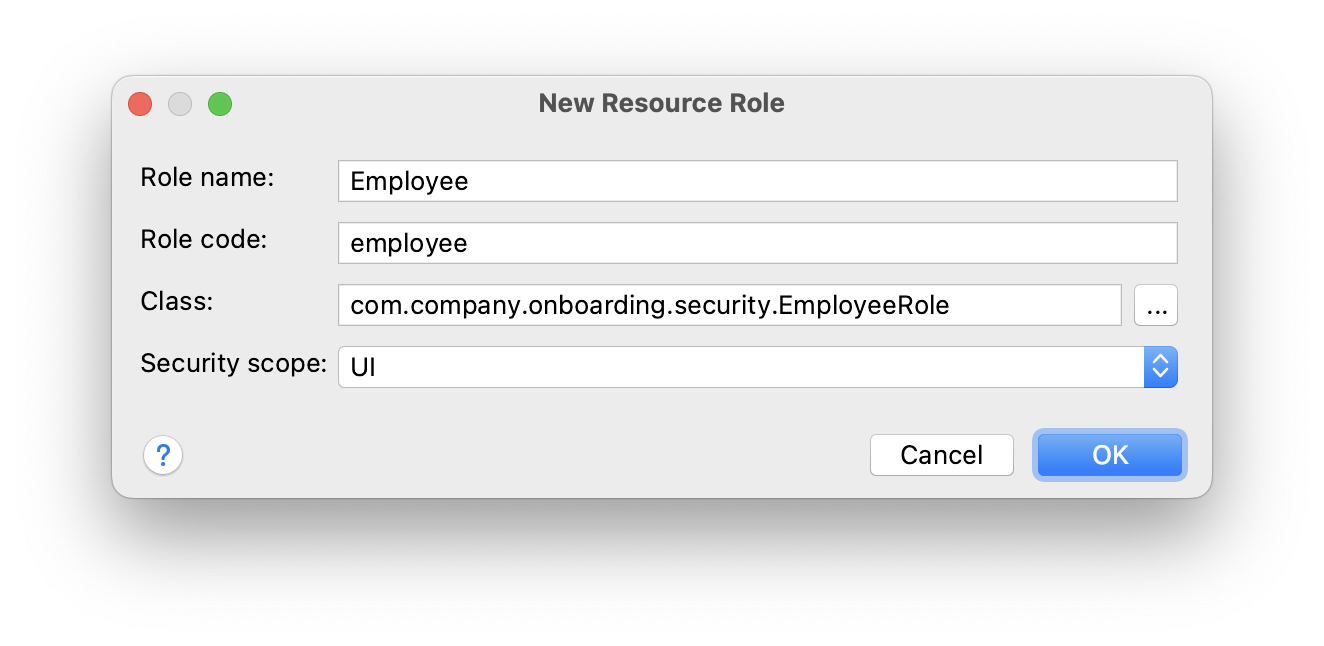
点击 OK。
Studio 会创建并打开一个带注解的接口:
package com.company.onboarding.security;

import io.jmix.security.role.annotation.ResourceRole;

@ResourceRole(name = "Employee", code = EmployeeRole.CODE, scope= "UI")
public interface EmployeeRole {
        String CODE = "employee";
}
UI 权限范围(scope)仅在用户通过 UI 登录系统后应用。如果同一个用户是通过 REST API 登录,则不会使用这个角色。建议为 API 创建一组不同的角色,许可范围相对少一些。
|
切换至 User Interface 标签页定义视图许可。在菜单树中,选中 MyOnboardingView,然后在右侧勾选 Allow 复选框:
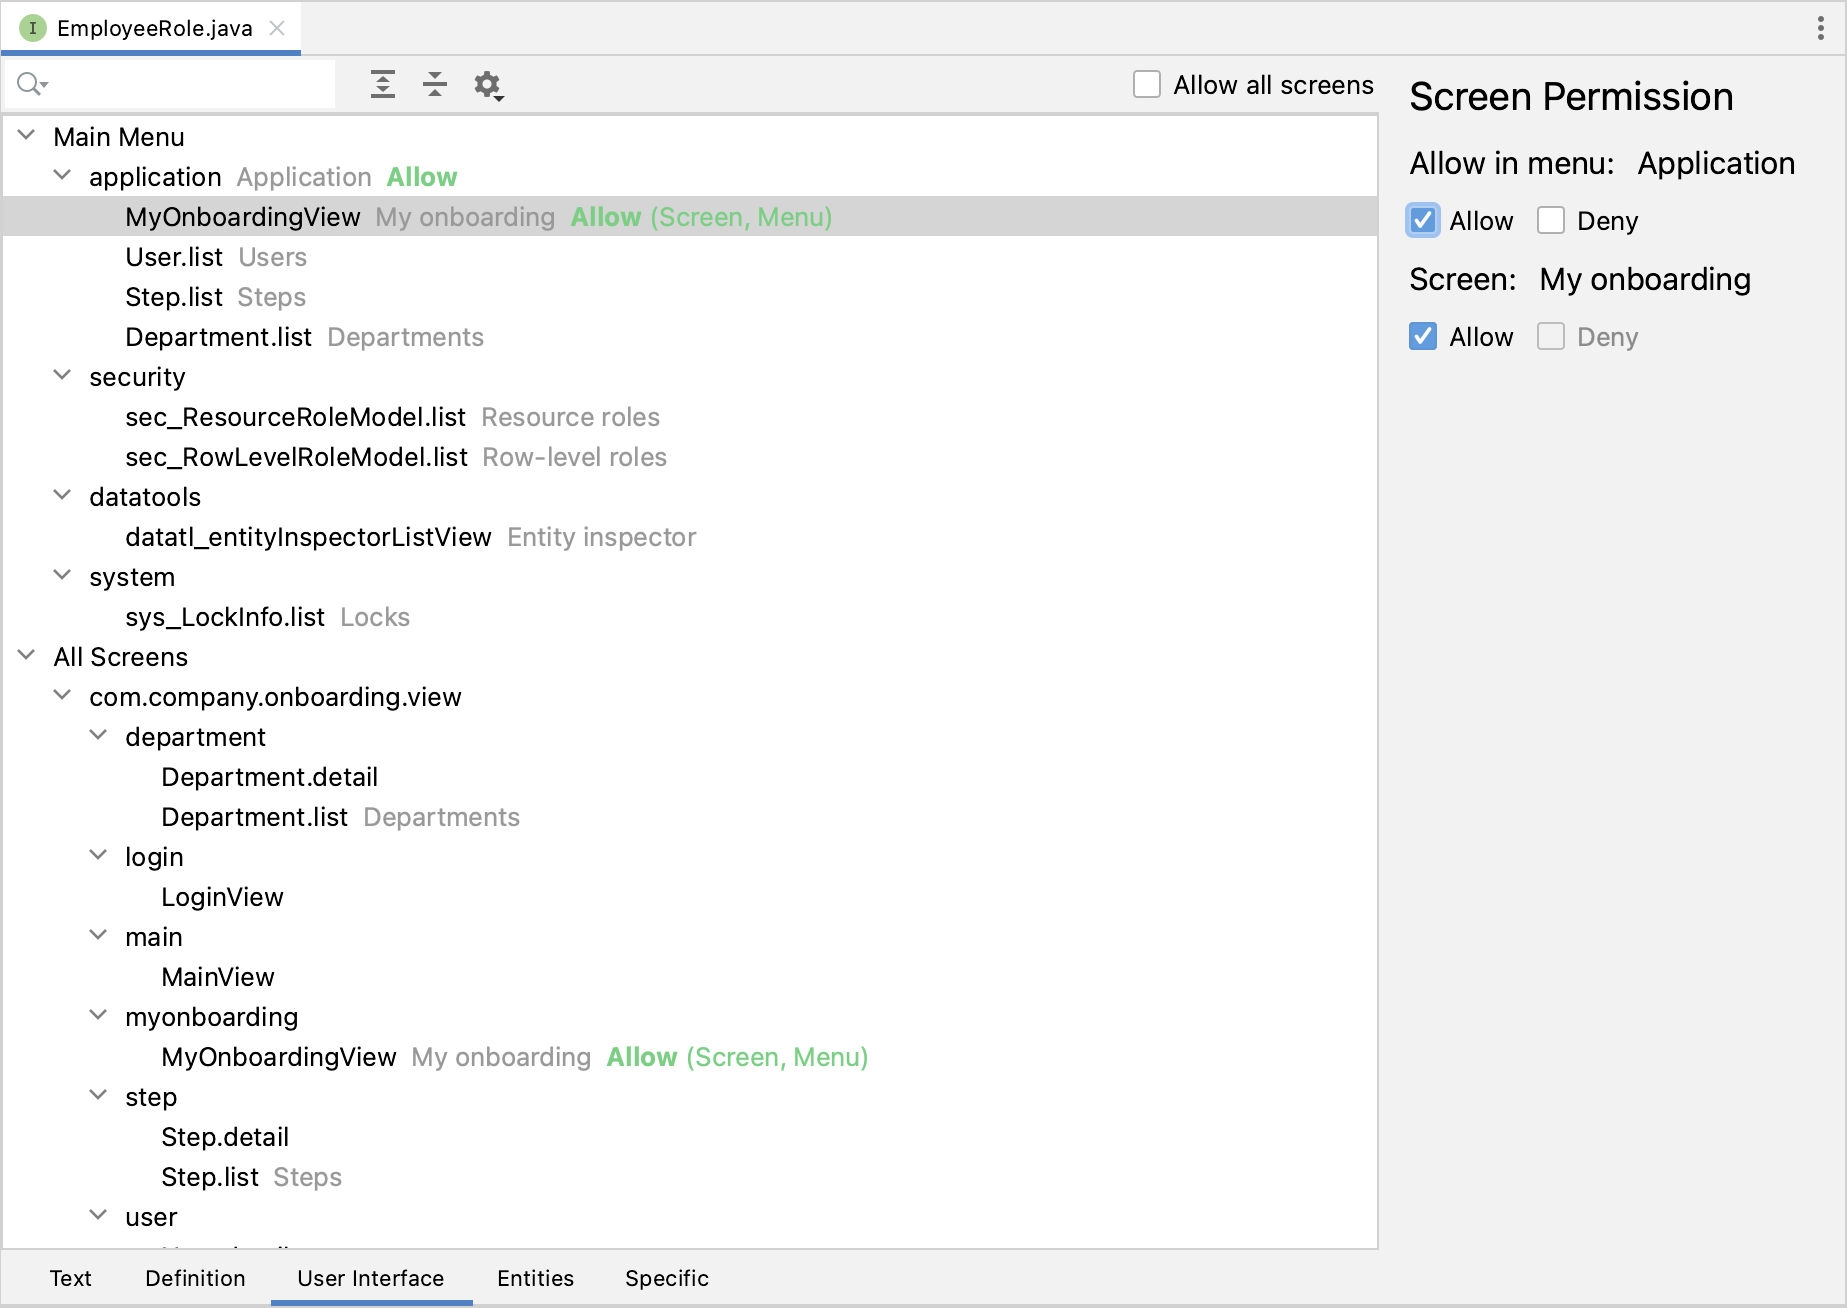
然后切换至 Entities 标签页并选择下列权限:
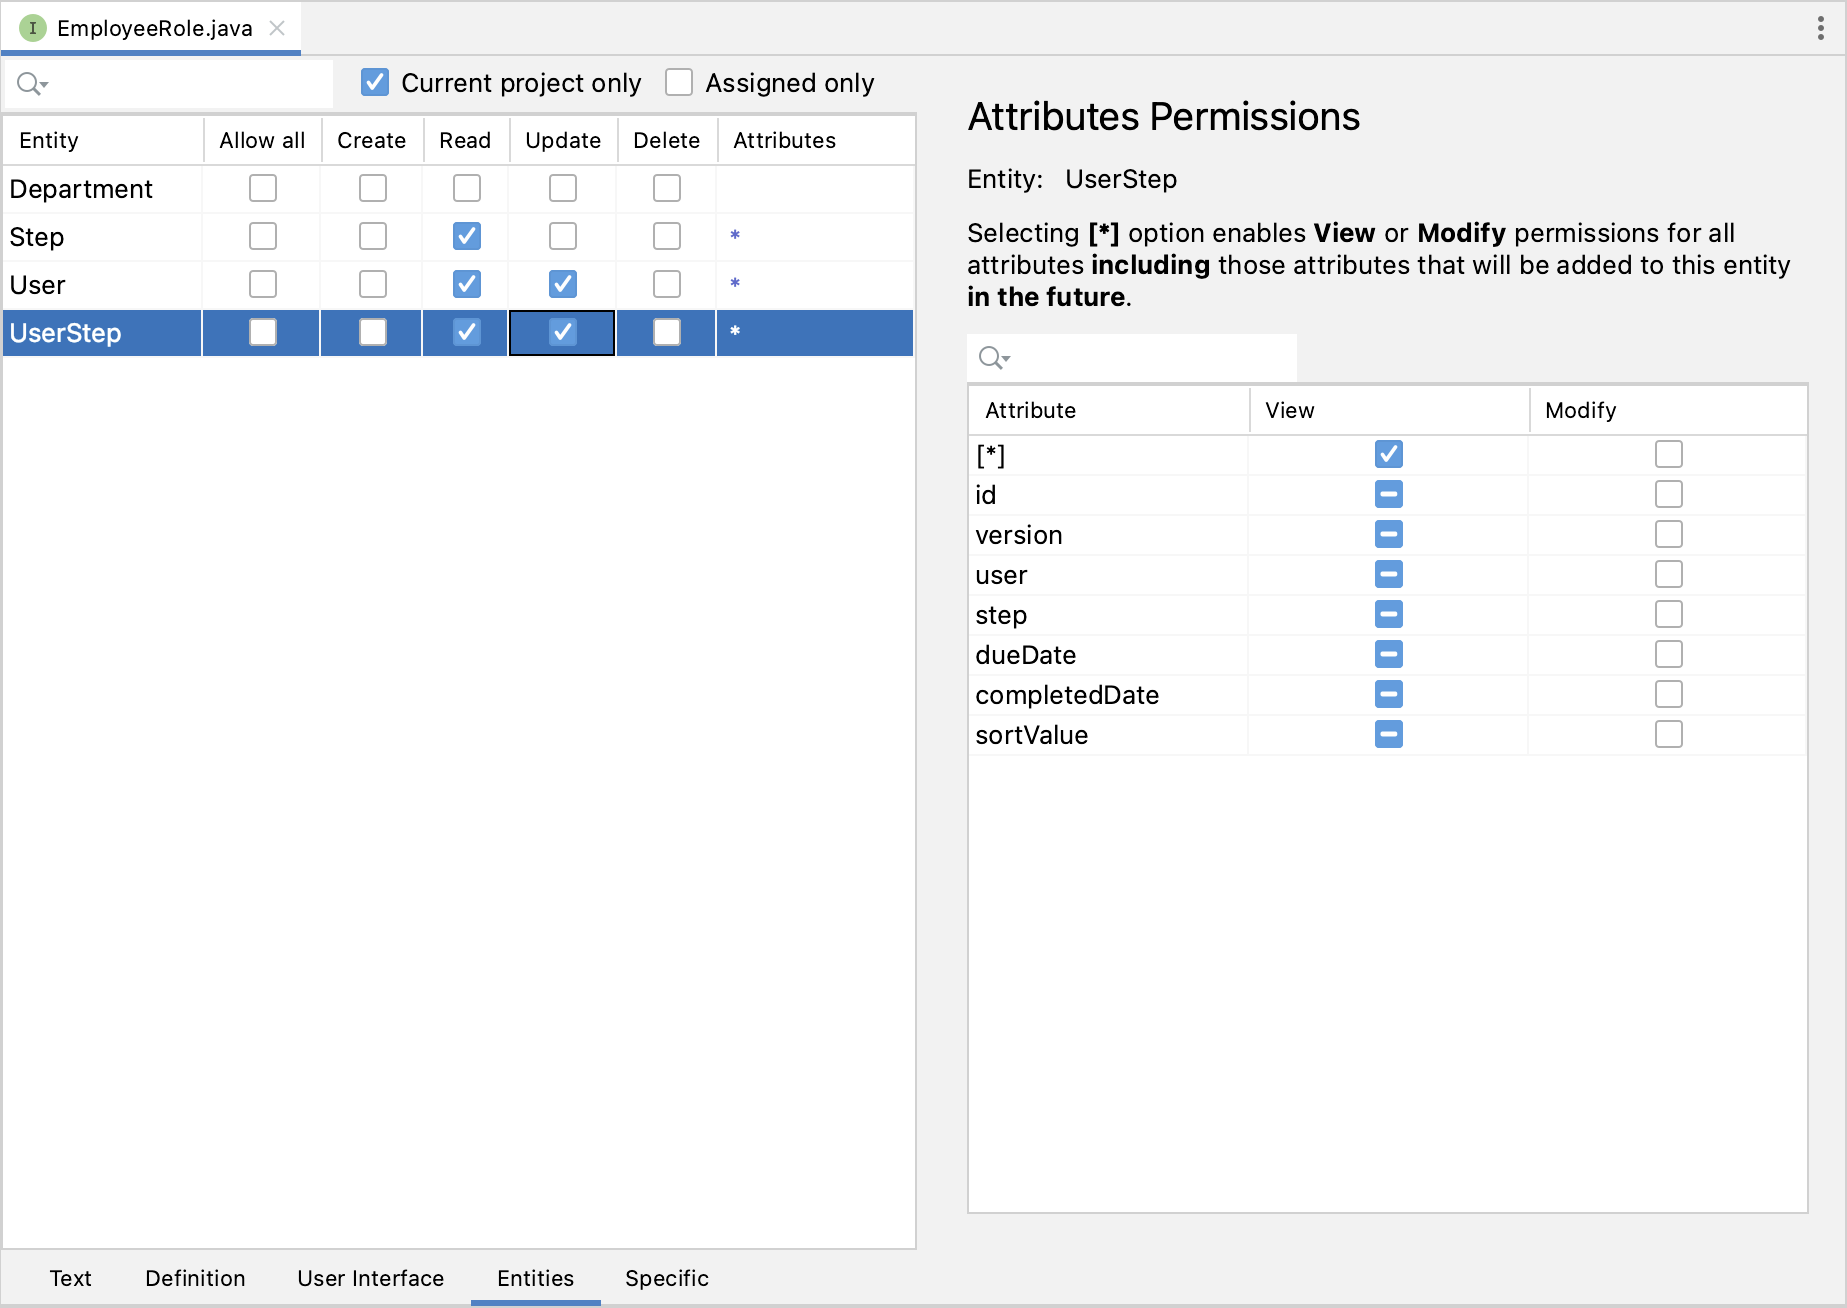
员工需要读取 Step、User 和 UserStep 实体以便在 UI 进行查看,还需要能更新 User 和 UserStep,标记步骤完成。
切回 Text 标签页。可以看到 Studio 在接口内生成了几个带注解的方法,分别对应于刚才我们设置的权限:
@ResourceRole(name = "Employee", code = EmployeeRole.CODE, scope = "UI")
public interface EmployeeRole {
String CODE = "employee";
@MenuPolicy(menuIds = "MyOnboardingView")
@ViewPolicy(viewIds = "MyOnboardingView")
void screens();
@EntityAttributePolicy(entityClass = User.class,
attributes = "*",
action = EntityAttributePolicyAction.VIEW)
@EntityPolicy(entityClass = User.class,
actions = {EntityPolicyAction.READ, EntityPolicyAction.UPDATE})
void user();
@EntityAttributePolicy(entityClass = UserStep.class,
attributes = "*",
action = EntityAttributePolicyAction.VIEW)
@EntityPolicy(entityClass = UserStep.class,
actions = {EntityPolicyAction.READ, EntityPolicyAction.UPDATE})
void userStep();
@EntityAttributePolicy(entityClass = Step.class,
attributes = "*",
action = EntityAttributePolicyAction.VIEW)
@EntityPolicy(entityClass = Step.class,
actions = EntityPolicyAction.READ)
void step();
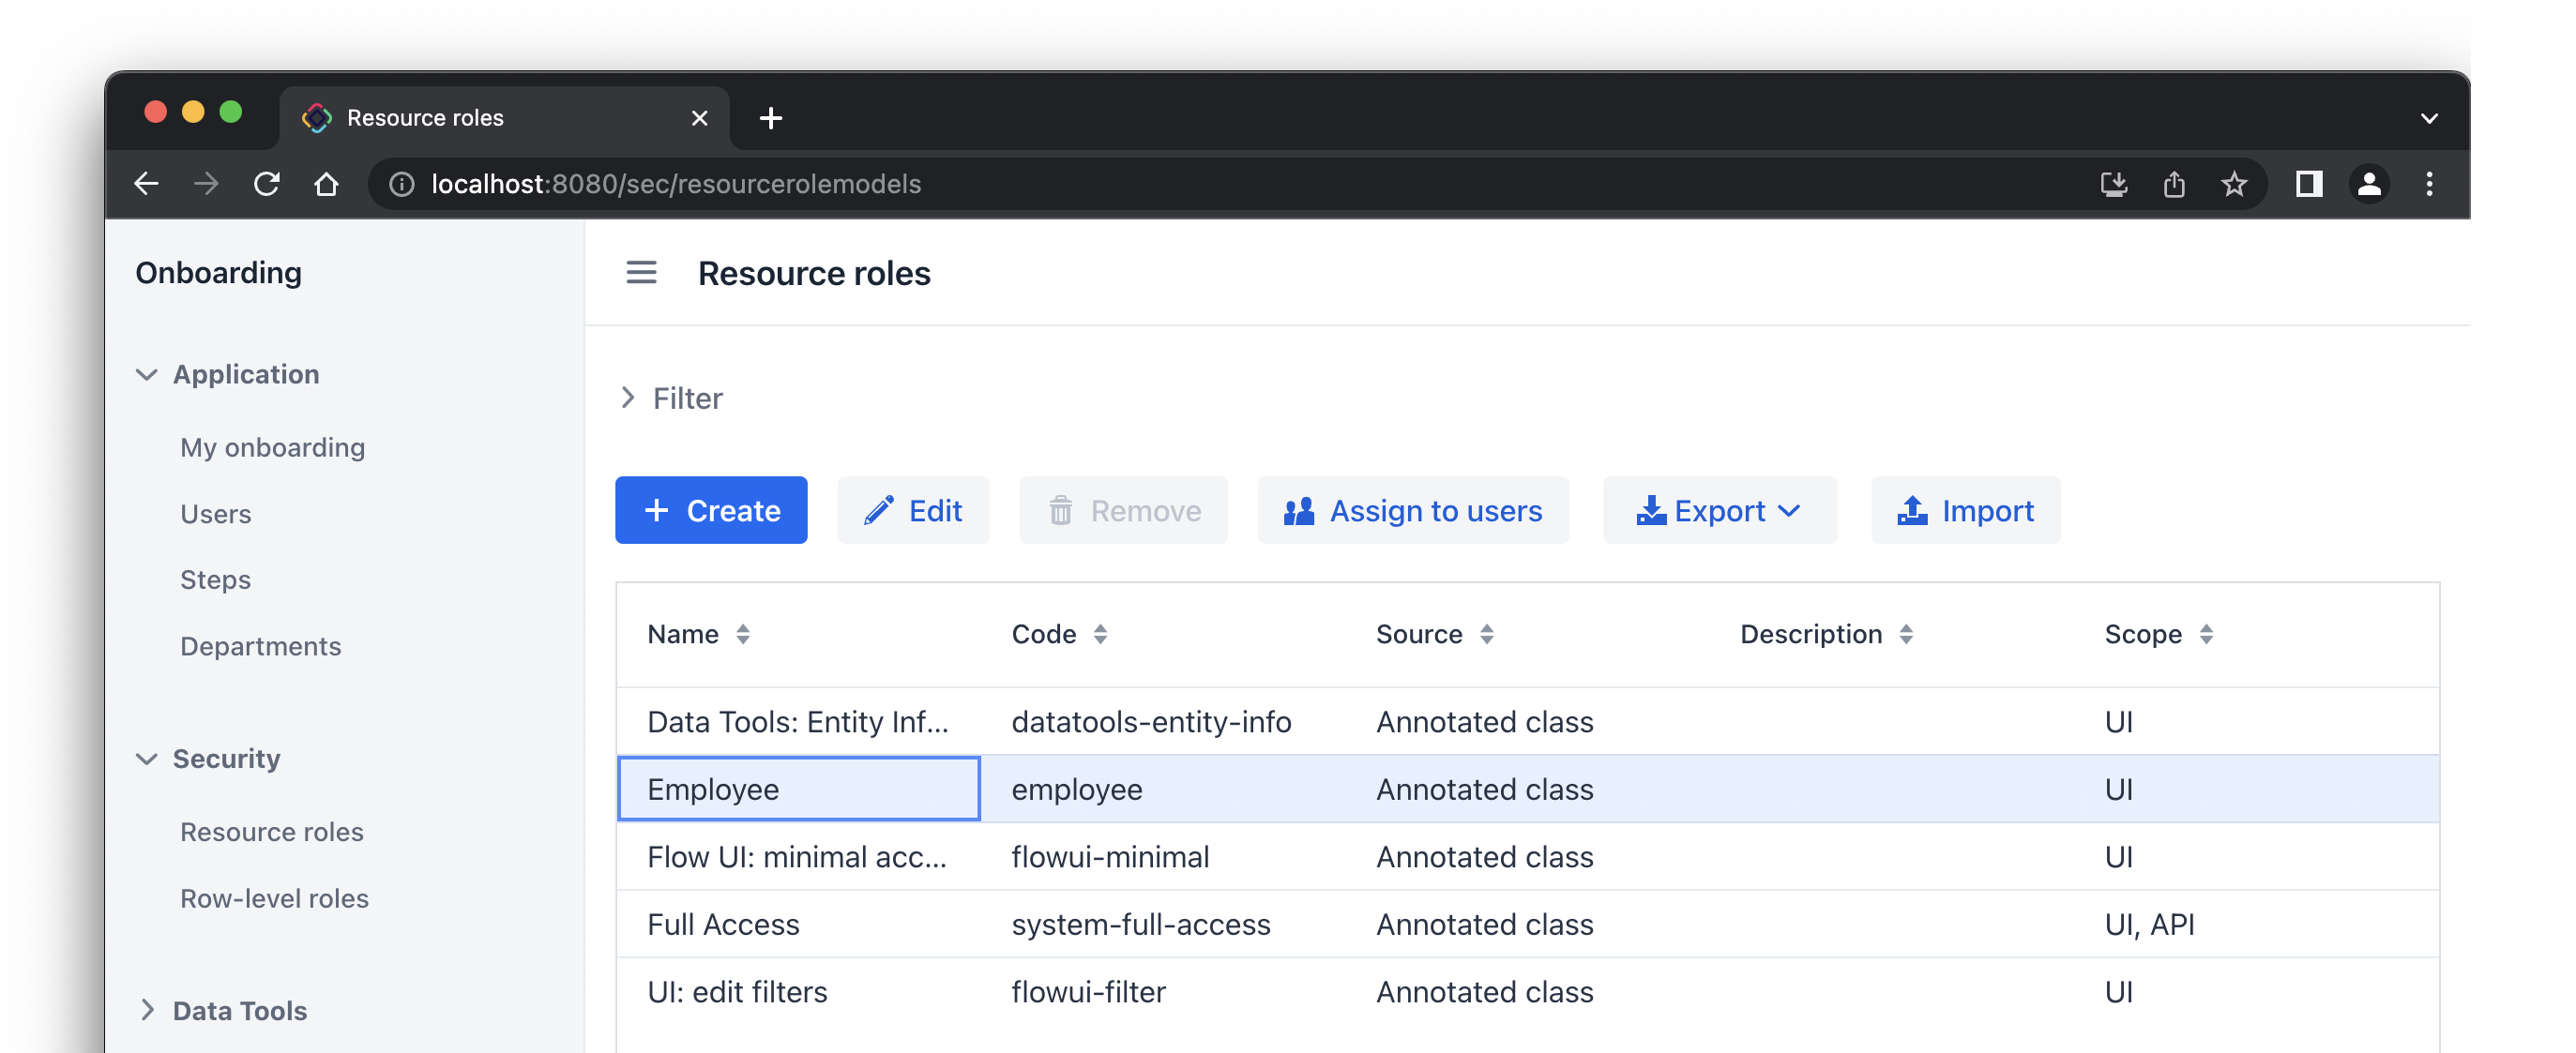
}按下 Ctrl/Cmd+S 保存修改然后切换至运行中的程序。打开 Security → Resource roles 视图,可以在列表中看到新角色:
分配角色
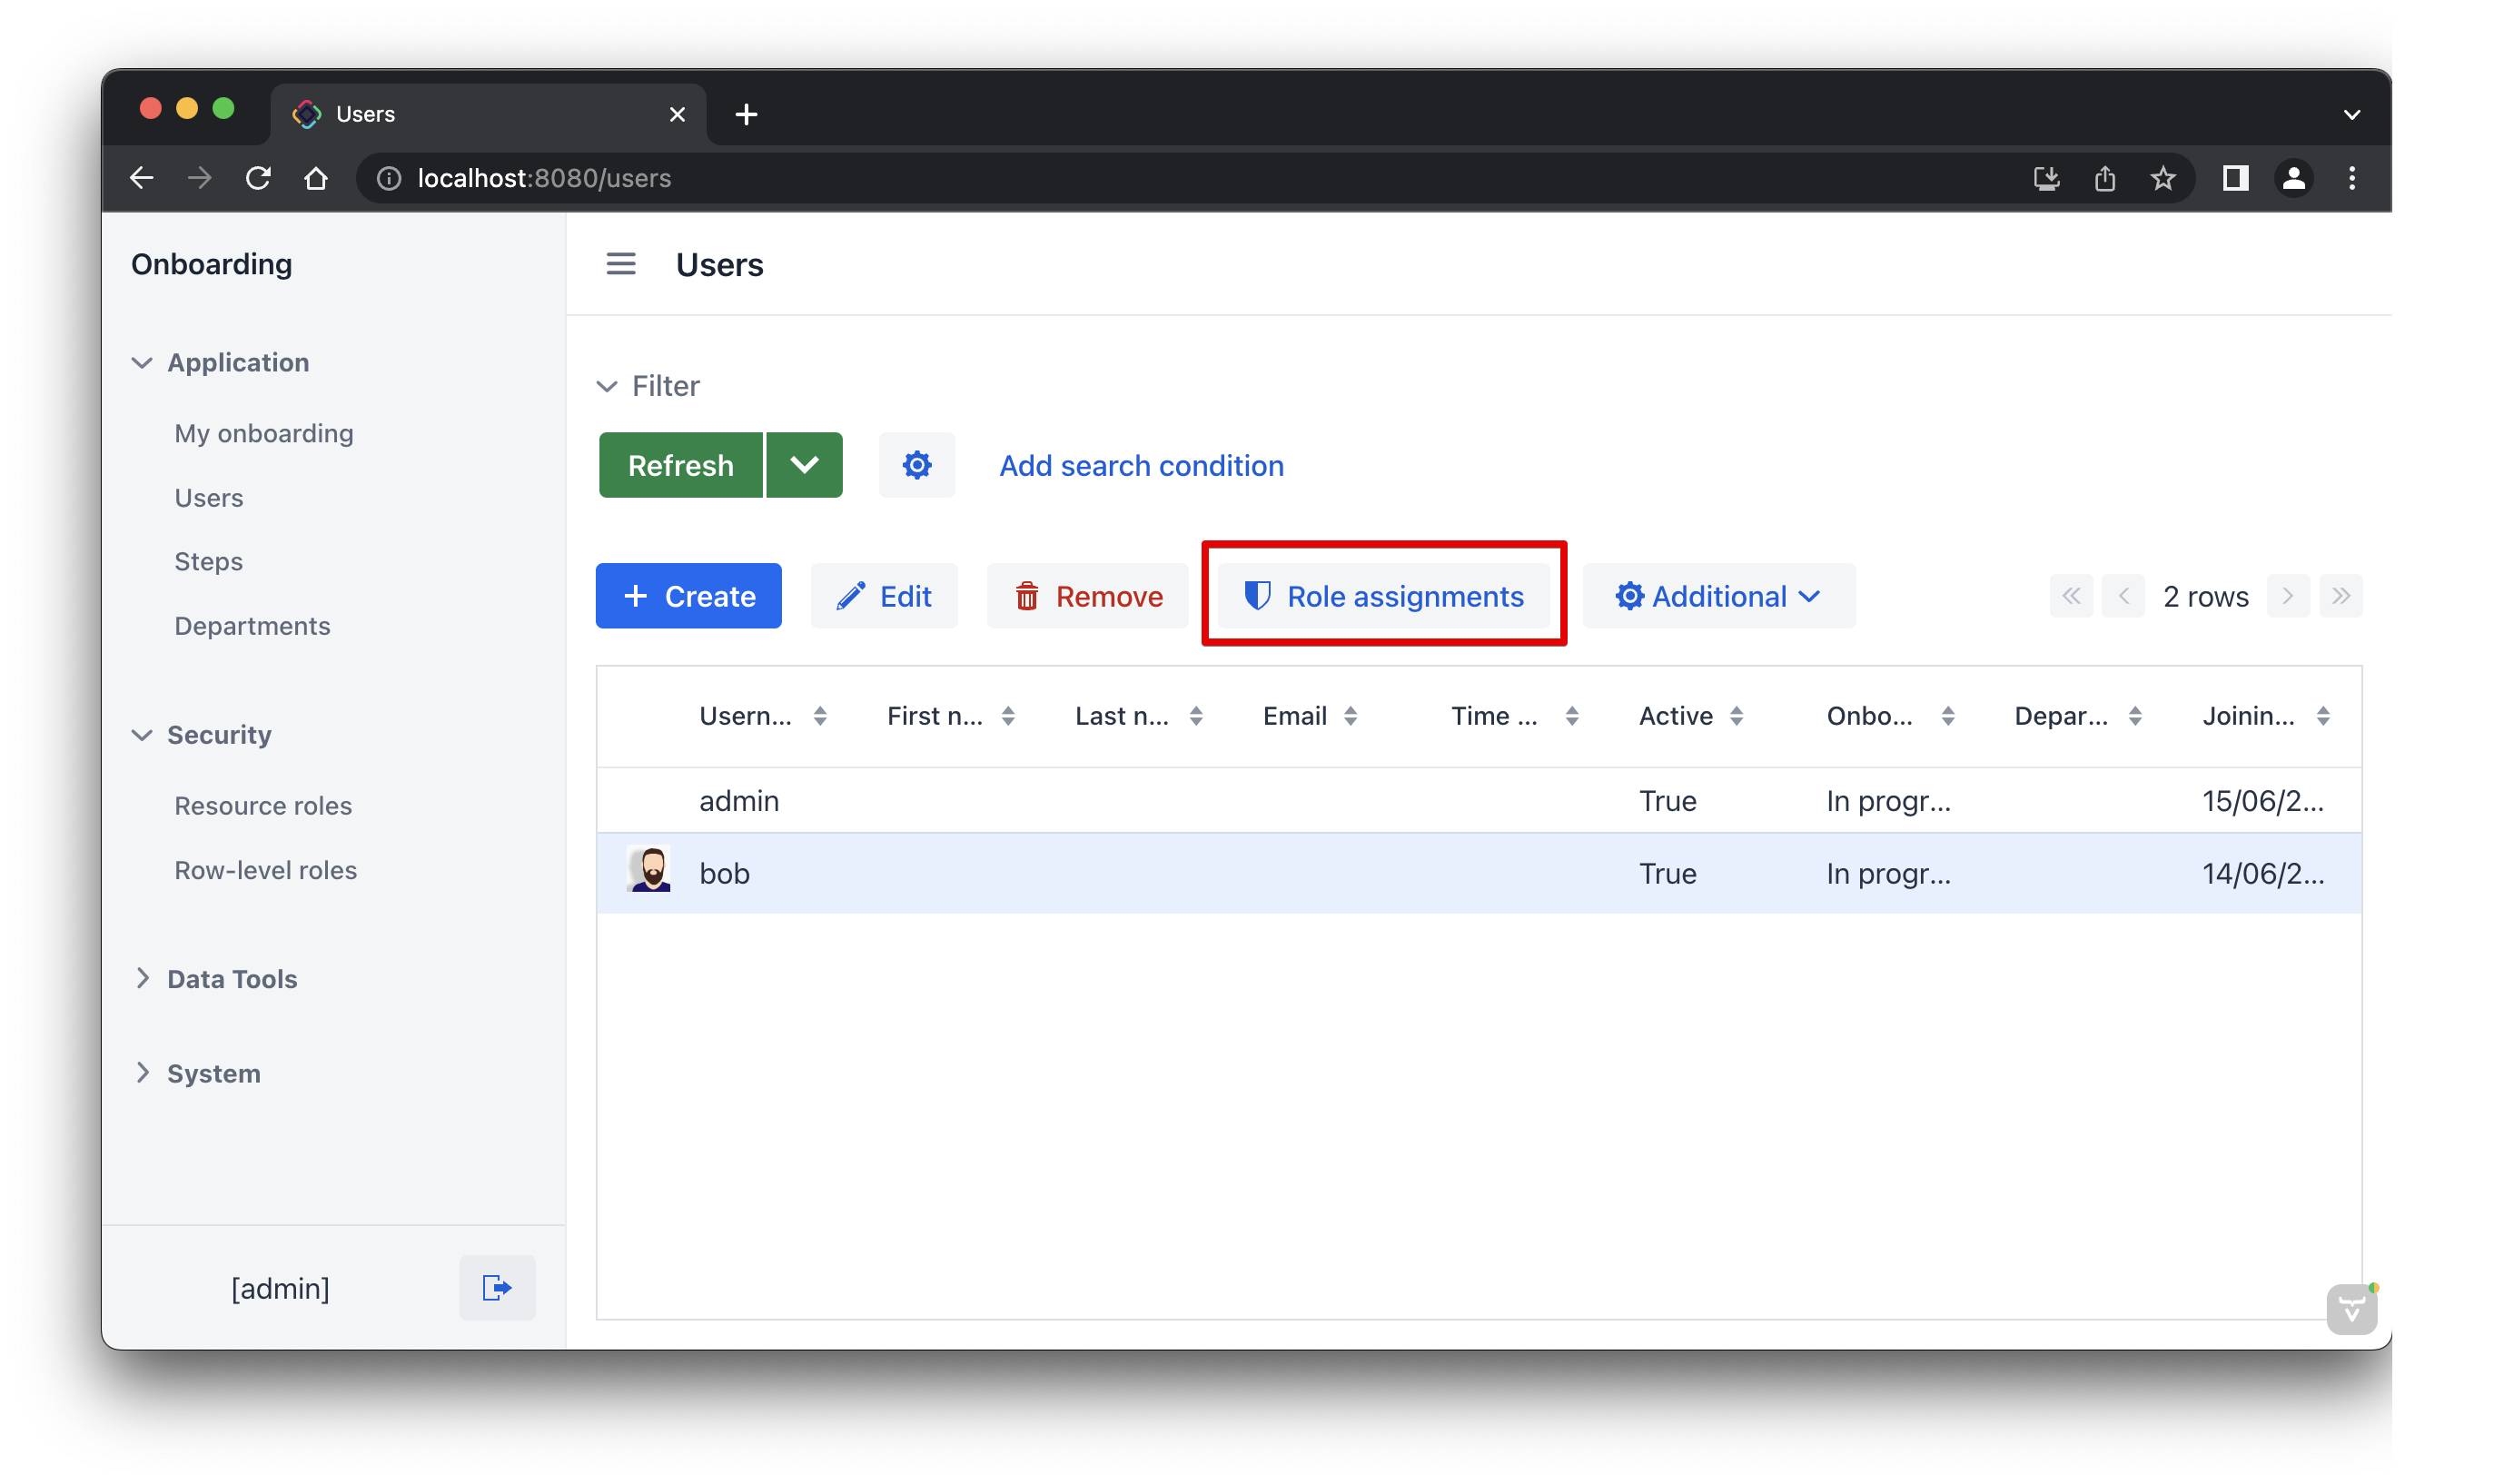
现在我们可以将角色分配给用户。打开 Users 列表视图并创建一个新用户 bob。选择该用户并点击 Role assignments 按钮:
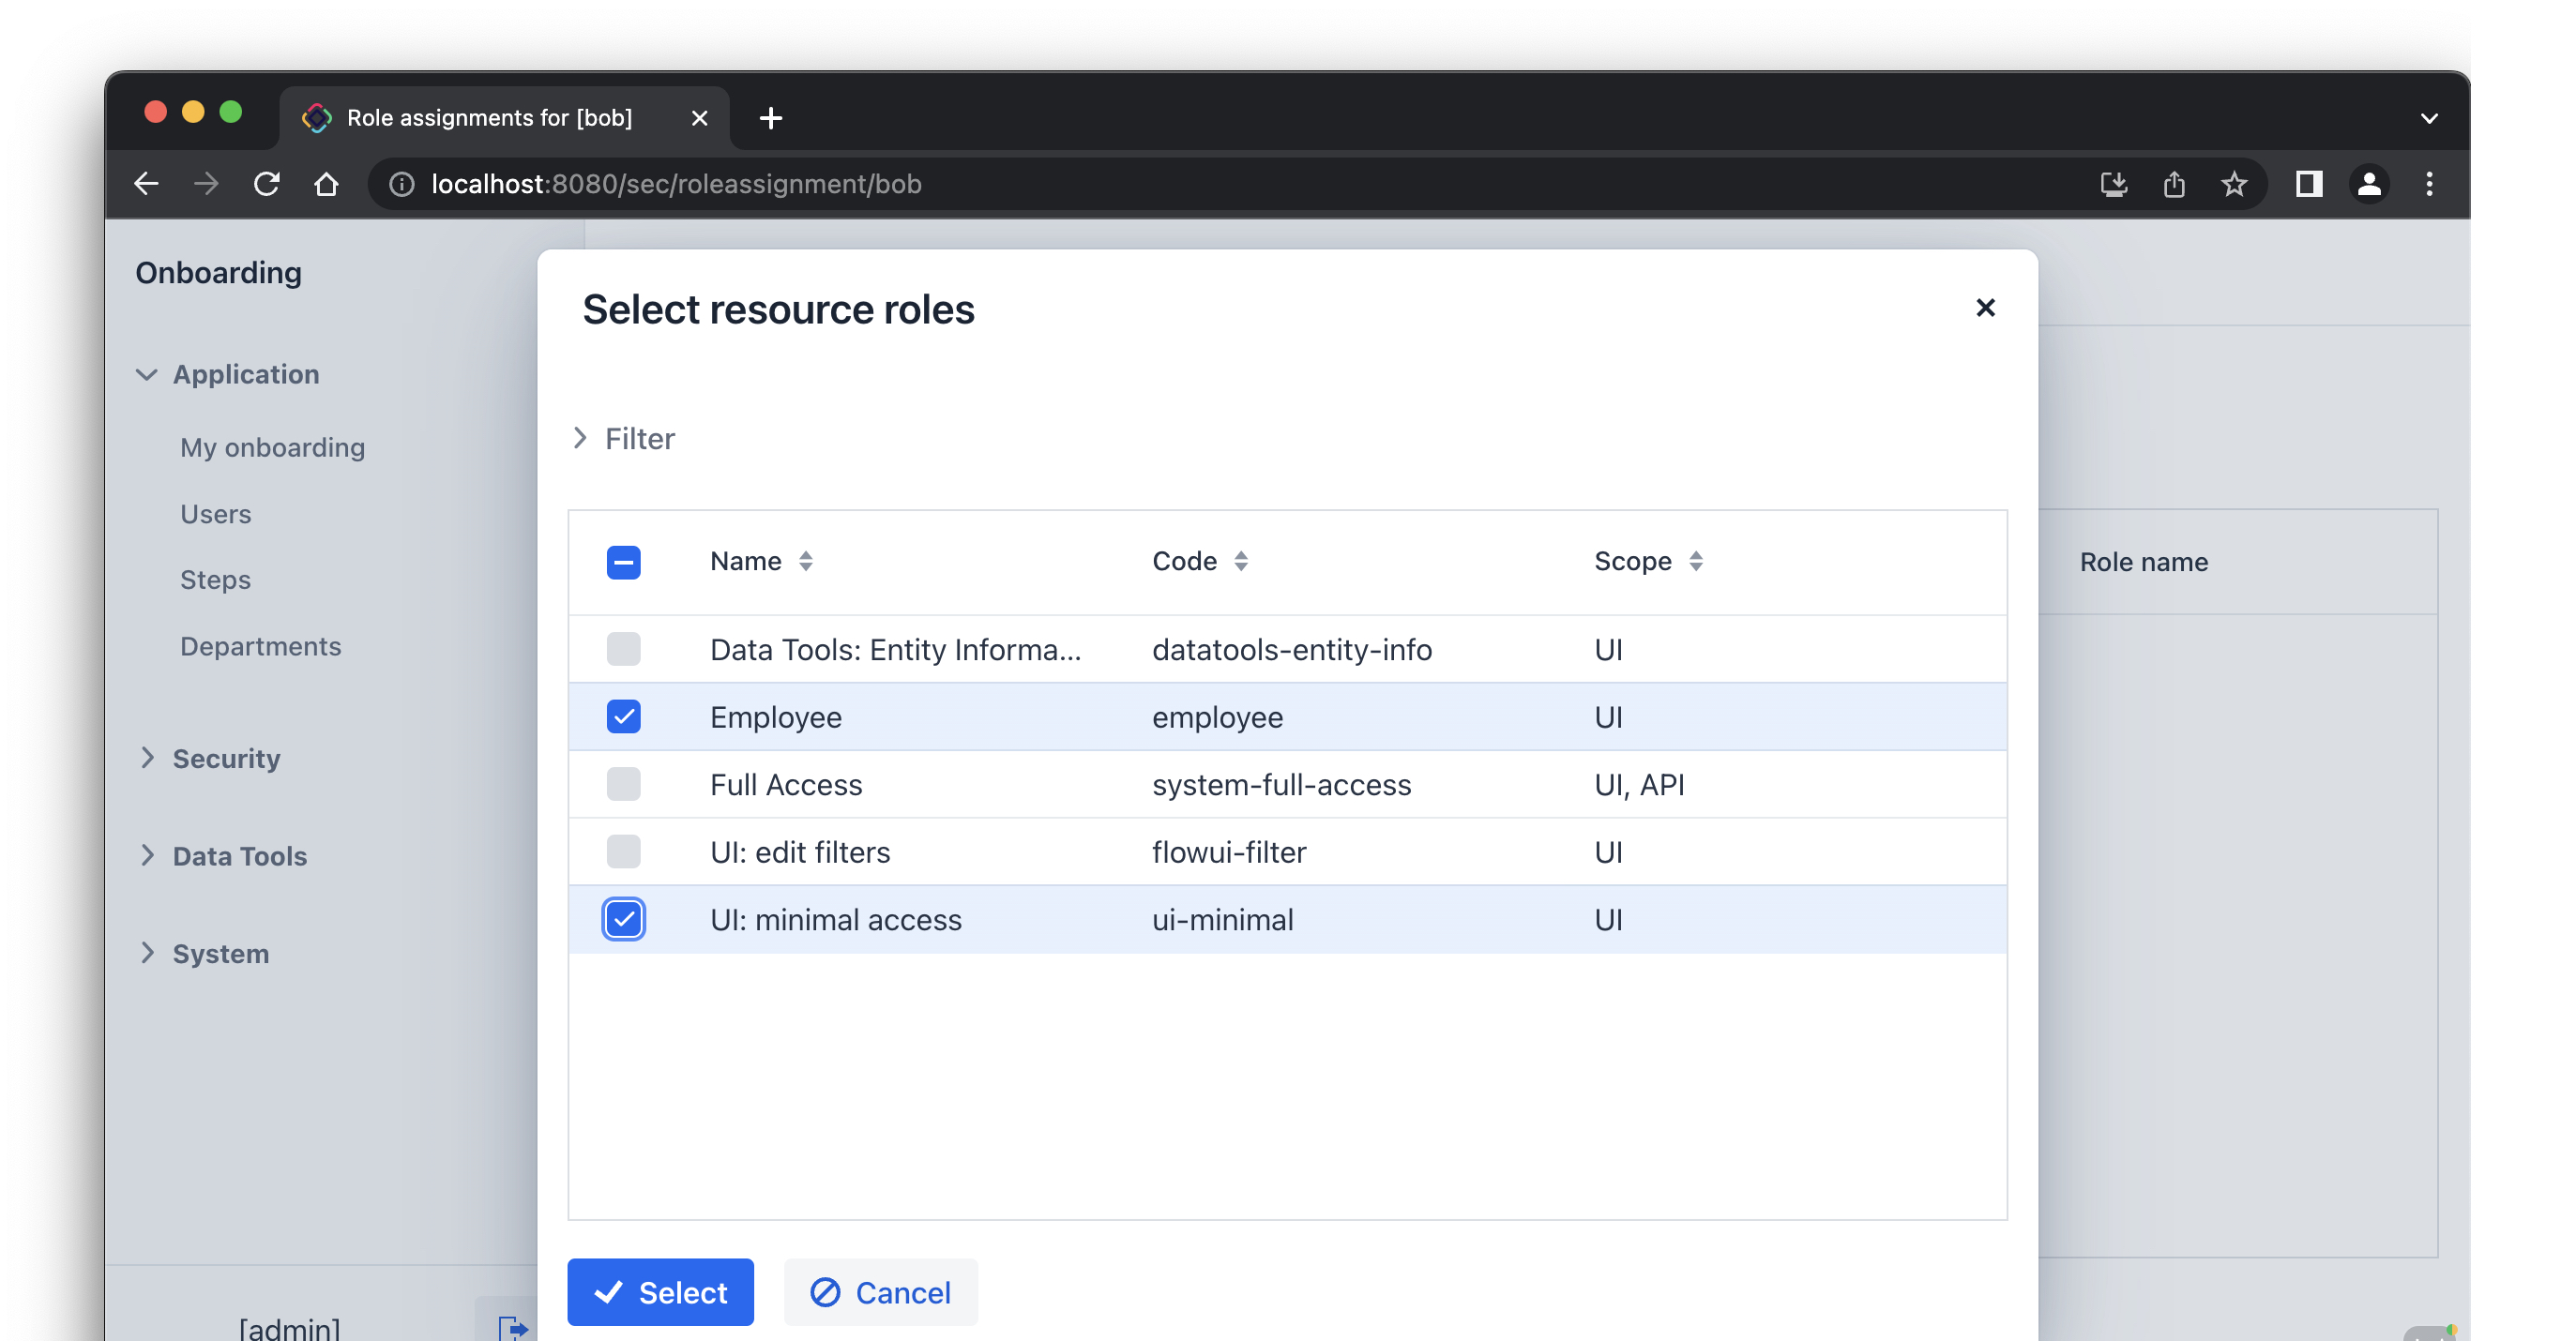
在 Role assignments 视图中,点击 Resource roles 中的 Add 按钮。
弹出的 Select resource roles 对话框中,选择 Employee 和 UI: minimal access 角色:
点击 Select。会在 Resource roles 面板展示选择的角色:
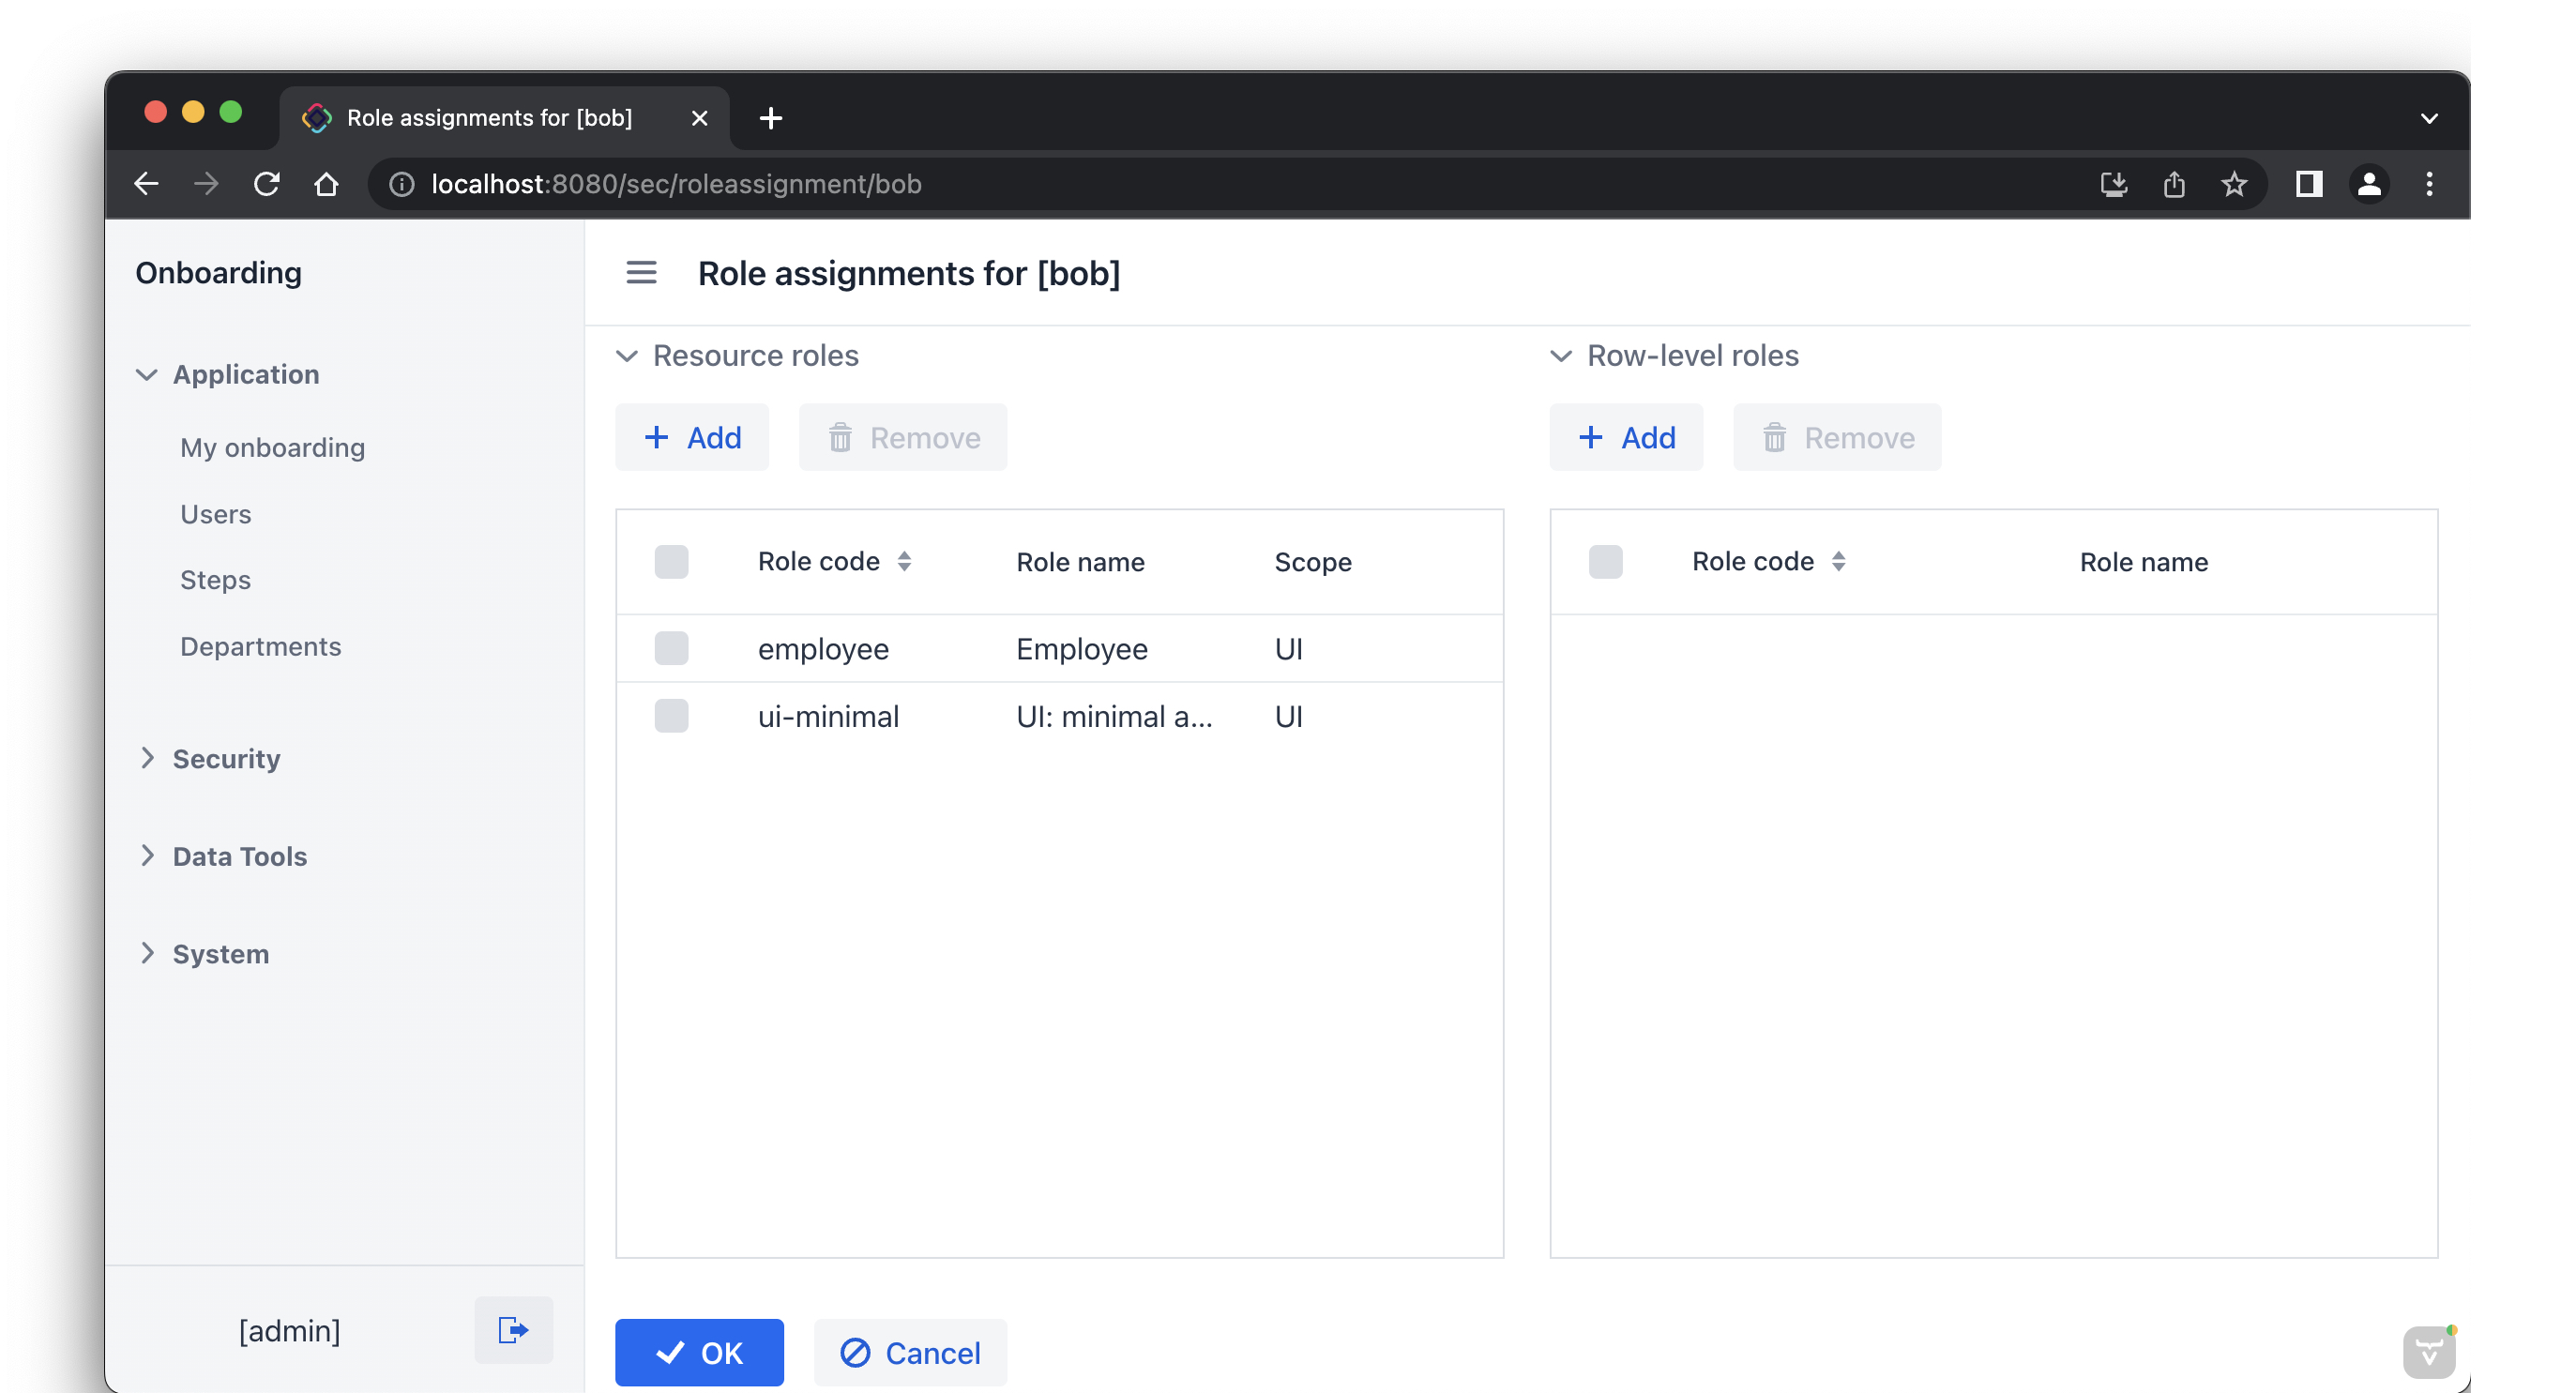
点击 OK 保存分配的角色。
用户需要 UI: minimal access 角色用来登录应用程序 UI。可以在项目中找到代码并查看内容。
|
使用左下角用户名右边的按钮登出系统:

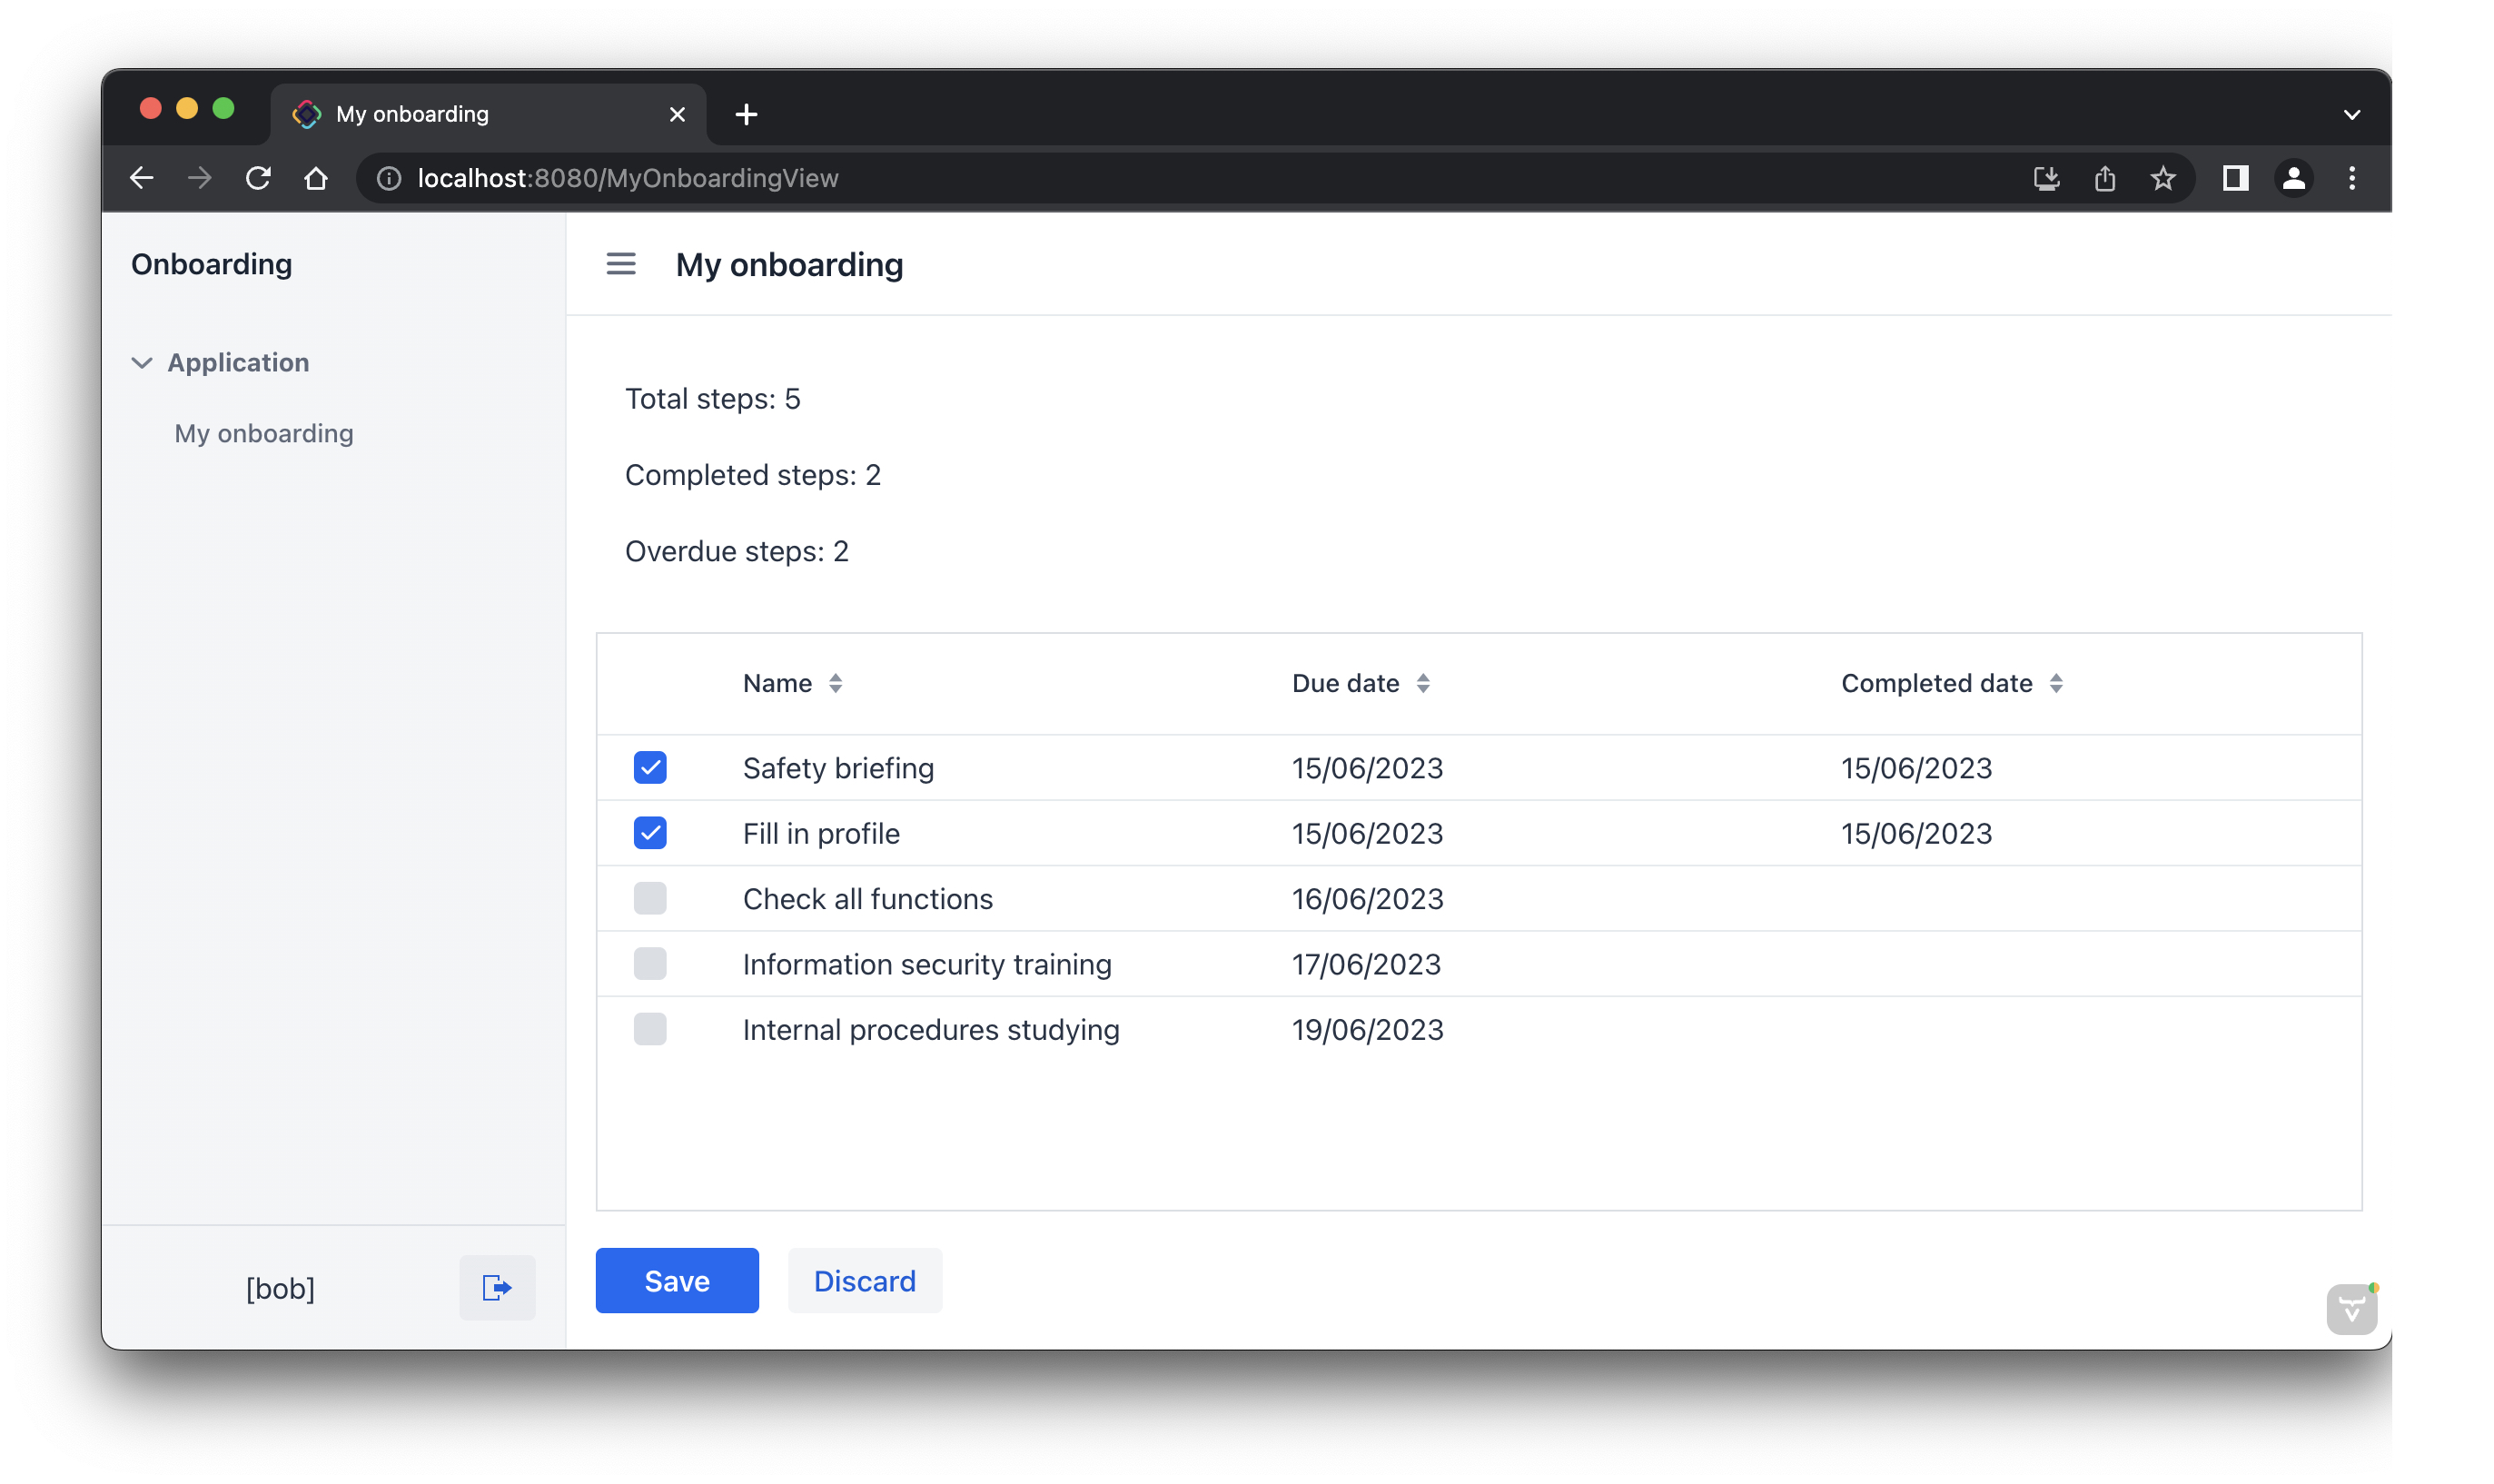
用 bob 登录。则在主菜单中仅能看到 My onboarding 视图:
HR 经理的资源角色
在 Jmix 工具窗口中,点击 New()→ Role。
New Role 弹窗中,Role name 字段输入 HR Manager,设置 Role code 为 hr-manager,并在 Security scope 下拉框选择 UI:
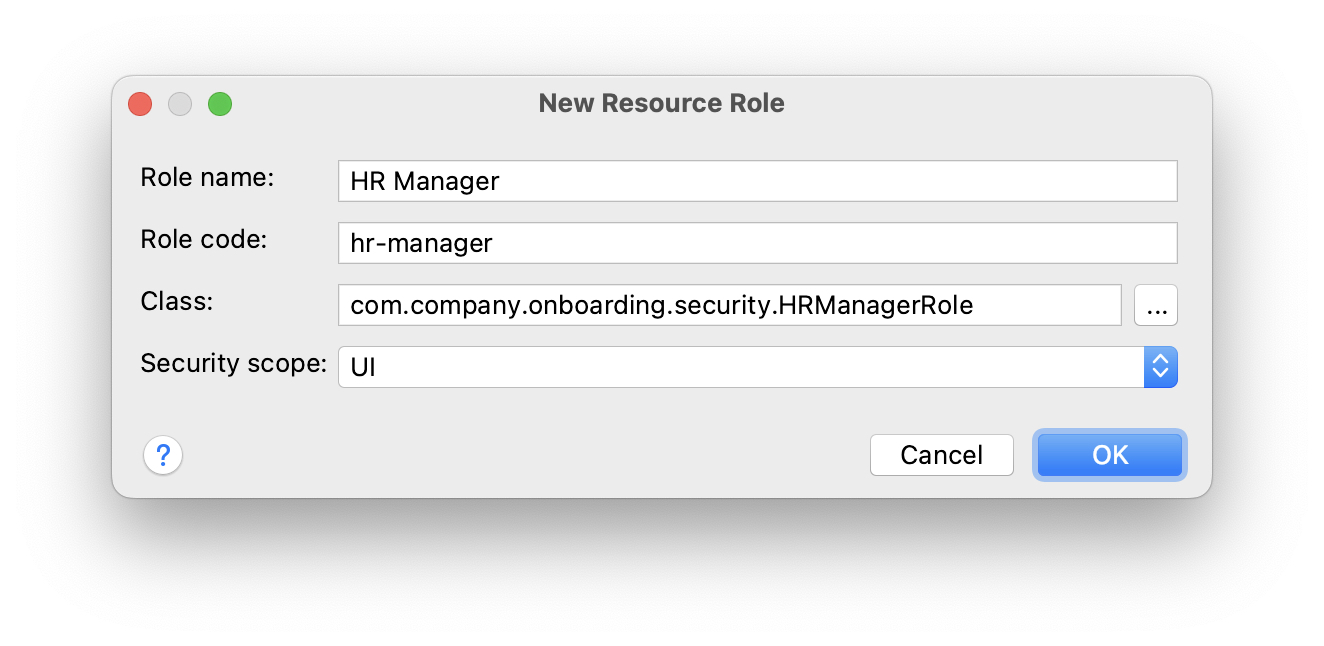
点击 OK。
Studio 会创建并打开一个带注解的接口:
package com.company.onboarding.security;
import io.jmix.security.role.annotation.ResourceRole;
@ResourceRole(name = "HR Manager", code = HRManagerRole.CODE, scope = "UI")
public interface HRManagerRole {
String CODE = "hr-manager";
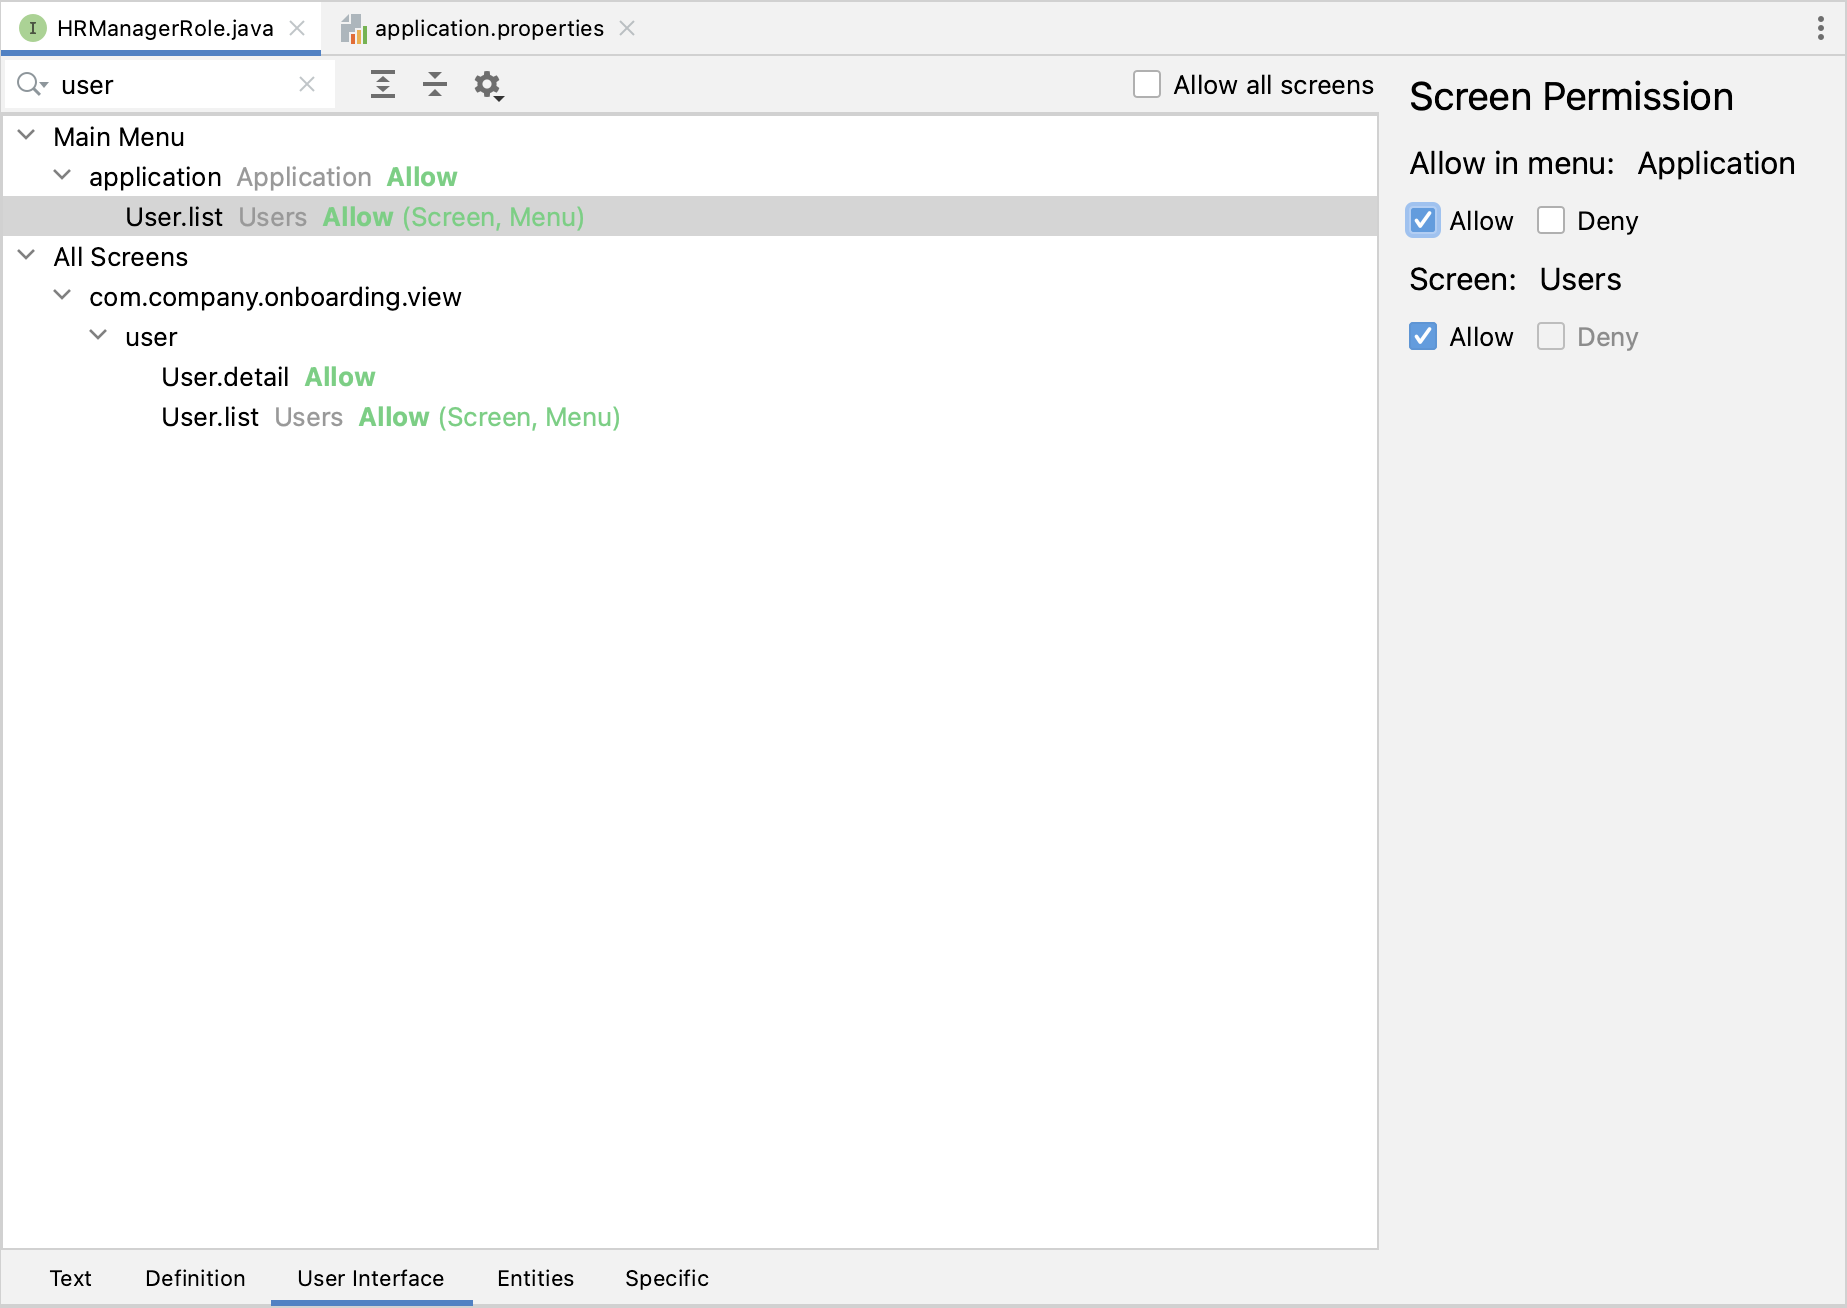
}切换至 User Interface 标签页并允许 User.list 和 User.detail 视图(可以用顶部的搜索栏进行查找):
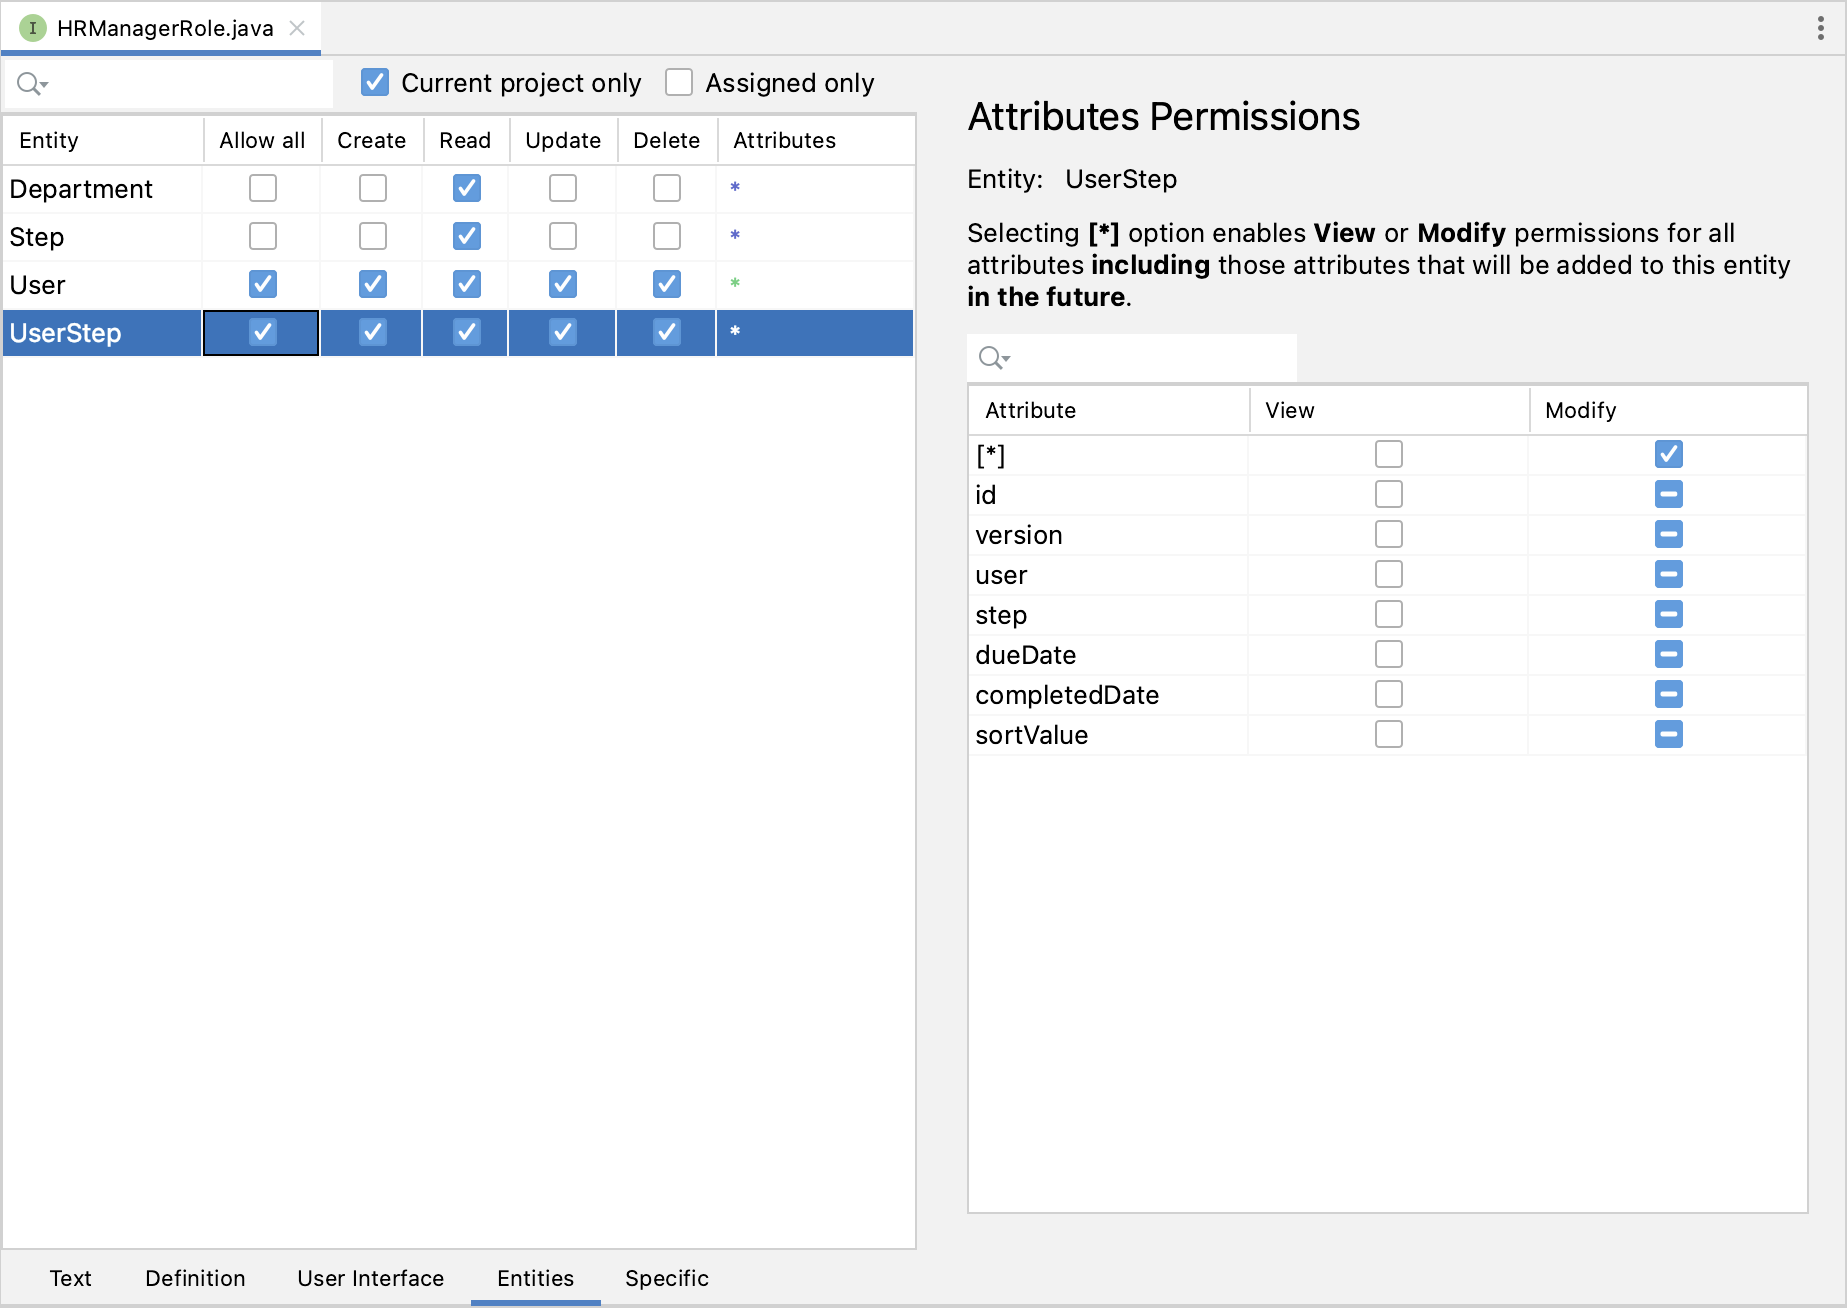
切换至 Entities 标签页,赋予对 Department 和 Step 的只读权限,User 和 UserStep 的所有权限:
切回 Text 标签页,查看 Studio 生成的带注解方法:
@ResourceRole(name = "HR Manager", code = HRManagerRole.CODE, scope = "UI")
public interface HRManagerRole {
    String CODE = "hr-manager";

    @MenuPolicy(menuIds = "User.list")
    @ViewPolicy(viewIds = {"User.detail", "User.list"})
    void screens();

    @EntityAttributePolicy(entityClass = Department.class,
            attributes = "*",
            action = EntityAttributePolicyAction.VIEW)
    @EntityPolicy(entityClass = Department.class,
            actions = EntityPolicyAction.READ)
    void department();

    @EntityAttributePolicy(entityClass = Step.class,
            attributes = "*",
            action = EntityAttributePolicyAction.VIEW)
    @EntityPolicy(entityClass = Step.class,
            actions = EntityPolicyAction.READ)
    void step();

    @EntityAttributePolicy(entityClass = User.class,
            attributes = "*",
            action = EntityAttributePolicyAction.MODIFY)
    @EntityPolicy(entityClass = User.class,
            actions = EntityPolicyAction.ALL)
    void user();

    @EntityAttributePolicy(entityClass = UserStep.class,
            attributes = "*",
            action = EntityAttributePolicyAction.MODIFY)
    @EntityPolicy(entityClass = UserStep.class,
            actions = EntityPolicyAction.ALL)
    void userStep();
}
按下 Ctrl/Cmd+S 保存修改然后切换至运行中的程序。以 admin 登录。打开 Security → Resource roles 视图,确保列表中存在新创建的 HR Manager 角色。
创建一个新用户,比如 alice。
通过与 前一小节 一样的方法,给 alice 分配 HR Manager 和 UI: minimal access 角色。
然后以 alice 的账号登录。将可以打开 Users 视图并能管理用户和入职步骤:

HR 经理的行级角色
此时,HR 经理可以创建用户、为用户分配任意部门并能查看所有部门的用户。
本小节中,我们将引入一个 行级角色(row-level role),用于限制 HR 经理对部门和其他用户的访问权限。他们将只能看到并分配他们自己的部门(也就是部门中他们作为 hrManager 的那些)。
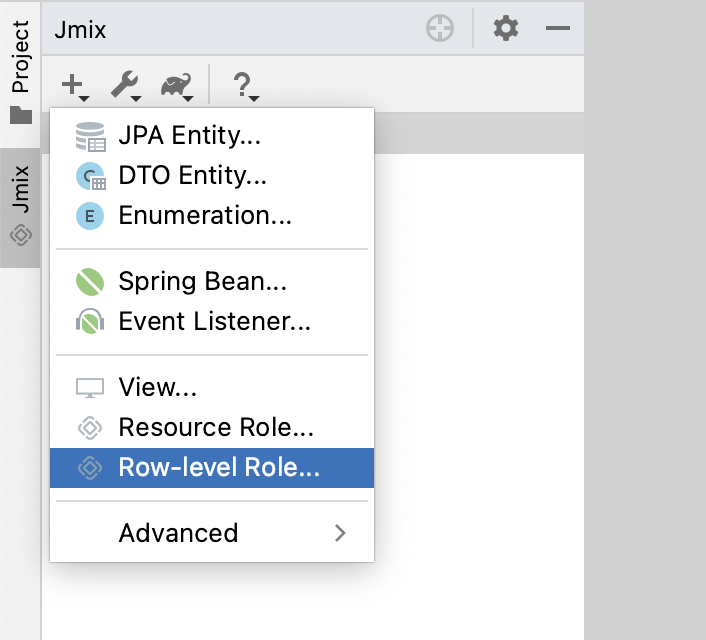
在 Jmix 工具窗口中,点击 New()→ Row-level Role:
在 New Row-level Role 弹窗中输入:
-
Role name:
HR manager’s departments and users -
Role code:
hr-manager-rl -
Class:
com.company.onboarding.security.HrManagerRlRole
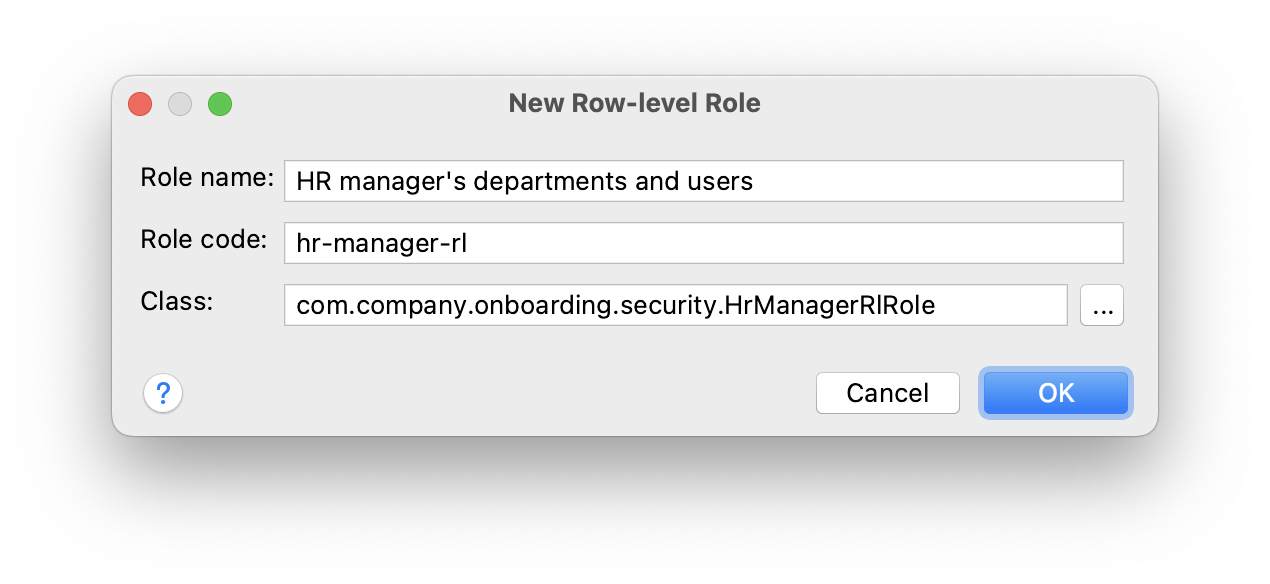
点击 OK。
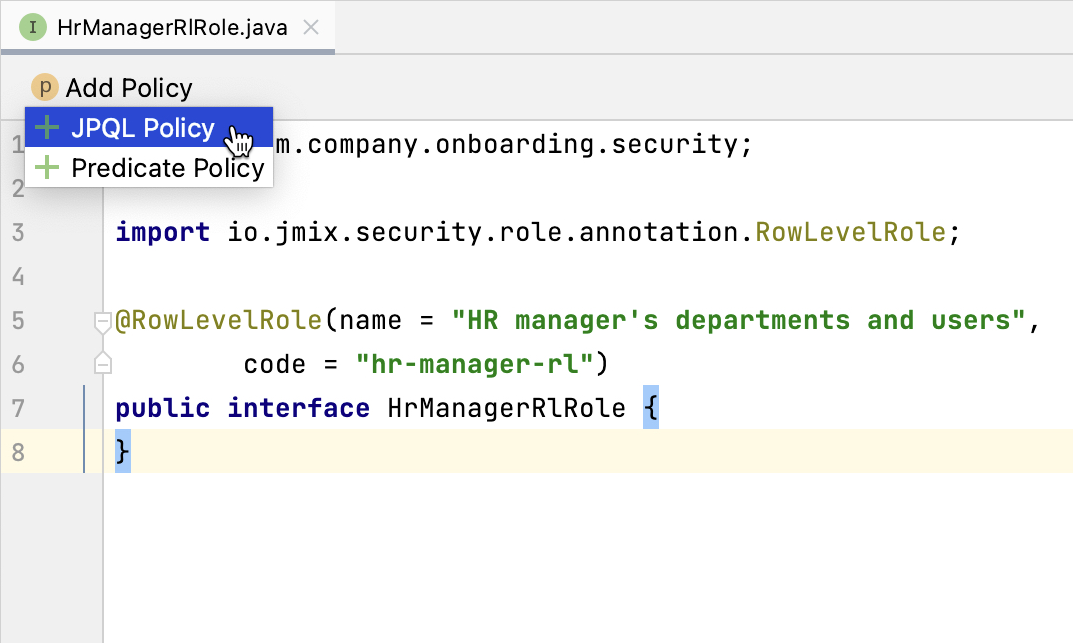
Studio 会创建并打开一个带注解的接口:
package com.company.onboarding.security;

import io.jmix.security.role.annotation.RowLevelRole;

@RowLevelRole(name = "HR manager’s departments and users", code = HrManagerRlRole.CODE)
public interface HrManagerRlRole {
    String CODE = "hr-manager-rl";
}
在顶部的操作面板中点击 Add Policy → JPQL Policy:
然后在 Add JPQL Policy 弹窗中,输入:
-
Entity:
Department -
Where clause:
{E}.hrManager.id = :current_user_id

点击 OK。
再次点击 Add Policy → JPQL Policy,并输入:
-
Entity:
User -
Where clause:
{E}.department.hrManager.id = :current_user_id
点击 OK。
HrManagerRlRole 接口代码如下:
package com.company.onboarding.security;

import com.company.onboarding.entity.Department;
import com.company.onboarding.entity.User;
import io.jmix.security.role.annotation.JpqlRowLevelPolicy;
import io.jmix.security.role.annotation.RowLevelRole;

@RowLevelRole( (1)
        name = "HR manager's departments and users",
        code = HrManagerRlRole.CODE)
public interface HrManagerRlRole {
    String CODE = "hr-manager-rl";

    @JpqlRowLevelPolicy( (2)
            entityClass = Department.class, (3)
            where = "{E}.hrManager.id = :current_user_id") (4)
    void department();

    @JpqlRowLevelPolicy(
            entityClass = User.class,
            where = "{E}.department.hrManager.id = :current_user_id")
    void user();
}| 1 | @RowLevelRole 注解表示这个接口定义的是一个行级角色。 |
| 2 | @JpqlRowLevelPolicy 定义当读取实体时,在数据库层面将使用的一个策略。 |
| 3 | 策略应用的实体类。 |
| 4 | 执行实体的每个 JPQL 查询语句时添加的 where 子句。语句中使用 {E} 而非实体的别名。:current_user_id 是预定义的参数,由框架设置为当前登录用户的 id。 |
按下 Ctrl/Cmd+S 保存修改然后切换至运行中的程序。用 admin 登录。打开 Security → Row-level roles 视图,确保列表存在新添加的 HR manager’s departments and users 角色。
为用户 alice 打开 Role assignments 视图并在 Row-level roles 表格中添加刚才创建的角色:
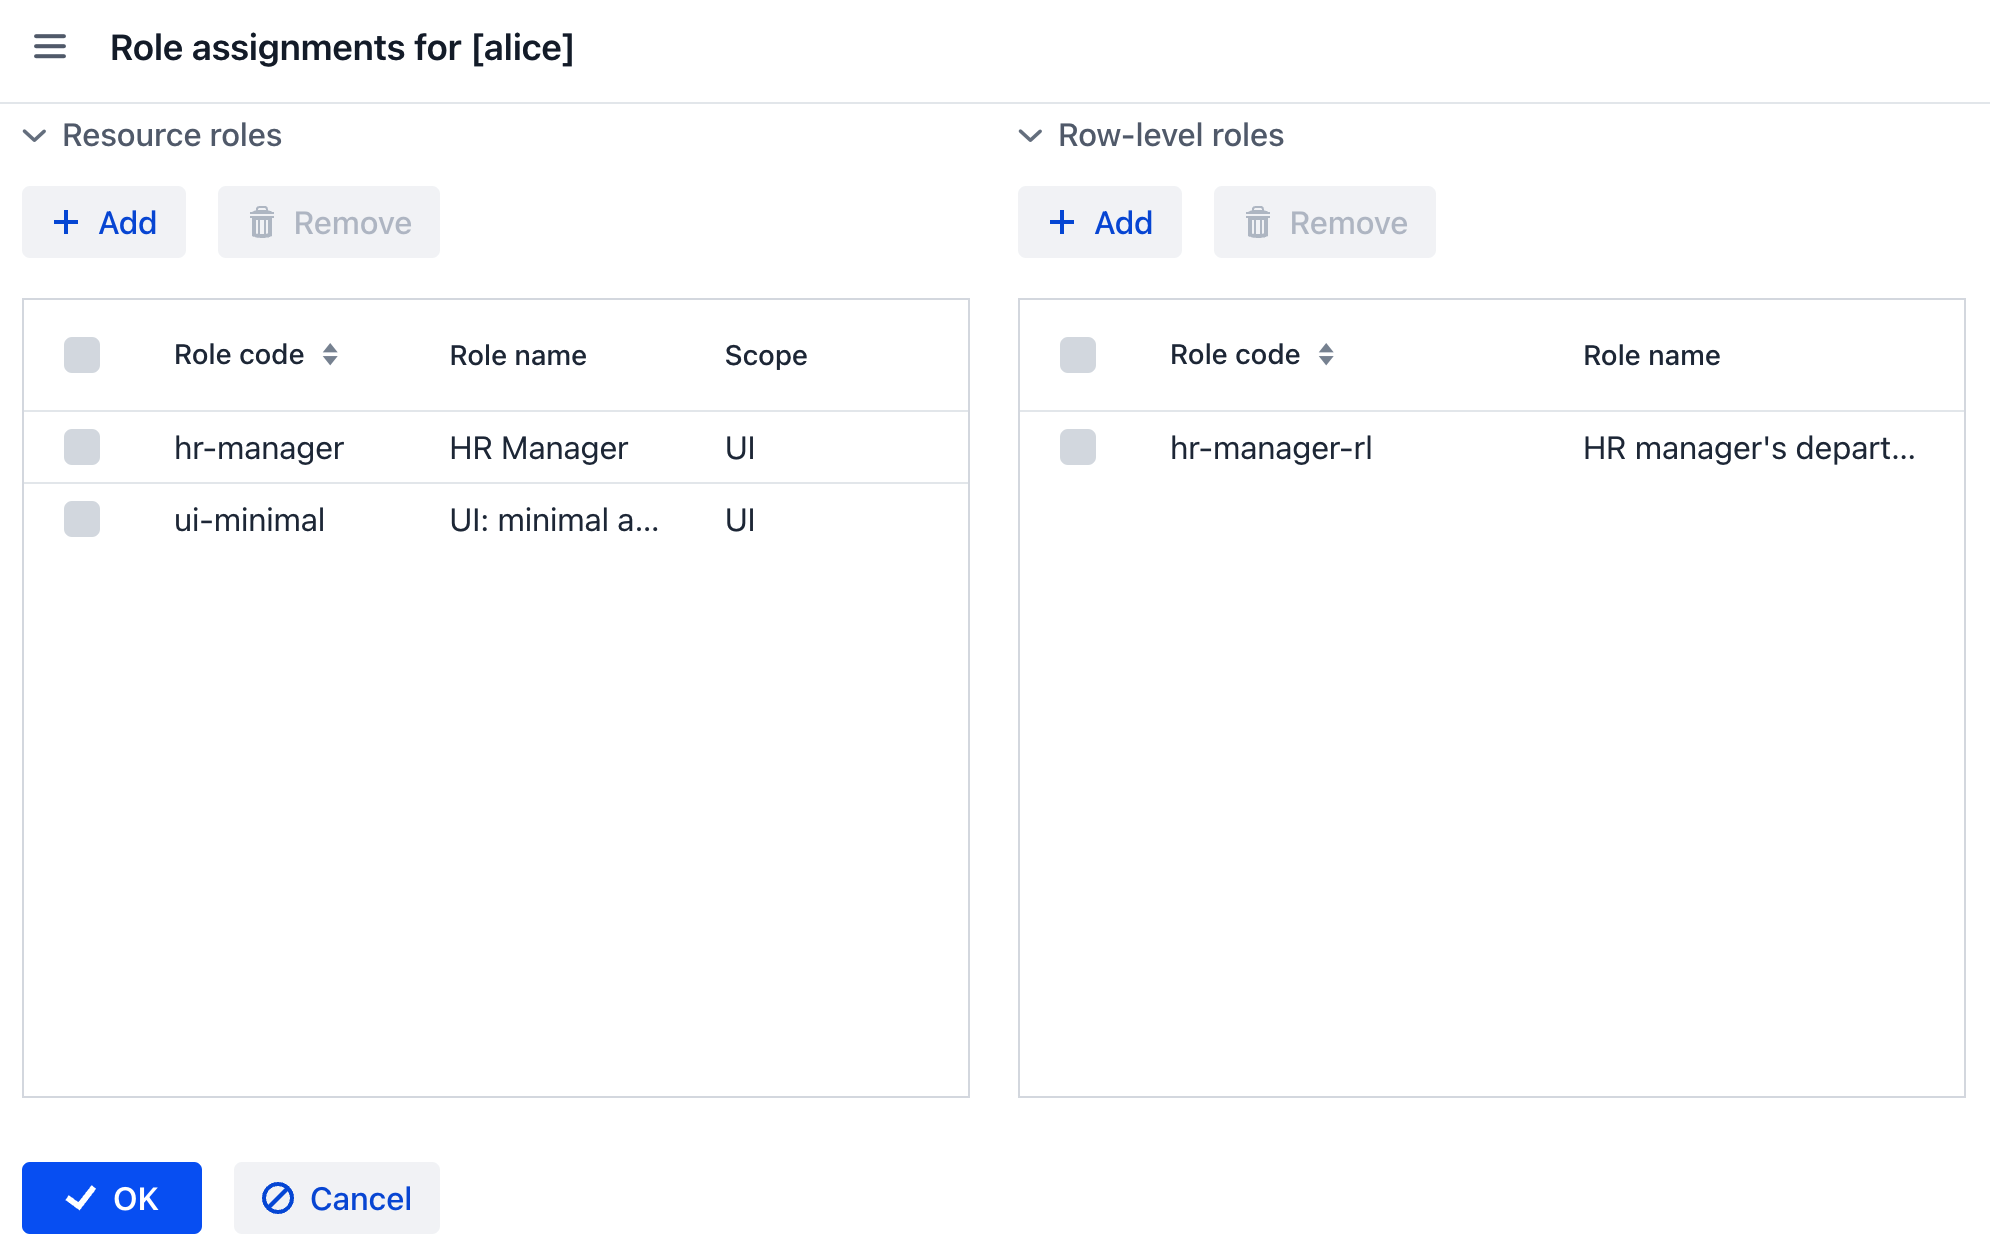
点击 OK 保存角色修改。
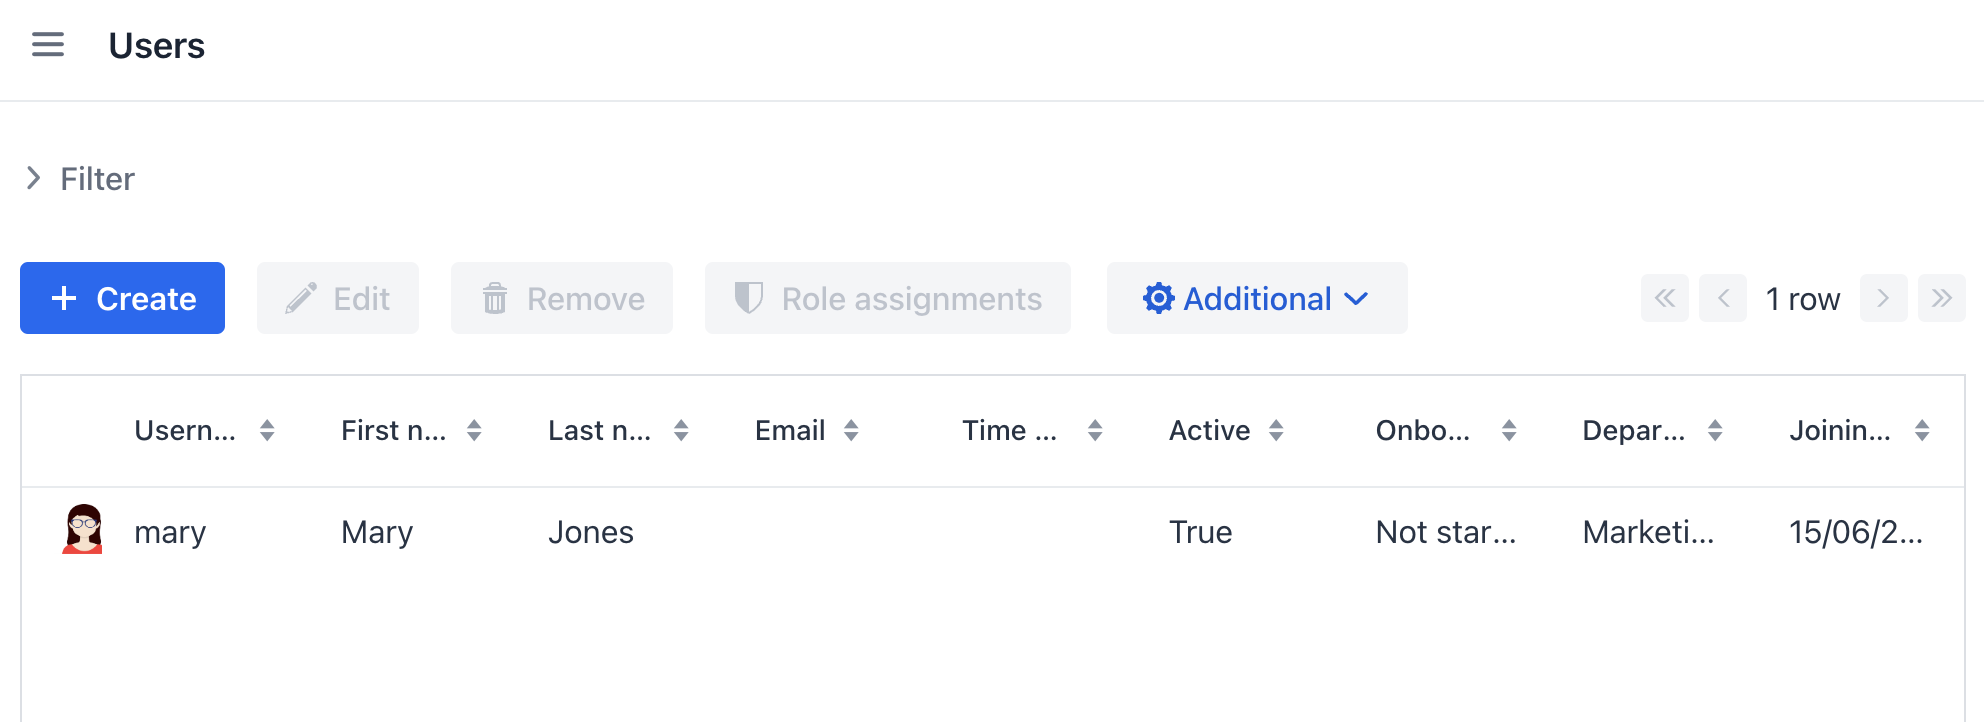
将 alice 设置为一个部门的 HR 经理:
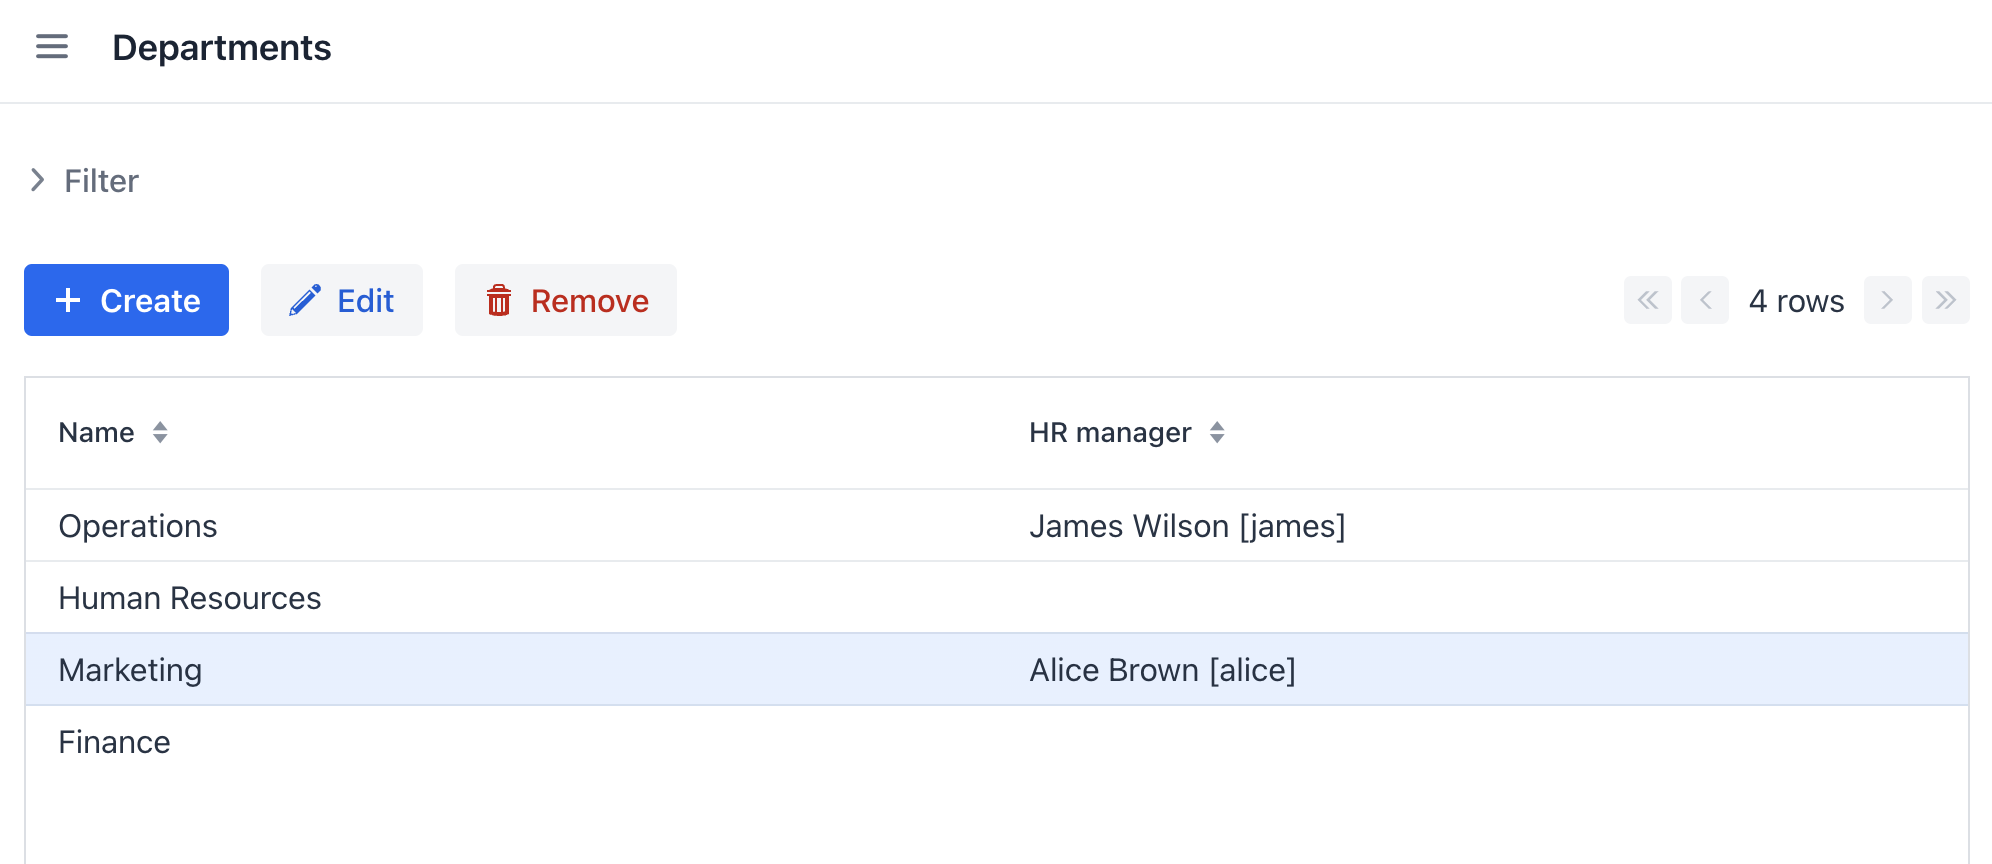
以 alice 用户登录。
在 Users 列表视图,只能看到同一部门的用户了:
并且 alice 只能将本部门分配给其他用户:

