对话框
Dialogs 接口用来展示标准的对话框窗口。对话框窗口是一个小的弹出窗口,可以在当前页面叠加展示信息或者 UI 元素。
使用流式接口可以创建和展示对话框,入口方法是 createMessageDialog()、createOptionDialog() 和 createInputDialog()。
消息对话框
消息对话框可以为用户展示某些消息。
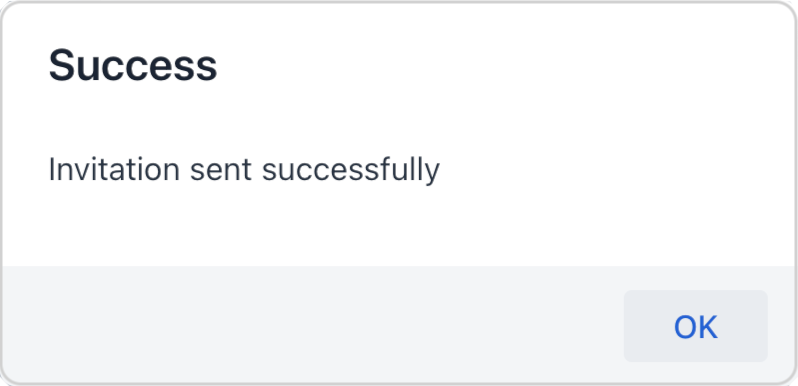
下面示例中,当用户点击一个按钮时,展示一个消息对话框:
@Autowired
private Dialogs dialogs;
@Subscribe("messageDialogButton")
public void onHelloButtonClick(ClickEvent<Button> event) {
    dialogs.createMessageDialog()
            .withHeader("Success") (1)
            .withText("Invitation sent successfully") (2)
            .open();
}| 1 | 添加对话框标题。 |
| 2 | 添加消息内容。 |
使用下列方法可以对消息对话框的外观显示和行为进行设置:
withHeader - withWidth - withHeight - withLeft - withTop - withText - withContent - withModal - withThemeName - withClassName - withDraggable - withResizable - withMinWidth - withMaxWidth - withMaxWidth - withMaxHeight - withCloseOnOutsideClick - withCloseOnEsc - withDraggedListener - withResizeListener
选项对话框
选项对话框能展示消息和一组用户交互的按钮。

使用 withActions() 方法提供 操作,每个操作都由对话框中的一个按钮展示。示例:
@Autowired
private Dialogs dialogs;
@Subscribe("selectOptionButton")
public void onSelectOptionButtonClick(ClickEvent<Button> event) {
    dialogs.createOptionDialog()
            .withHeader("Please confirm")
            .withText("Do you really want to add a customer?")
            .withActions(
                    new DialogAction(DialogAction.Type.YES)
                            .withHandler(e -> addCustomer()), (1)
                    new DialogAction(DialogAction.Type.NO)
            )
            .open();
}| 1 | 如果点击 Yes,则对话框关闭并调用 addCustomer() 操作方法。 |
用 DialogAction 基类可以创建标准操作。支持 5 种通过 DialogAction.Type 枚举类型定义的操作:OK、CANCEL、YES、NO、CLOSE。按钮的名称从 消息包 获取。
使用下列方法可以对选项对话框的外观显示和行为进行设置:
后台任务对话框
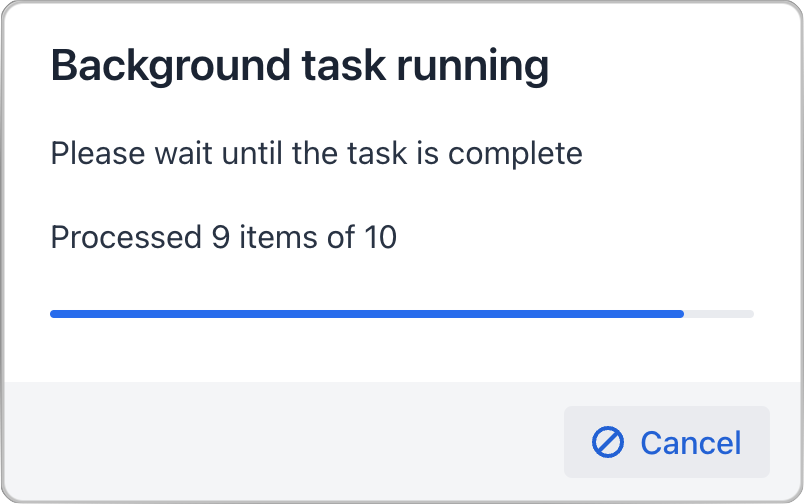
后台任务对话框为长时间运行的任务提供了用户友好的体验,用户可以在对话框中查看进度并在需要时可以取消操作。
| 更多关于后台任务机制的内容,请参阅 后台任务 部分。 |
配置对话框时,需使用一个后台任务对象:
@Autowired
private Dialogs dialogs;
@Subscribe(id = "backgroundTaskButton", subject = "singleClickListener")
public void onBackgroundTaskClick(final ClickEvent<JmixButton> event) {
    dialogs.createBackgroundTaskDialog(new SampleTask(15, this, 10)) (1)
            .withHeader("Background task running")
            .withText("Please wait until the task is complete")
            .withTotal(10) (2)
            .withCancelAllowed(true) (3)
            .open();
}

protected class SampleTask extends BackgroundTask<Integer, Void> {
    int count;

    public SampleTask(long timeoutSeconds, View<?> view, int count) {
        super(timeoutSeconds, view);
        this.count = count;
    }

    @Override
    public Void run(TaskLifeCycle<Integer> taskLifeCycle) throws Exception {
        for (int i = 1; i < count + 1; i++) {
            Thread.sleep(1000);
            taskLifeCycle.publish(i);
        }
        return null;
    }
}| 1 | 将后台任务对象传递给对话框。 |
| 2 | 根据任务完成的数量设置进度条。 |
| 3 | 支持用户中断操作。 |
使用下列方法可以对后台任务对话框的外观显示和行为进行设置:
输入对话框
输入对话框是一个多功能的工具,可以使用 API 构建输入表单,摆脱为琐碎的数据输入创建界面的麻烦。支持不同类型数据的输入、验证输入数据以及为用户提供不同的操作。
使用下列方法可以对输入对话框的外观显示和行为进行设置:
withHeader - withWidth - withHeight - withLeft - withTop - withText - withDraggable - withDraggedListener
下面我们看几个例子。
标准参数
使用 withParameters() 方法添加参数,每个参数都会在对话框中显示为一个输入框。
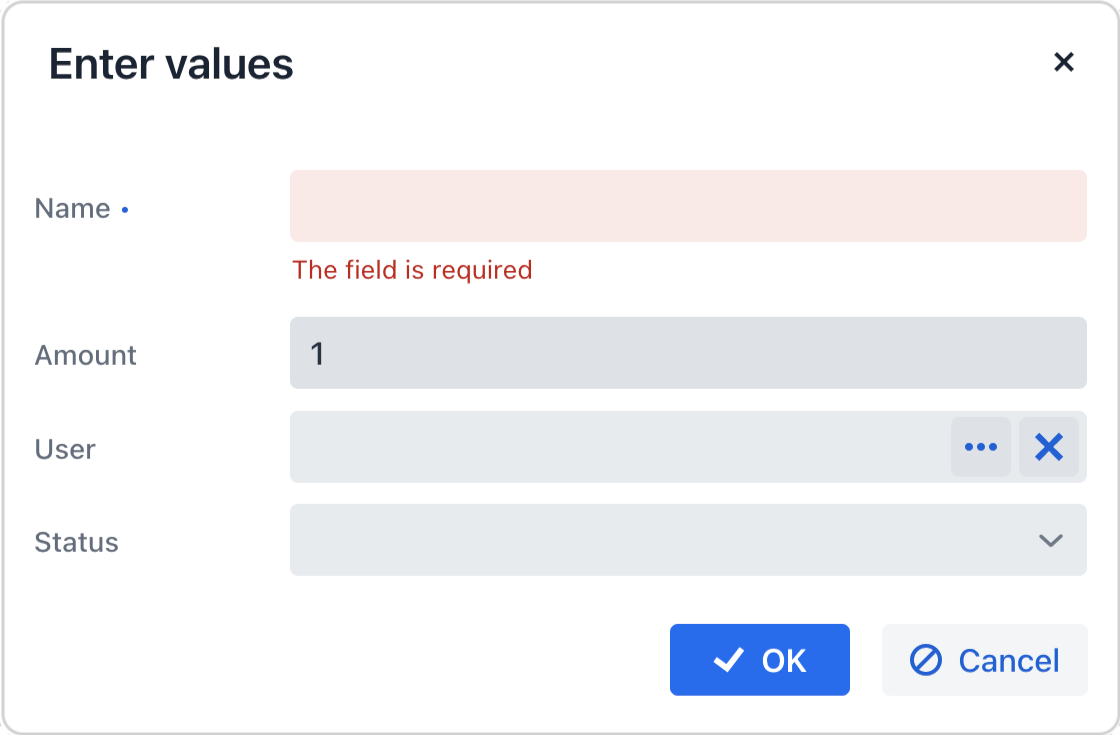
下面的示例中,输入对话框带有标准类型的参数和标准的 OK/Cancel 操作:
@Autowired
private Dialogs dialogs;
@Subscribe("standardParametersButton")
public void onStandardParametersButtonClick(ClickEvent<Button> event) {
    dialogs.createInputDialog(this)
            .withHeader("Enter values")
            .withParameters(
                    stringParameter("name").withLabel("Name").withRequired(true), (1)
                    intParameter("amount").withLabel("Amount").withDefaultValue(1), (2)
                    entityParameter("user", User.class).withLabel("User"), (3)
                    enumParameter("status", OnboardingStatus.class).withLabel("Status") (4)
            )
            .withActions(DialogActions.OK_CANCEL) (5)
            .withCloseListener(closeEvent -> {
                if (closeEvent.closedWith(DialogOutcome.OK)) { (6)
                    String name = closeEvent.getValue("name"); (7)
                    int amount = closeEvent.getValue("amount");
                    User user = closeEvent.getValue("user");
                    OnboardingStatus status = closeEvent.getValue("status");
                    // process entered values...
                }
            })
            .open();

}| 1 | 指定一个必填的字符串参数。 |
| 2 | 指定一个带有默认值的整型参数。 |
| 3 | 指定一个实体参数。 |
| 4 | 指定一个枚举参数。 |
| 5 | 指定标准的 OK/Cancel 操作,放置于对话框底部。 |
| 6 | 在关闭事件监听器中,我们可以检查用户使用了什么操作。 |
| 7 | 关闭事件包含了输入的值,可以通过参数标识符进行获取。 |
自定义参数
下面的示例展示了创建自定义参数并支持用户通过 combobox 进行选择:
@Autowired
private Dialogs dialogs;
@Autowired
private DataManager dataManager;
@Autowired
private UiComponents uiComponents;

@Subscribe("customParameterButton")
public void onCustomParameterButtonClick(ClickEvent<Button> event) {
    dialogs.createInputDialog(this)
            .withHeader("Enter values")
            .withParameters(
                    stringParameter("name").withLabel("Name").withRequired(true),
                    intParameter("amount").withLabel("Amount").withDefaultValue(1),
                    parameter("user") (1)
                            .withLabel("User")
                            .withField(() -> {
                                EntityComboBox<User> field = uiComponents.create(EntityComboBox.class); (2)
                                field.setItems(dataManager.load(User.class).all().list()); (3)
                                field.setWidthFull();
                                return field;
                            }),
                    enumParameter("status", OnboardingStatus.class).withLabel("Status")
            )
            .withActions(DialogActions.OK_CANCEL).withCloseListener(closeEvent -> {
                if (closeEvent.closedWith(DialogOutcome.OK)) {
                    String name = closeEvent.getValue("name");
                    int amount = closeEvent.getValue("amount");
                    User user = closeEvent.getValue("user");
                    OnboardingStatus status = closeEvent.getValue("status");
                    // process entered values...
                }
            })
            .open();
}| 1 | 指定一个自定义参数。 |
| 2 | 为自定义参数创建 combobox。 |
| 3 | 为 combobox 加载选项。 |
|
当使用 使用
这是因为,开发者需要对通过 lambda 方法手动创建的字段全权负责。因此,除了 下面的示例中,一些重要的属性,例如 如果不需要对字段进行自定义,则可以在 此时 Jmix 会自动创建字段组件并应用所有的特定属性。 |
自定义校验
对话框默认带有一些基础的校验:验证输入值的类型、检查必填项是否为空。在这之上,可以添加其他通用的自定义校验。
下面的示例添加了一个校验,要求至少输入一个参数:
@Autowired
private Dialogs dialogs;
@Subscribe("validationButton")
public void onValidationButtonClick(ClickEvent<Button> event) {
    dialogs.createInputDialog(this)
            .withHeader("Enter at least one value")
            .withParameters(
                    stringParameter("name").withLabel("Name").withRequired(true),
                    entityParameter("User", User.class).withLabel("User")
            )
            .withValidator(context -> { (1)
                String name = context.getValue("name"); (2)
                User user = context.getValue("user");
                if (Strings.isNullOrEmpty(name) && user == null) {
                    return ValidationErrors.of("Enter name or select a customer"); (3)
                }
                return ValidationErrors.none();
            })
            .withActions(DialogActions.OK_CANCEL)
            .withCloseListener(closeEvent -> {
                if (closeEvent.closedWith(DialogOutcome.OK)) {
                    String name = closeEvent.getValue("name");
                    User user = closeEvent.getValue("user");
                    // process entered values...
                }
            })
            .open();
}| 1 | 自定义验证逻辑,保证至少有一个参数。 |
| 2 | 验证器内,参数可以从 context 对象获取。 |
| 3 | 如果没有输入任何参数,则返回验证错误。 |
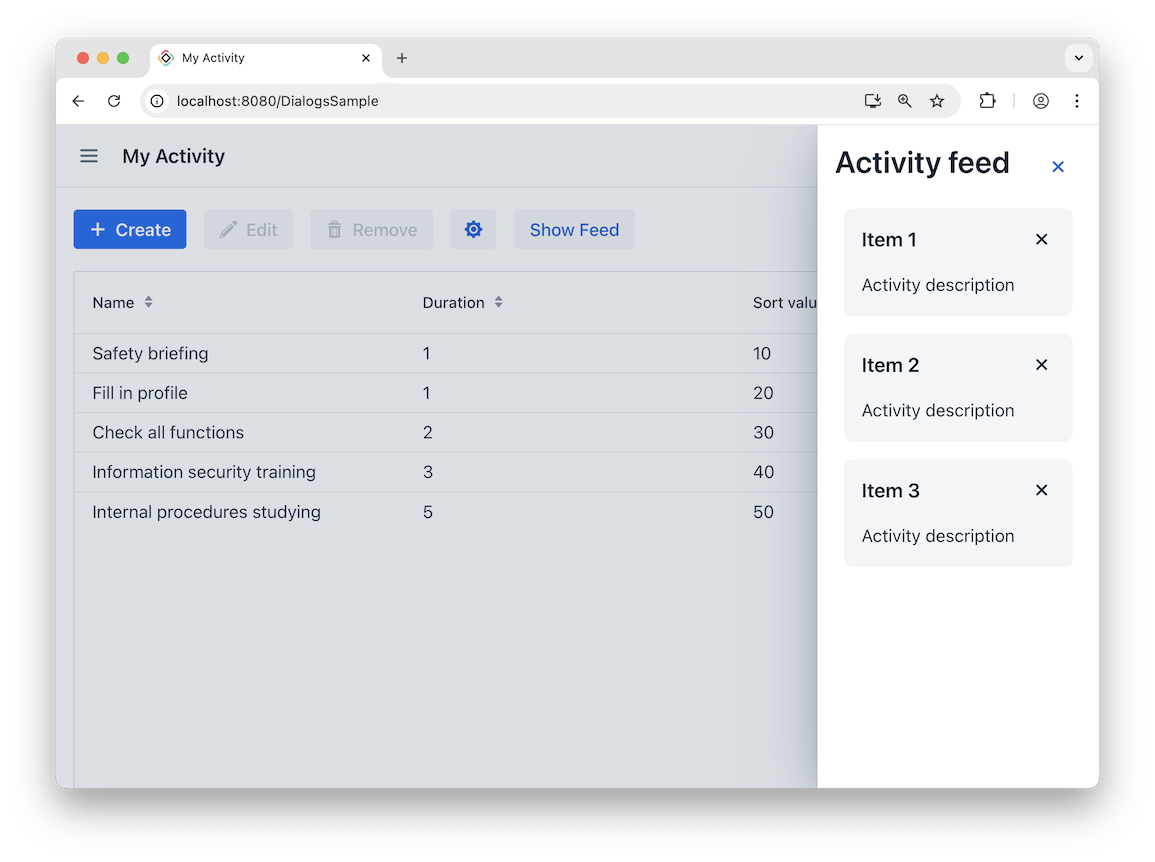
侧边对话框
从视图的某一边滑出的对话框。
使用 Dialogs bean 打开对话框:
@Autowired
private Dialogs dialogs;
@ViewComponent
private MessageBundle messageBundle;

@Subscribe(id = "sideDialogButton", subject = "clickListener")
public void onSimpleSideDialogButtonClick(final ClickEvent<JmixButton> event) {
    dialogs.createSideDialog()
            .withHorizontalSize("14em")
            .withHeaderProvider(this::createHeader)
            .withContentComponents(createContent())
            .open();
}

private HorizontalLayout createHeader(SideDialog sideDialog) {
    HorizontalLayout header = new HorizontalLayout();
    header.setWidthFull();
    header.add(new H2(messageBundle.getMessage("sideDialogHeader")));
    header.setJustifyContentMode(FlexComponent.JustifyContentMode.BETWEEN);
    Button closeButton = new Button(LumoIcon.CROSS.create(), event -> sideDialog.close());
    closeButton.addThemeVariants(ButtonVariant.LUMO_TERTIARY, ButtonVariant.LUMO_ICON);
    header.add(closeButton);

    return header;
}

private Component createContent() {
    VirtualList<String> list = new VirtualList<>();
    list.setWidthFull();
    list.setItems("Item 1", "Item 2", "Item 3");
    list.setRenderer(new ComponentRenderer<>((item -> {
        Card root = new Card();
        root.setTitle(item);
        root.setHeaderSuffix(LumoIcon.CROSS.create());
        root.add(messageBundle.getMessage("activityDescription"));
        root.addThemeVariants(CardVariant.LUMO_HORIZONTAL);
        root.addClassName(LumoUtility.Margin.Bottom.MEDIUM);
        return root;
    })));
    return list;
}
位置和大小
使用 withSideDialogPosition() 定义对话框出现的位置。可选值为 RIGHT、TOP、BOTTOM、LEFT、INLINE_START 和 INLINE_END。默认值为 RIGHT。INLINE_START 和 INLINE_END 遵循文本方向(LTR/RTL)。
对话框的大小根据其方向进行不同的配置。
对于水平对话框(LEFT、RIGHT、INLINE_START、INLINE_END):
-
setHorizontalSize() -
setHorizontalMaxSize() -
setHorizontalMinSize()
对于垂直对话框(TOP、BOTTOM):
-
setVerticalSize() -
setVerticalMaxSize() -
setVerticalMinSize()
内容
可以使用 provider 为对话框定义显示的内容:
方法 |
描述 |
|---|---|
|
为对话框的内容区域提供组件。 |
|
为对话框的 header 区域提供组件。 |
|
为对话框的 footer 区域提供组件。 |
事件
支持以下事件:
事件 |
描述 |
|---|---|
|
对话框打开或关闭是发送。 |
|
当用户按下 |
样式
侧边对话框的外观和大小可以用 CSS 自定义。
大小
你可以使用 CSS 变量全局配置对话框大小。这些值将应用于所有 SideDialog 实例。
| 通过 Java API 以编程方式设置大小优先于 CSS 变量。 |
水平方向大小(适用于 LEFT、RIGHT、INLINE_START、INLINE_END):
变量 |
描述 |
默认值 |
|---|---|---|
|
对话框的基本水平大小。 |
|
|
最大水平大小。 |
|
|
最小水平大小。 |
|
垂直方向大小(适用于 TOP、BOTTOM):
变量 |
描述 |
默认值 |
|---|---|---|
|
对话框的基本垂直大小。 |
|
|
最大垂直大小。 |
|
|
最小垂直大小。 |
|
可样式化 parts
侧边对话框开放了以下 可样式化部分:
parts |
描述 |
|---|---|
|
模态遮罩层(对话框背后的背景覆盖层)。 |
|
对话框覆盖层(主容器)。 |
|
对话框的头部区域。 |
|
标题包装元素。 |
|
标题元素。 |
|
自定义头部内容的容器。 |
|
主要内容区域。 |
|
底部区域。 |
状态
侧边对话框暴露了以下 状态:
状态 |
描述 |
|---|---|
|
根据对话框位置应用,例如 |
|
当对话框在小设备上以全屏模式显示时应用。 |
对话框配置
可以通过下面的方法自定义对话框的标题、大小、位置:
-
withHeader()- 设置标题。
-
withWidth()- 设置对话框的宽度。
-
withHeight()- 设置对话框的高度。
-
withLeft()- 设置对话框与其外部容器的左边距(无单位值按像素处理)
-
withTop()- 设置对话框与其外部容器的上边距(无单位值按像素处理)
示例:
@Subscribe(id = "configDialogButton", subject = "clickListener")
public void onConfigDialogButtonClick(final ClickEvent<JmixButton> event) {
    dialogs.createMessageDialog()
            .withHeader("Information")
            .withWidth("600px")
            .withHeight("200px")
            .withTop("100px")
            .open();
}
特定的对话框类型还有些额外的外观和行为设置:
-
withText()- 设置对话框显示的文本信息。
-
withContent()- 设置对话框的内容。这里的文本会通过Paragraph组件渲染。注意,这个设置会覆盖withText()的设置。文本格式支持 HTML - 即,调用
withContent()方法可以在对话框显示 HTML 内容。此时,HTML 文本内容需要通过一个组件封装:@Autowired private Dialogs dialogs; Html htmlContent = new Html("<p>Here starts a paragraph. A new line starts after this.<br />" + "<b>This text is bold.</b> <i>This text is italic.</i></p>"); @Subscribe("htmlContentButton") public void onHtmlContentButtonClick(ClickEvent<Button> event) { dialogs.createMessageDialog() .withHeader("HTML Formatting") .withContent(htmlContent) .open(); }
-
withModal()- 设置为false时,对话框以非模态窗展示,此时可以与应用程序的其他 UI 组件交互。对话框默认以模态窗显示。
-
withThemeName()- 设置组件的主题样式名称,覆盖之前设置的任何值。
-
withClassName()- 设置组件的 CSS 类名称,覆盖之前设置的任何值。
-
withDraggable()- 设置对话框是否可拖动。对话框默认可拖动。
-
withResizable()- 设置对话框是否可手动调节大小。 对话框大小默认不能调。
-
withMinWidth()、withMaxWidth()、withMaxWidth()、withMaxHeight()- 分别设置对话框的最小、最大宽度和高度。
-
withCloseOnOutsideClick()- 是否可以通过点击对话框外部区域关闭对话框。默认支持该行为。
-
withCloseOnEsc()- 是否可以通过按下ESC关闭对话框。默认支持该行为。
-
withDraggedListener()- 注册一个用户拖拽的监听器,拖拽完成后调用。仅当启用拖拽时有效。默认情况下,组件会在拖拽后提供所在位置的 top/left 值。 示例:
@Subscribe(id = "dragDialogButton", subject = "clickListener")
public void onDragDialogButtonClick(final ClickEvent<JmixButton> event) {
    dialogs.createMessageDialog()
            .withHeader("Drag this dialog")
            .withDraggedListener(dialogDraggedEvent -> {
                String left = dialogDraggedEvent.getLeft();
                String top = dialogDraggedEvent.getTop();

                try {
                    int leftValue = Integer.parseInt(left.replace("px", ""));
                    int topValue = Integer.parseInt(top.replace("px", ""));

                    if (leftValue < 300 && topValue < 200) {
                        notifications.create("Dialog is in the upper left corner").show();
                    } else if (leftValue > 800 && topValue > 500) {
                        notifications.create("Dialog is in the lower right corner").show();
                    } else {
                        notifications.create("Dialog is in a neutral area").show();
                    }
                } catch (NumberFormatException e) {
                    notifications.create("Error: Invalid coordinates")
                            .withType(Notifications.Type.WARNING)
                            .show();
                }
            })
            .open();
}
-
withResizeListener()- 注册一个改变大小的监听器,大小调节完成后调用。仅当启用大小调节时有效。默认情况下,组件会在每次改变大小后提供 top/left 和 width/height 值。 示例:
@Subscribe(id = "resizeDialogButton", subject = "clickListener")
public void onResizeDialogButtonClick(final ClickEvent<JmixButton> event) {
    dialogs.createMessageDialog()
            .withHeader("Resize this dialog")
            .withResizable(true)
            .withResizeListener(dialogResizeEvent -> {
                String width = dialogResizeEvent.getWidth();
                String height = dialogResizeEvent.getHeight();
                try {
                    int widthValue = Integer.parseInt(width);
                    int heightValue = Integer.parseInt(height);

                    if (widthValue < 400 || heightValue < 300) {
                        notifications.create("Minimum size: 400×300")
                                .withType(Notifications.Type.WARNING)
                                .show();
                    }
                } catch (NumberFormatException e) {
                    notifications.create("Error: Invalid coordinates")
                            .withType(Notifications.Type.WARNING)
                            .show();
                }
            })
            .open();
}
